With the outbreak of the COVID-19 pandemic it has become very difficult to find masks here in Italy. I read that in some countries toilet rolls have disappeared from the shelves, in the bad luck I was lucky, 3D printing a mask is certainly easier than printing a roll of toilet paper and the result will not be painful!
Having no experience in the medical field, I decided first of all to study a little to understand how a mask works and which are the best materials to use, especially as regards the filter material. The masks that I produced and of which I write here are in PLA, there are better materials as we will see later, for these tests, however, this material has proved more than suitable.
What I report here is personal experience, a homemade experiment, do not entrust your health to these tests!
First of all I invite you to read some articles that have been useful to understand a little better what a mask is and how it works:
Before I started designing a mask from scratch I searched the Internet for some existing projects. I found several ready-made projects, some good, some a little less. Since I am not going to criticize the work of people who have worked to help us, in this article I report my experiences with the projects that I think are the best and that I can recommend.
The first project is that of Copper 3D. The project is done very well and the site illustrates the problems and many solutions well, there are many tips and that’s why I have listed it in the list above. I advise you to take a careful look at it. Copper 3D guys recommend printing this mask with PLACTIVE®️ and MDflex®️ and not with PLA for several good reasons. As said before I used the PLA but shortly I want to buy a roll of the recommended material and procede as recommended.
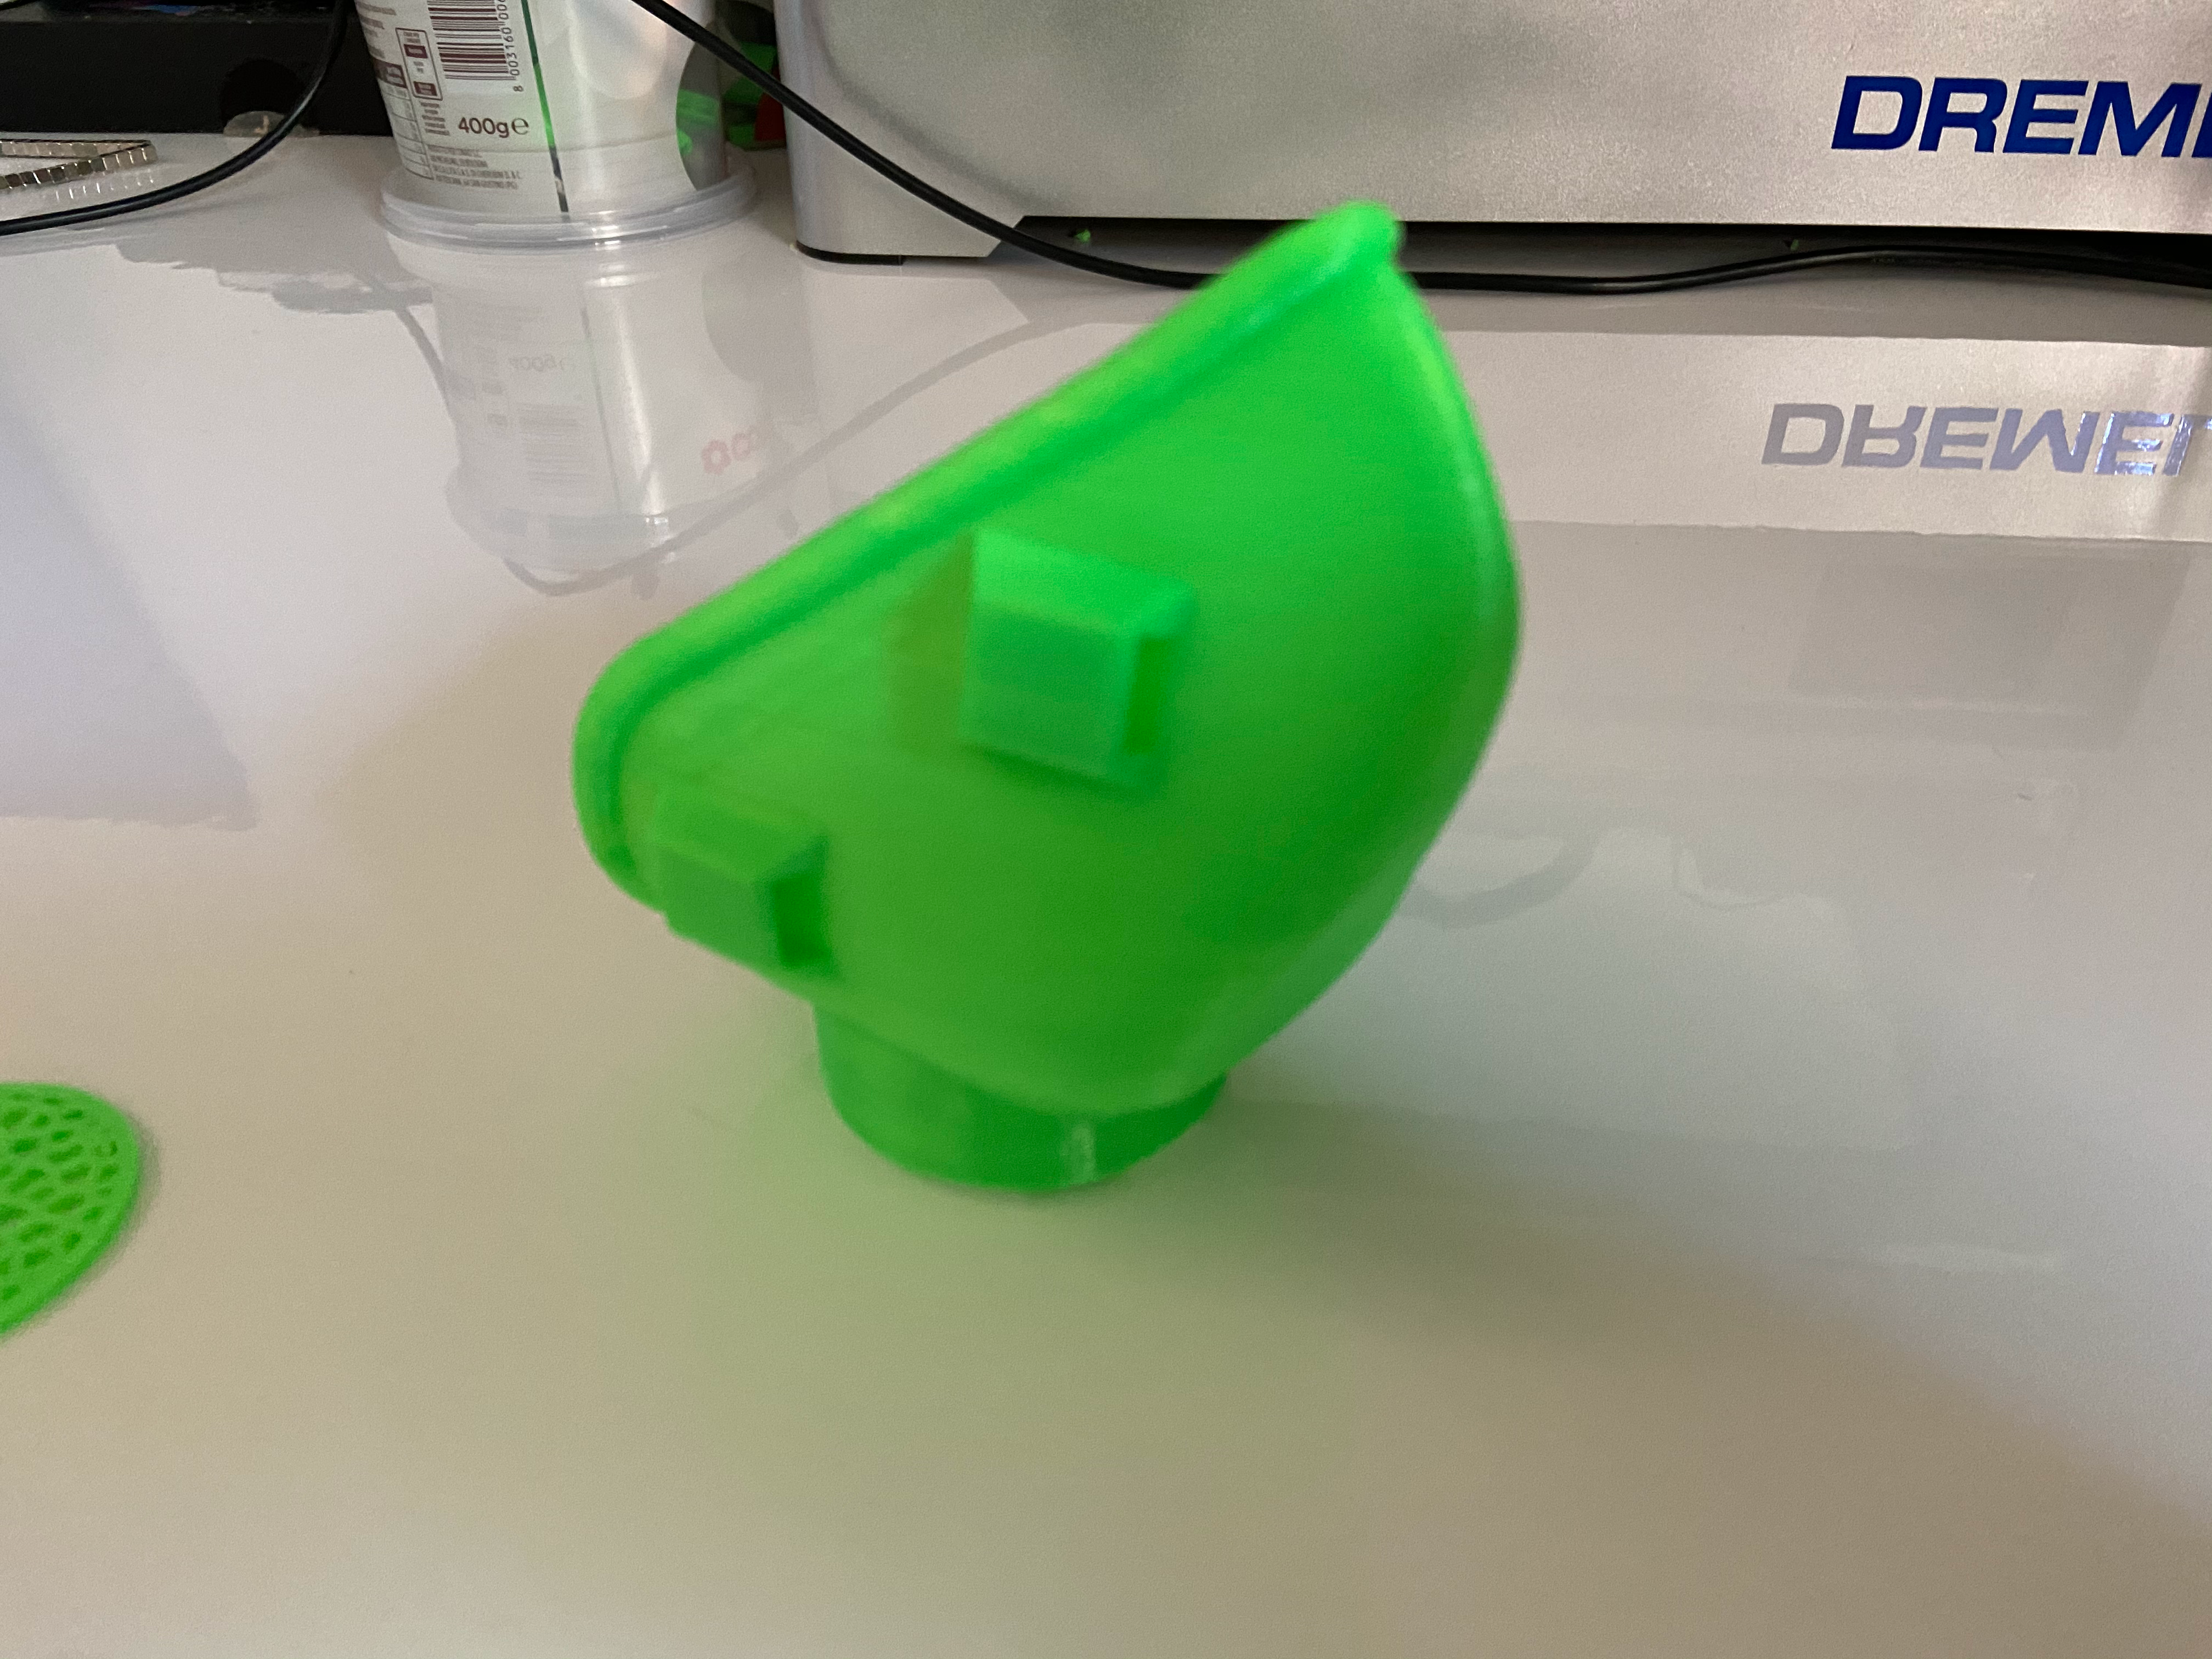
The project is very well done and once printed the template is immediately very robust. The printing phase required a bit of work, since with my Dremel I had to print the supports and this produce an object that needed to remove a lot of support material. Despite the cleaning post printing phase, a lot of material stille remain inside the mask.


I tried to print without support (knowing it would make a mess) but it didn’t work. The mask has two lateral supports for the elastic that are very wide but not printable with my Dremel without the print supports. I therefore decided to modify the project to change the supports for the elastic bands, making them compatible with my printer and allowing me to print without printing support. In addition to the supports I added a hole in the surface of the filter to improve the air flow.

Files (original): https://copper3d.com/stl/NanoHack_STL.zip
Files (modified for my needs): https://www.tinkercad.com/things/kKIGpXn7fLp
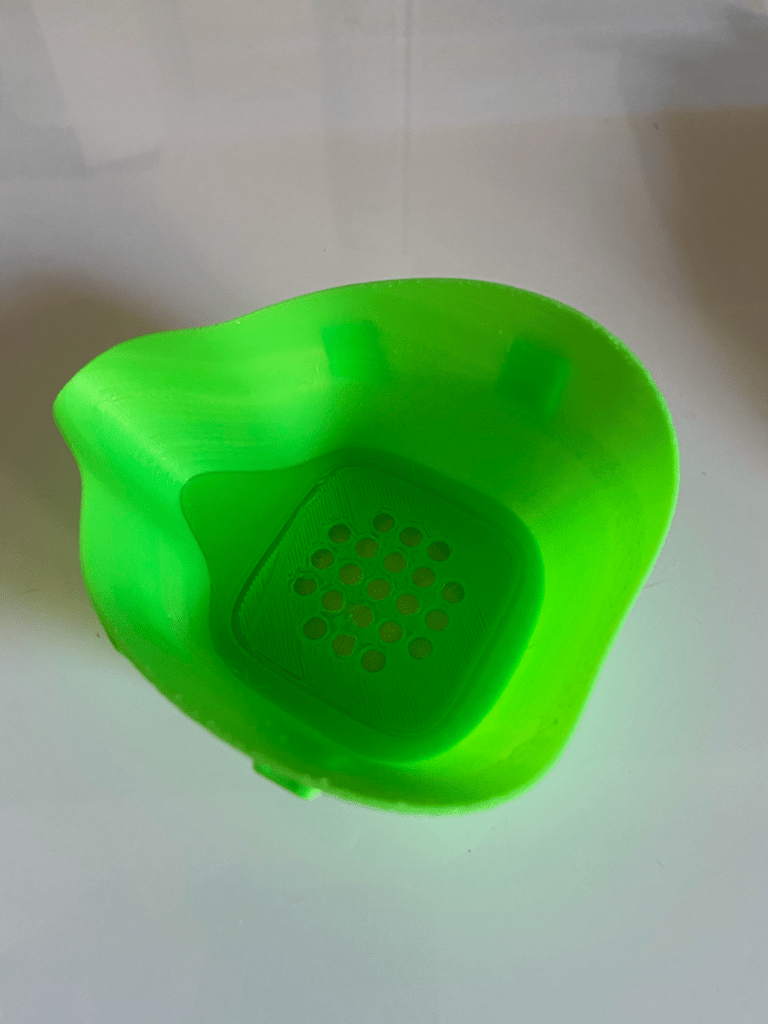
During my tests I created a post on my Facebook account to share my experience and at a certain point my big friend Milko told me about the project he was using. He sent me the project and I printed it. It is an excellent project, very simple and quick to print, does not require post-print cleaning and is also comfortable to wear. The only thing that would perhaps be useful is to add a gasket on the edge to improve the seal and make it even more comfortable.


Files: https://www.thingiverse.com/thing:4225667
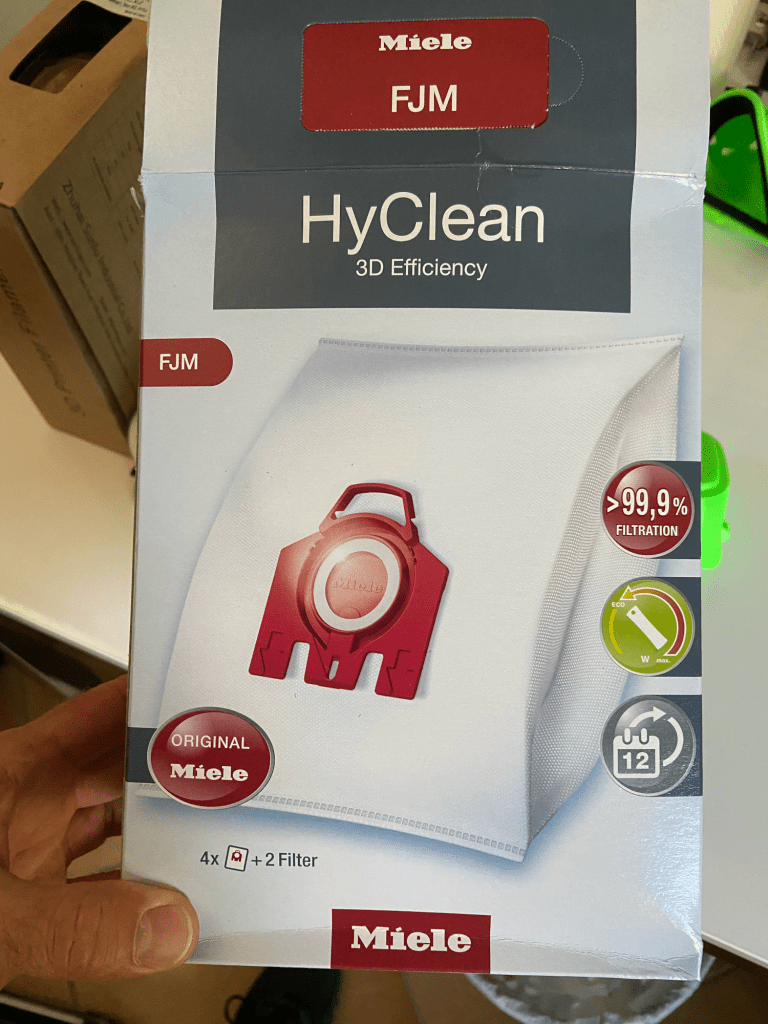
After trying 6 models of masks and having found two valid ones, I decided to move on to the more complicated and delicate phase, the choice of material to build the filter. After studying the problem throughout Saturday, the choice fell on Miele HyClean bags for vacuum cleaners. I bought them on Amazon and they arrived the next day. There are 5 bags inside the package and with each one you should be able to make at least 30 filters. The only precaution to keep when cutting the filters is to leave at least 3-4 millimeters of access, so that you can position it comfortably within the space that both masks provide. The installation of the filter takes a few seconds and is very easy.

As I said before, I am not familiar with biological viruses (I’m much more skilled about computer viruses), however this experience has made me reflect on the fact that changing the filters requires a minimum of attention. The filter we remove from the mask is potentially contaminated, so it is necessary to remove it without touching it with bare hands and throw it in a safe place to avoid contaminating the environment. After disassembling the used filter, before assembling the new one, I think it may be wise to clean the mask. You can do it in different ways: the first (and in my opinion more comfortable) is to put it in the microwave oven (I tried for a minute and the mask has not been damaged), the second is using some disinfectant (alcohol or other). Since I am not familiar with disinfectants, I invite you to look elsewhere for the best solution. The only suggestion I can give is that if you decide to use alcohol, wash it well afterwards!
Once the mask is printed and the filter is mounted, the last step is to mount the elastic bands. At the beginning I wanted to use the classic flat elastic used for bra, unfortunately on Amazon I did not find anything with fast delivery (it would arrive in 2-3 weeks, at least). So I decided to use something I had at home. After a few minutes of research, a two-centimeter-tall elastic appear so I finished the masks.

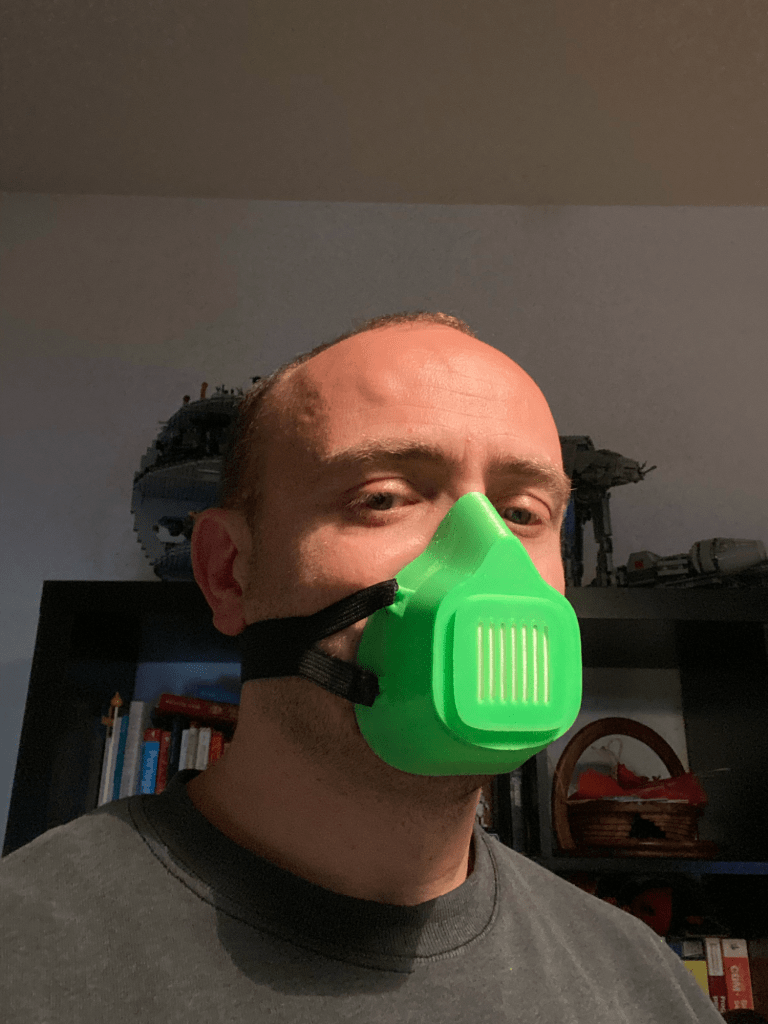
Once you put on the mask with the filter you immediately notice the difference in ease that you try to inhale. In fact, at the beginning the situation was annoying and it reminded me of the first time I did a scuba dive. You have to give yourself five minutes to get used to it. After a while you get used to it. In these days I have tried the two models on the rare occasions when I left the house to take the dogs for a walk or to do the shopping. The tests lasted 1-2 hours, in this period I have always kept the masks and I have not encountered any problems (apart from talking on the phone).
I hope this report of my experience will be useful to you. It served me to learn something new and also to distract me a little in this quarantine period.
For advice, suggestions or anything else you can write to me using the references on the side.
Update – 11/04/2020
To make the mask more comfortable or inserted in a sponge seal, this in addition to improving comfort also improves the seal.

