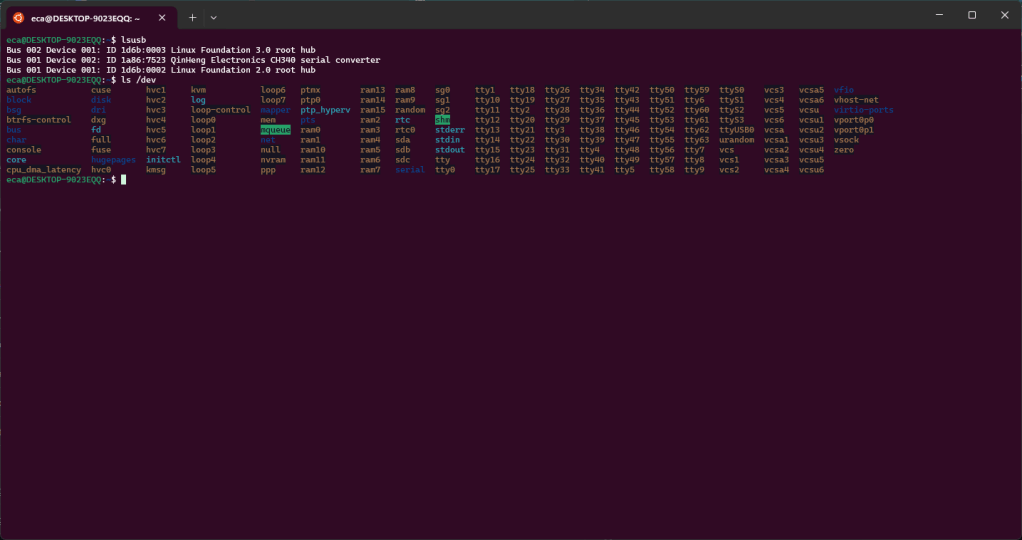
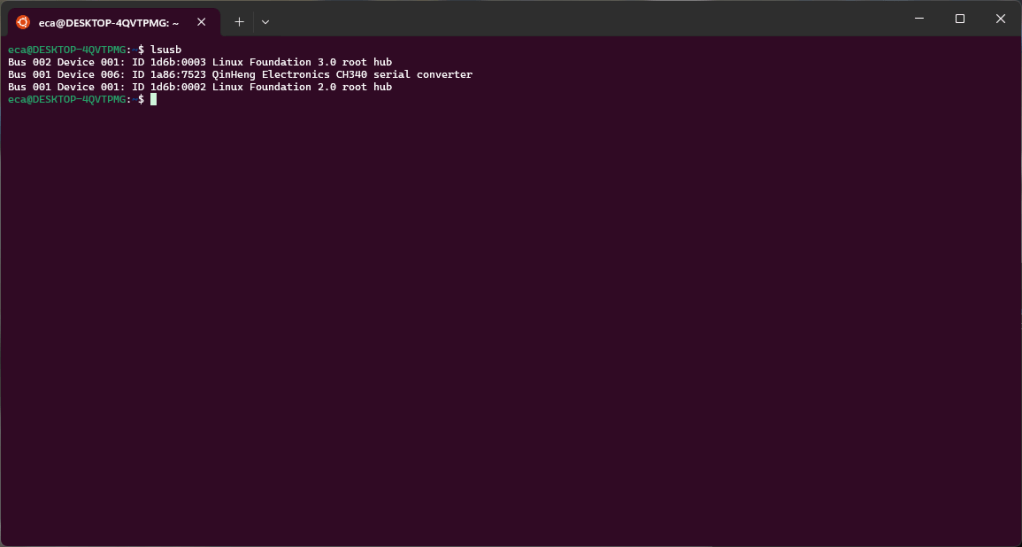
In the previous post we saw how to connect our ESP2282 board via USB to our WSL. In this post we see how to use ESPHome into our WSL. If everything worked we will have the following configuration. As you can see we have the “ttyUSB0” device, this represents our board.
First we install the components missing from the default Python installation of WSL: “pip” and “venv”.
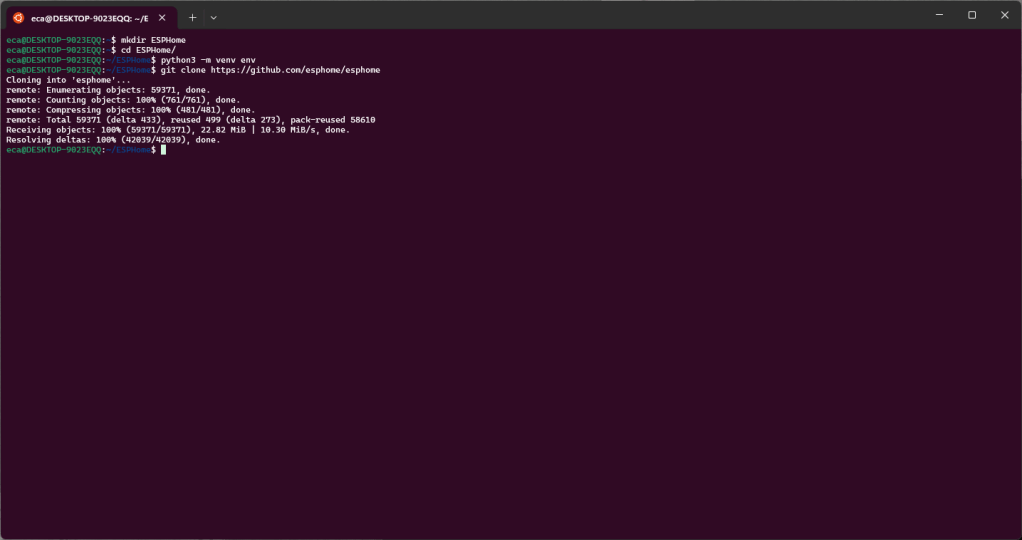
Now let’s create the directories that we will use. The parent directory will be “ESPHome”, under this we will create “env” with the Python venv and “esphome” with the ESPHome repo clone.
Now let’s activate the venv and install the ESPHome dependencies.
source env/bin/activate
cd  esphome
sudo python3 setup.py install
Once this is done we can verify that everything works by trying to invoke “esphome”.
As indicated in the documentation we can start the wizard to try to install our firmware on the board using this command
esphome wizard livingroom.yaml
If everything went well we can install the firmware on the board with the following command
esphome run livingroom.yaml --device /dev/ttyUSB0
The first run will take some time because it need to download all dependencies and libraries. At the end of the download the new firmware will be compiled and installed on the board.
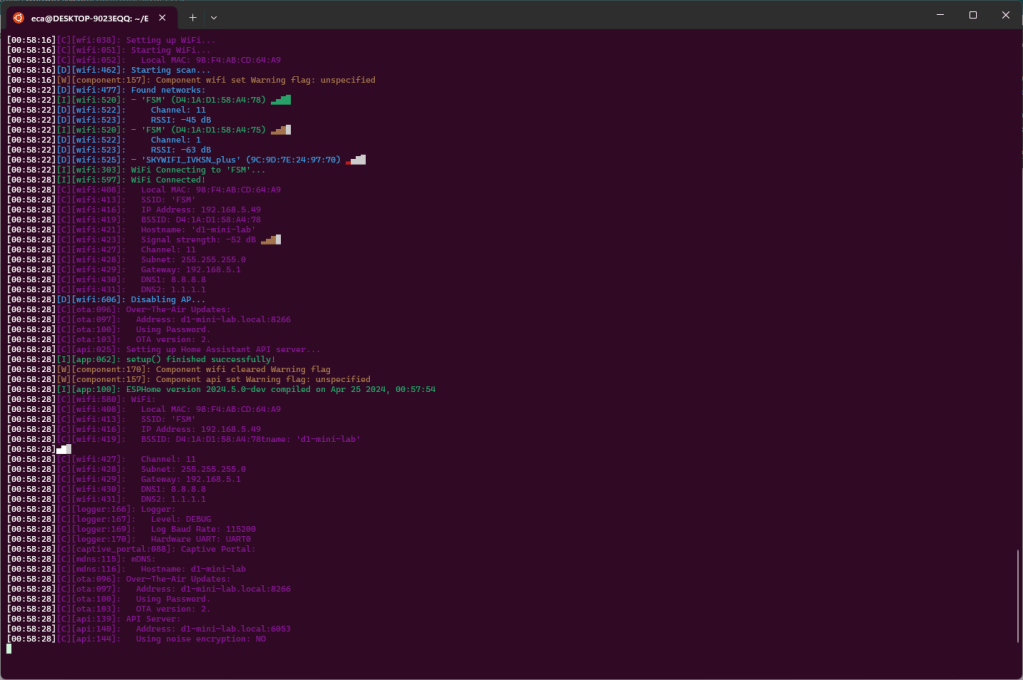
Once the firmware has been installed, the board will be started and it will connect to the WIFI network configured during the wizard and in the output we will find all the information relating to the available WIFI network as well as the information relating to the WIFI network to which the device is connected.
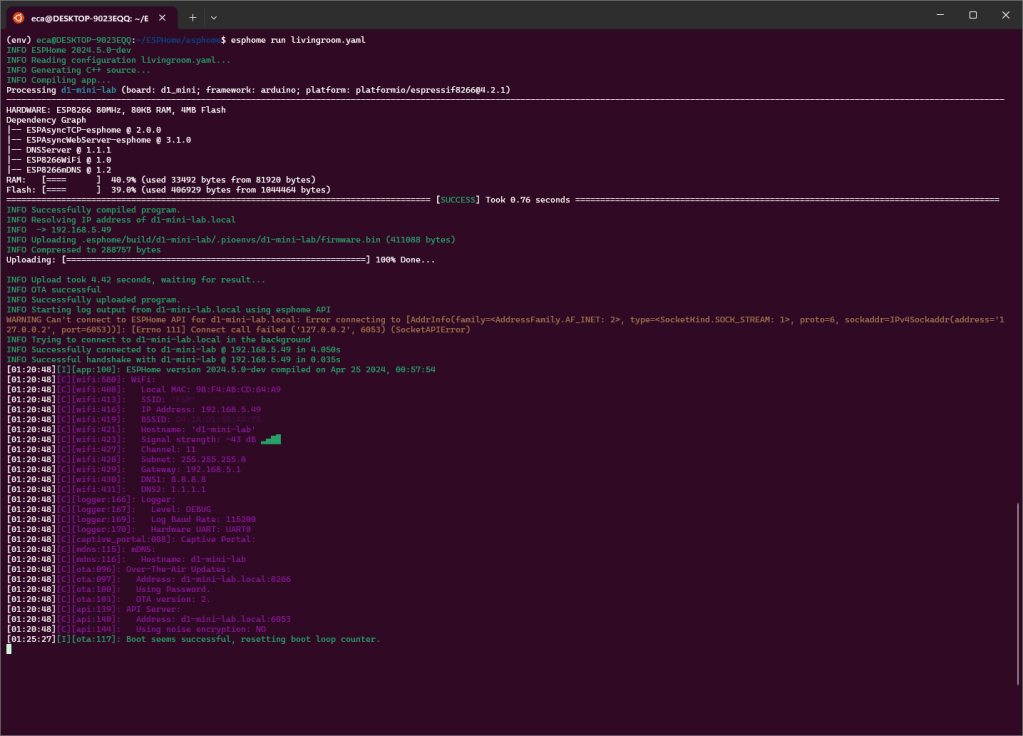
Now that the board is installed and configured to use your WIFI, you can disconnect it from the USB port and power it using a power supply or another computer and connect to the board itself using WIFI, also to carry out a new firmware upload. To do this you can use the previous command omitting the device.
esphome run livingroom.yaml
If you get an error like this after uploading
you can fix it by using these commands to update protobuf
I decided to check out ESPHome. This is a very interesting project and I think I will write something about it here in the future too. For now, however, I thought I’d write a first quick post on how to connect a USB device to WSL. In fact, my workstation is a Windows 11 machine and for certain tasks I prefer to use Linux, WSL is perfect for me. However, the connection of USB devices is not automatic and therefore I describe the necessary steps here.
The device I will use as an example in this article is an ESP8266 board.
After connecting the board using a USB cable I find the new device in Device Manager
However, within WLS the device is not present.
To be able to connect the device to WSL it is necessary to follow some steps described in this article and install software. The link to the software to install is always present in this article:
Once the software is installed you can use the “usbipd” command to connect the USB device to WSL. The command will need to be used within a PowerShell terminal started as administrator.
First of all, using “usbipd list” we are going to identify the device we want to connect to WSL.
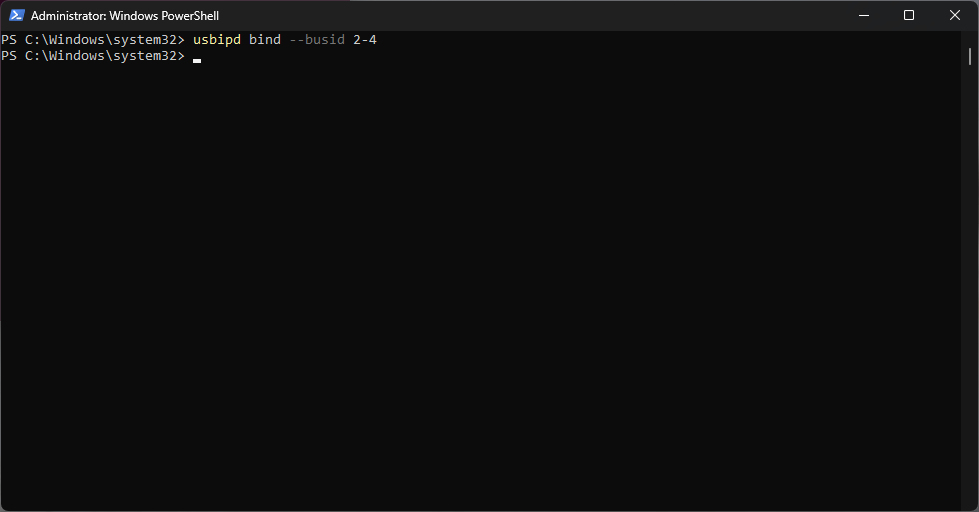
In this case the device is identified by busid 2-4. Using the “usbipd” command with the “bind” option we are going to share the device.
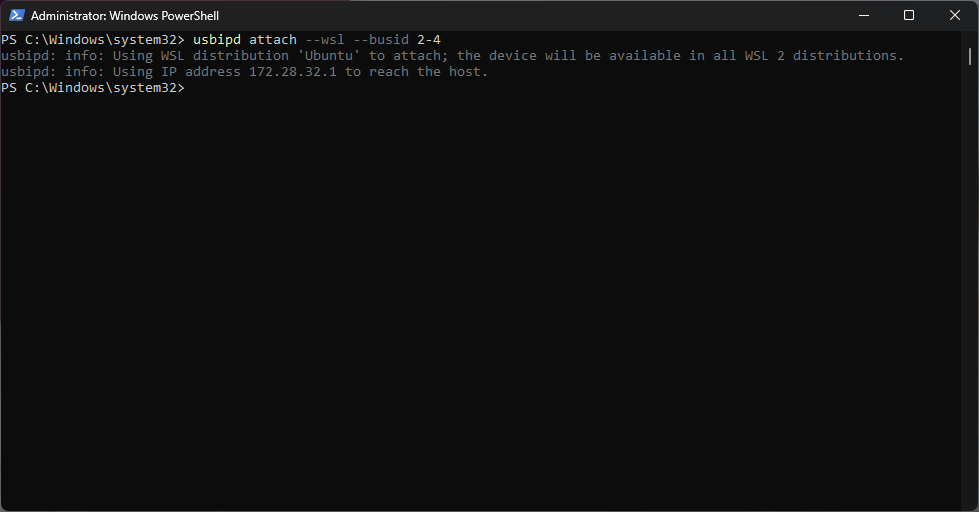
At this point we can connect the device to WSL using the “attach” option.
To be honest I didn’t know this bank. Today Matrix identified these two threats and so I did a little research into who they are. It is a bank based in the United Arab Emirates.
Looking at the wio.io website the first thing that struck me was that in the management section they don’t have a head of security.
There will probably be someone on the CEO or CTO’s staff, however I would give them more prominence 😉
The domains involved in the attack are:
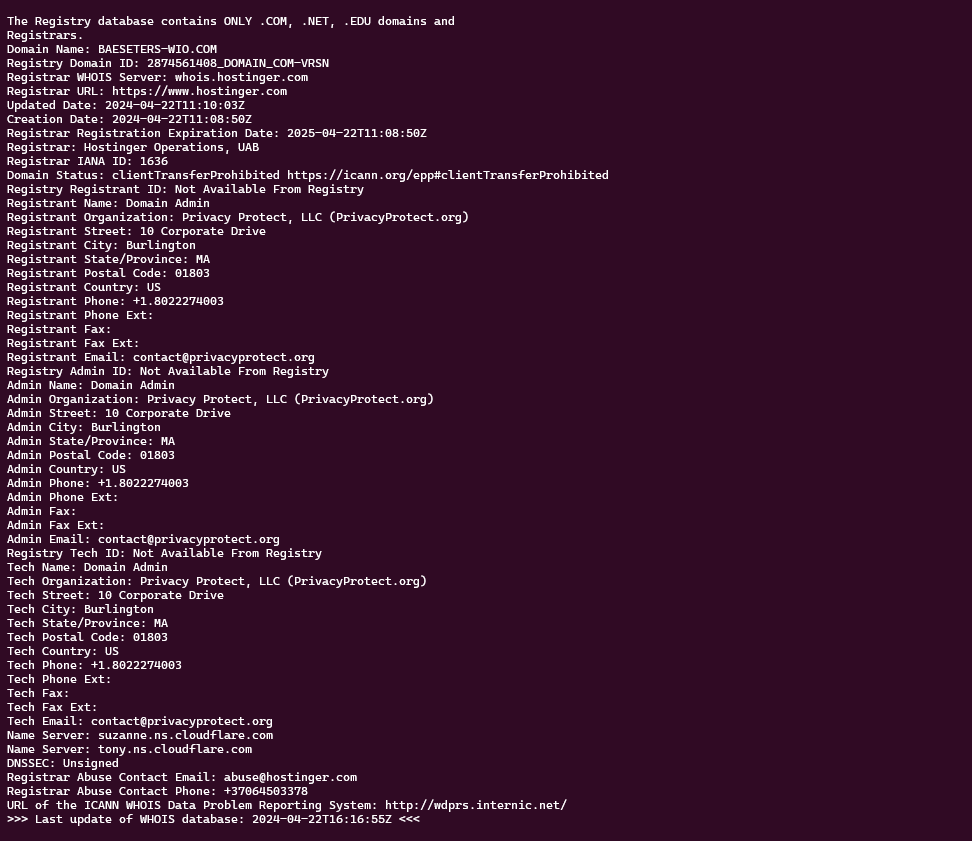
baeseters-wio[.]com
baeselers-wio[.]com
olabngsqwrxs[.]com
The domains baeseters-wio[.]com and baeselers-wio[.]com were registered a few hours ago.
The domain olabngsqwrxs[.]com was registered several days ago. I believe this domain is also used by other phishing site to collect stolen information.
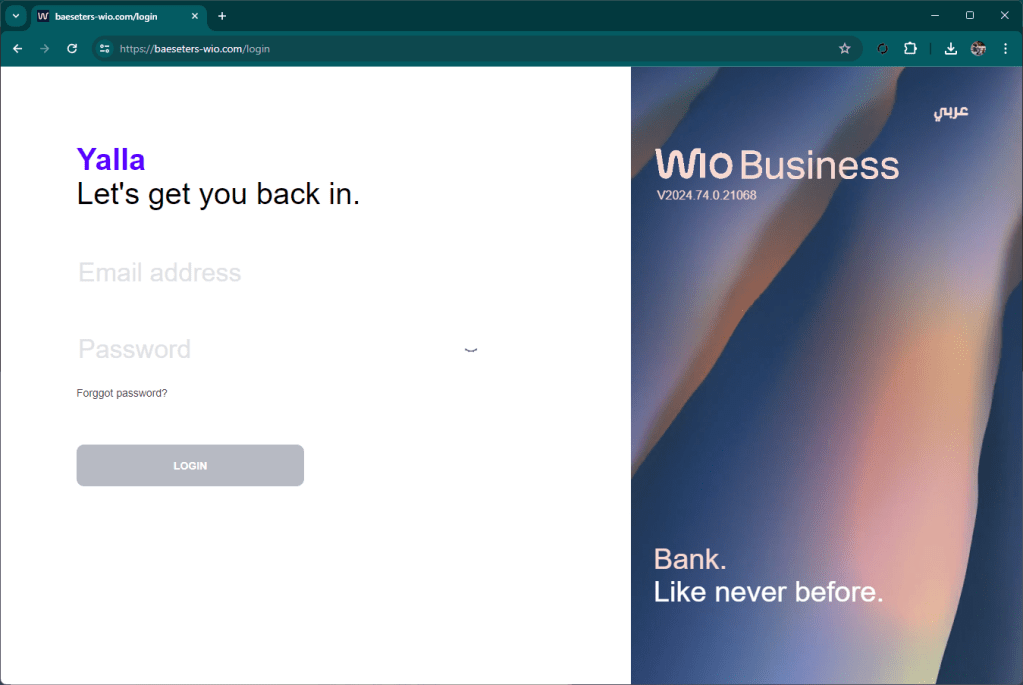
The graphics of the site are quite similar to the original, too bad an idiot wrote “forggot”.
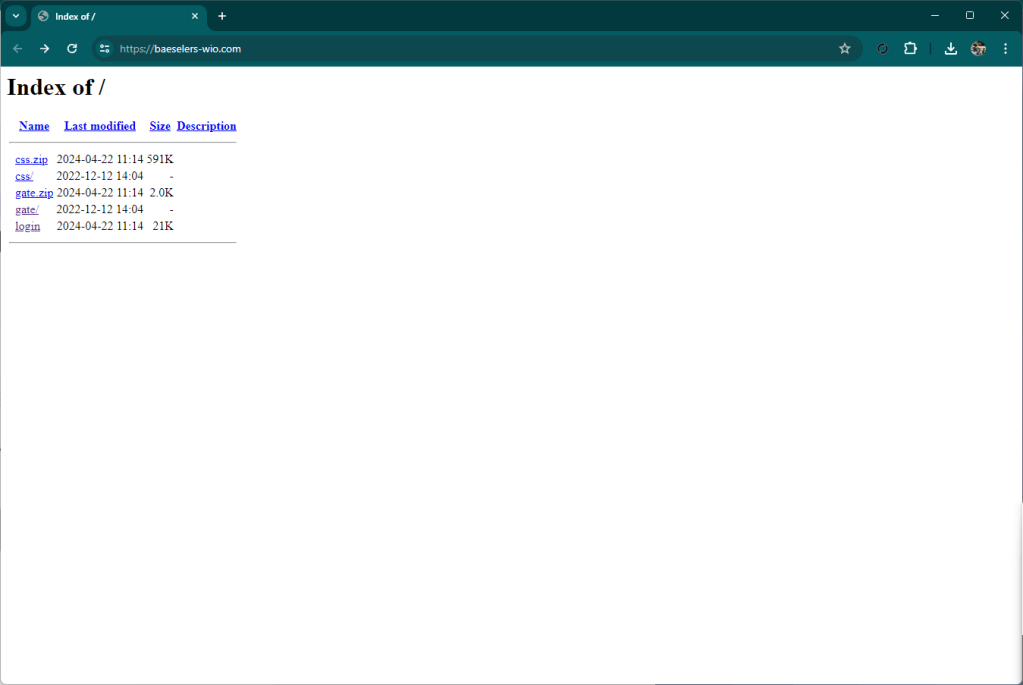
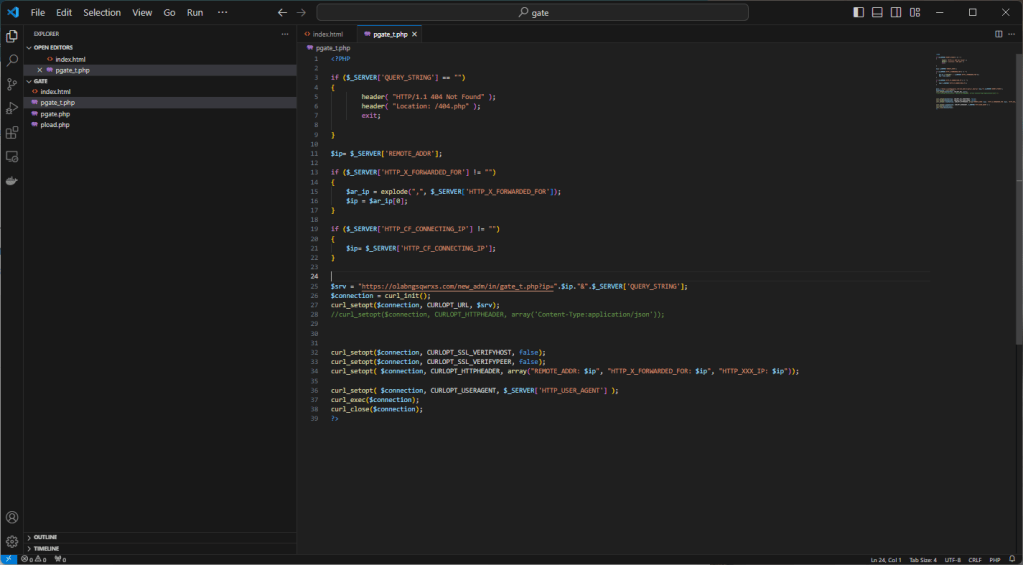
The kit is made up of two files, one (css.zip) which contains the graphic files and the information collection logic, the second (gate.zip) which receives the stolen information from the css/main.php page and sends it to olabngsqwrxs.com domain which presents a landing page when the subdirectory contains php files suitable for receiving the stolen information.
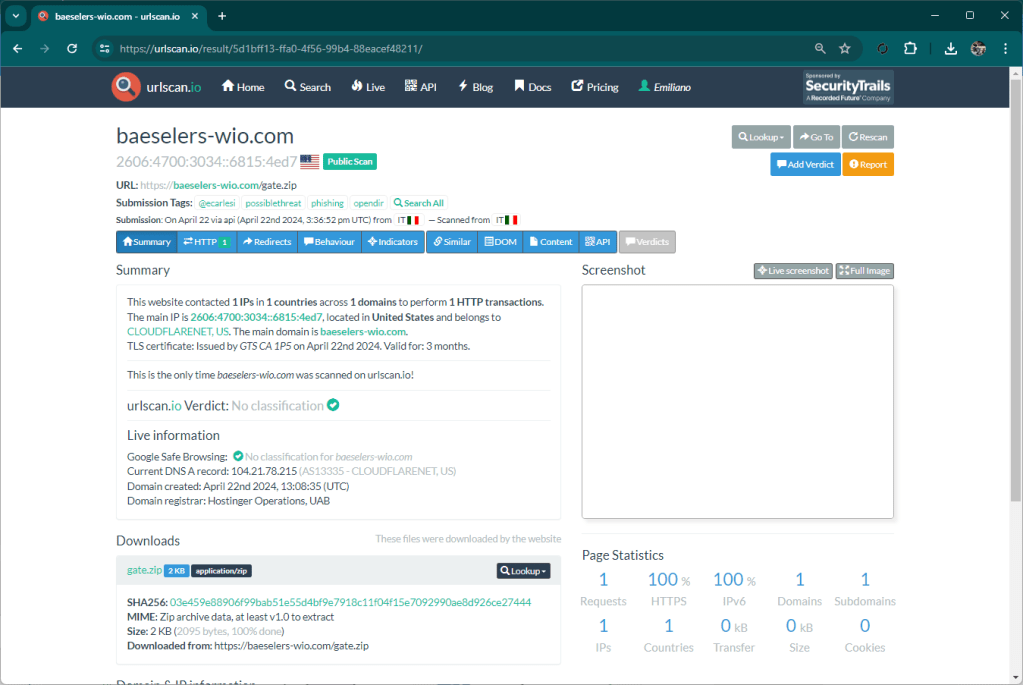
This site also uses techniques to avoid being tracked once online (default pages without content) too bad for them the Matrix agents are extremely efficient 🙂
This morning Matrix located a file containing Facebook user credentials stolen using a phishing attack.
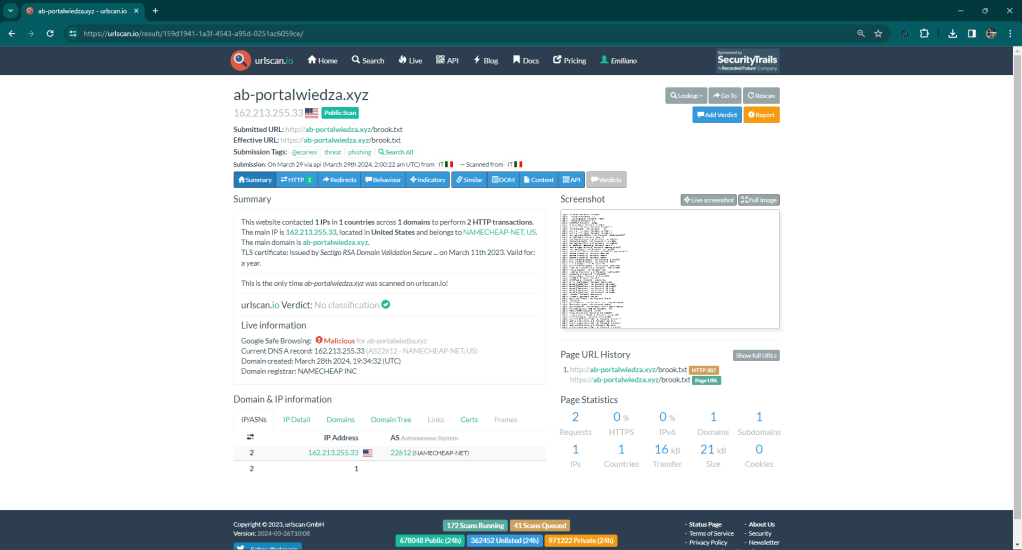
The malicious site is “ab-portalwiedza.xyz”.
16 hours after the report of the attack, the site is still online even if the file containing the credentials is no longer visible, I imagine because the criminal changed its name.
The site presents itself as an article from the Polish news site “wiadomosci.wp.pl” and the article talks about an alleged particularly brutal news story.
At the end of the article, an alleged video is presented, to access which however Facebook credentials are required.
After entering the credentials in the popup that requests them, you will be redirected to Google. Credentials gone.
The kit code is a mess 😦 I don’t think the low quality indicates attempts at evasion, more likely the author is a junior dev 😀 The code and comments are in Italian.
The author of the kit offers support to his criminal customers via the Smartsupp platform using the key 8a501f860d70f42e5100568c07885c9b3daa8ceb.
In an attempt to reduce the risk of being identified, in the configuration panel we find a flag set to make the phishing site visible only to mobile devices. Obviously it doesn’t work 🙂
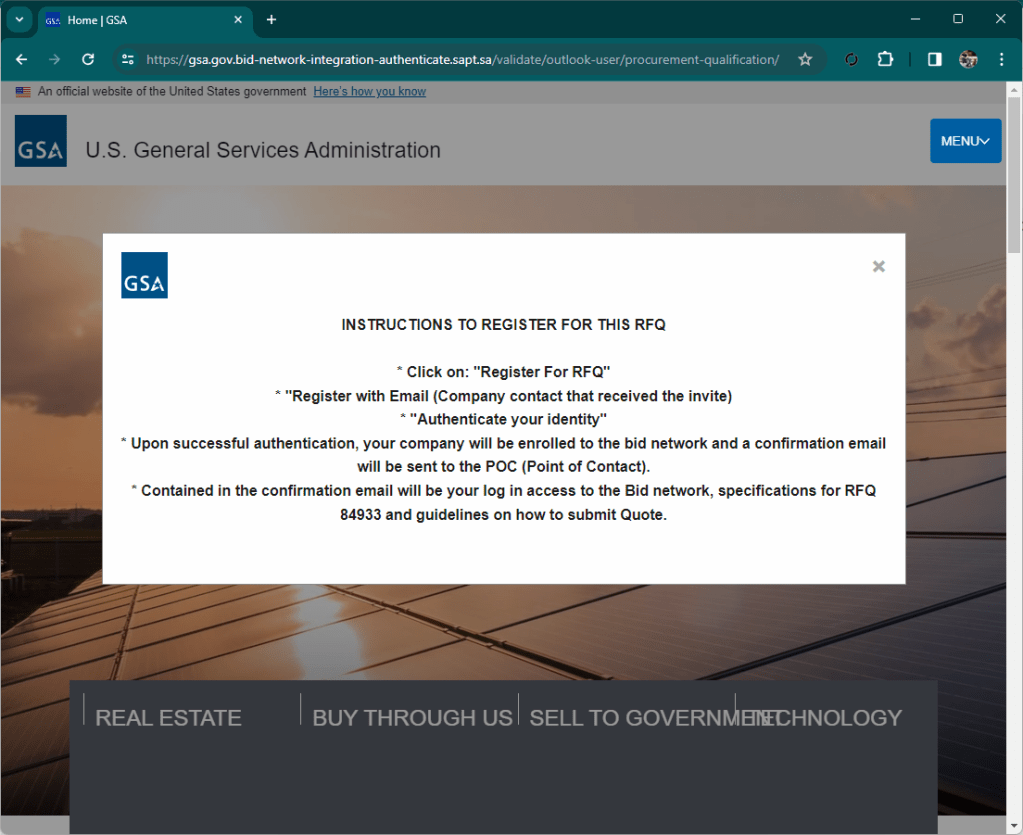
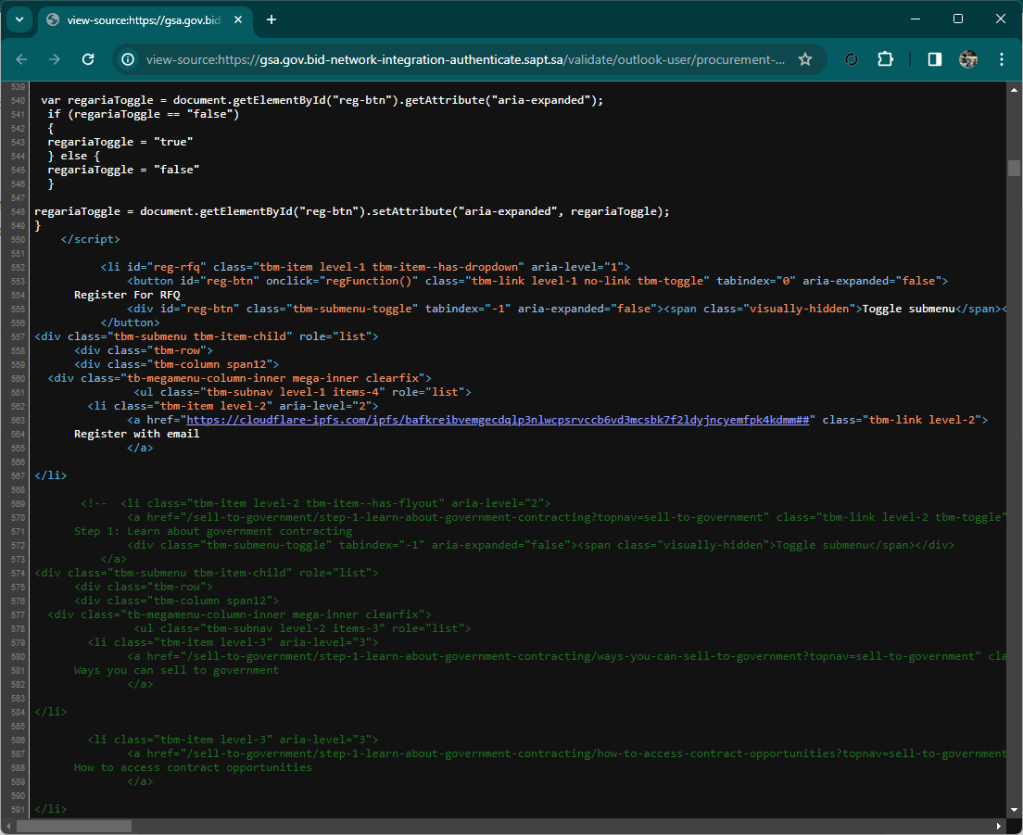
This morning I wanted to write a short post on a phishing site, which was also poorly made, but which using IPFS could be a little more interesting than the others.
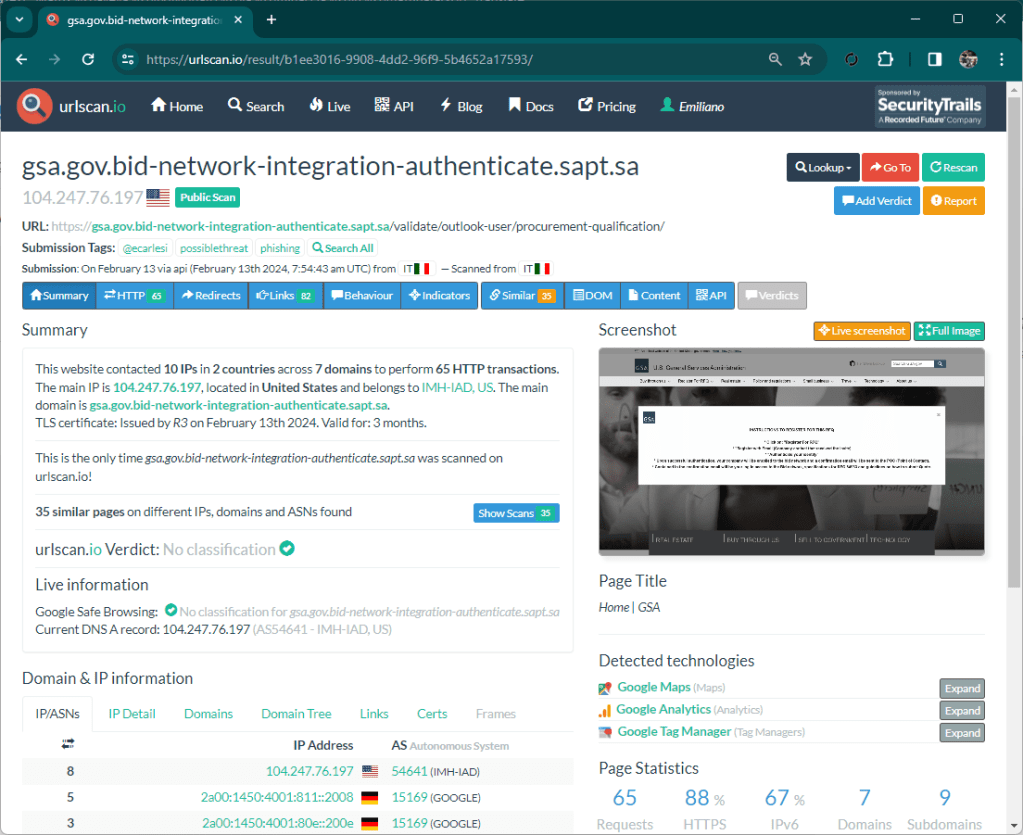
The site is an attack (targeted or not I don’t know) against some company that wants to become a supplier to the US government. The URL is: hxxps://gsa.gov.bid-network-integration-authenticate.sapt[.]sa
Matrix had identified the threat in the morning
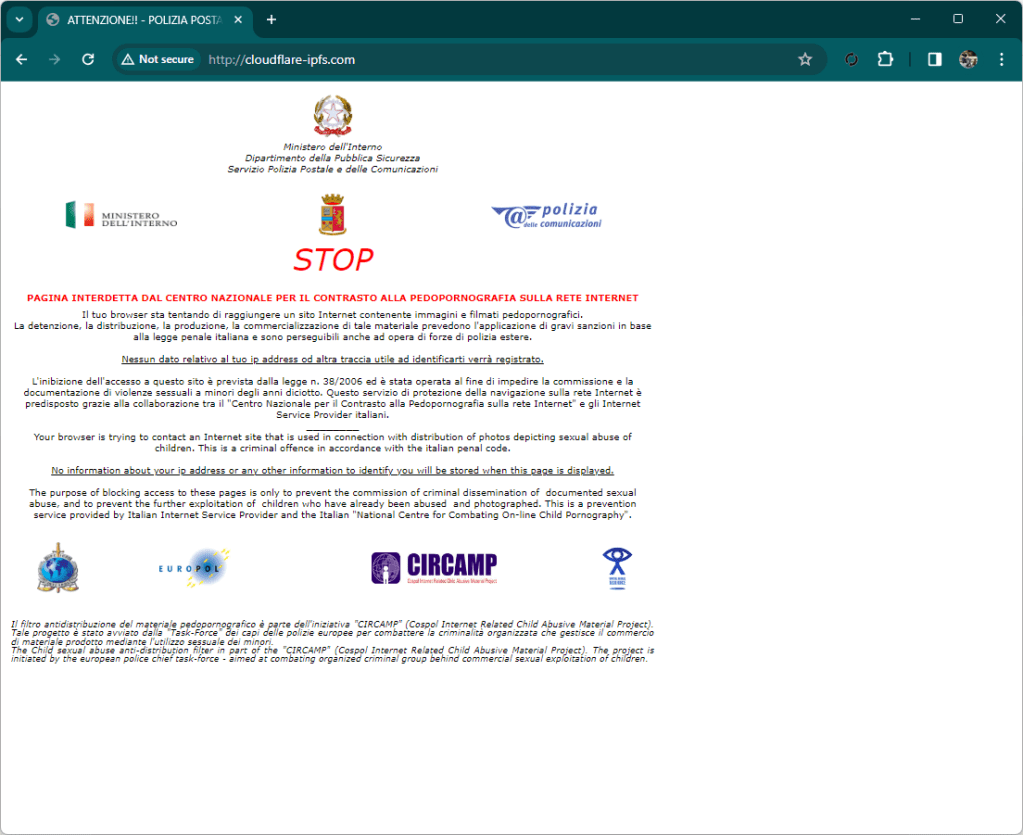
When I tried to access the content on IPFS from my laboratory network (in Italy) I was in for a surprise: access to the Cloudflare gateway to IPFS is blocked by Italian providers with the explanation that it contains child pornography!
I can understand someone’s difficulty in understanding the technology, I can understand the lack of funds to invest in research, but censoring an emerging technology like this is truly third world country!
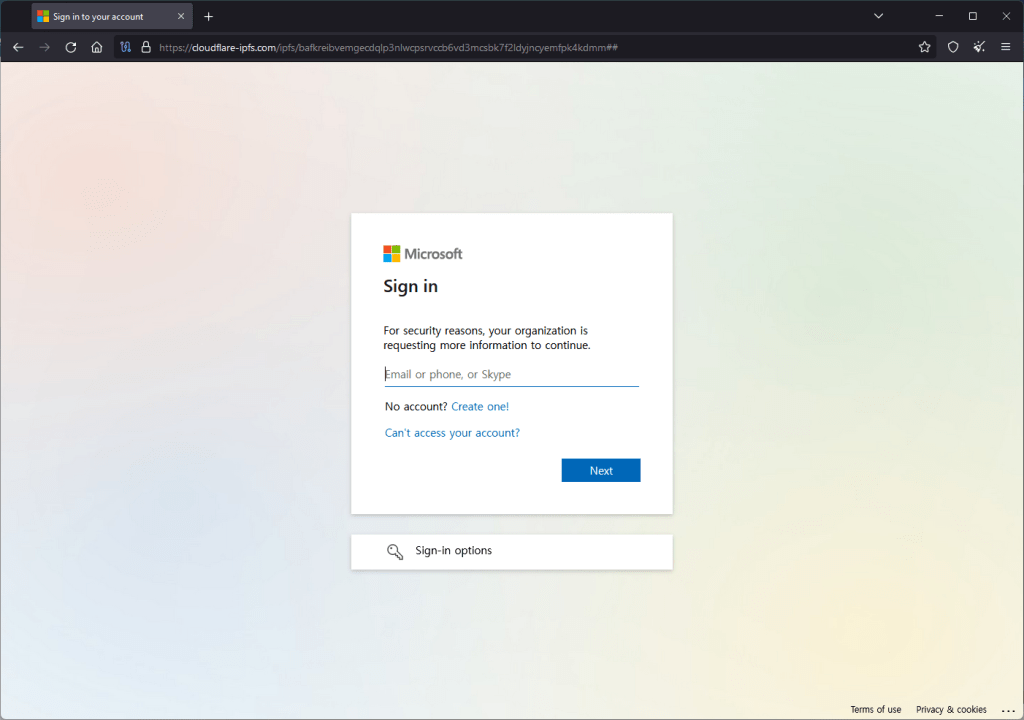
Obviously using TOR the powerful censorship is avoided in a minute and I can finally access.
Let’s put aside the attack that sucks and doesn’t even work at the moment, but what approach is it to block an entire world because you don’t understand it? I know that in Italy there are many nostalgic for that idiot Mussolini, but here it seems that someone is even nostalgic for the Middle Ages!
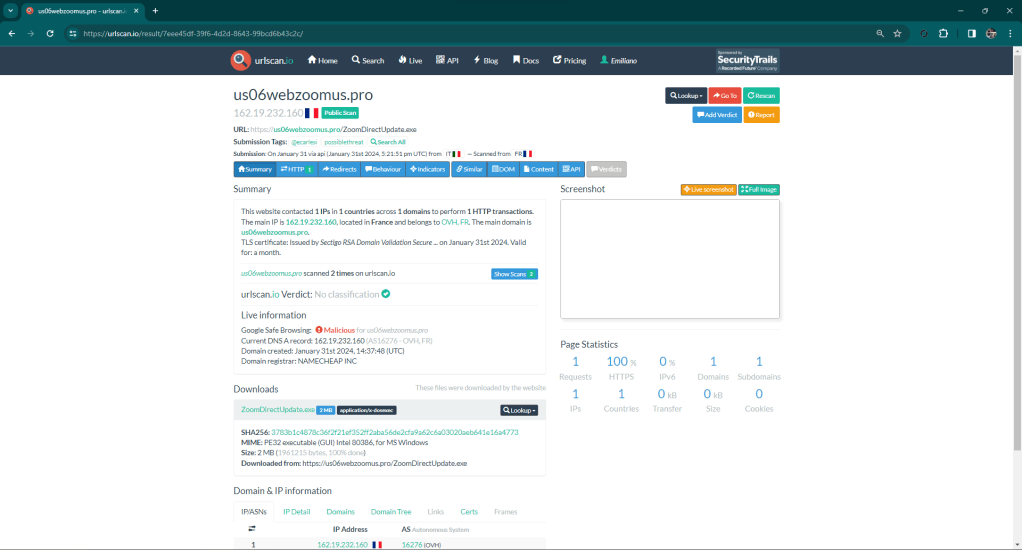
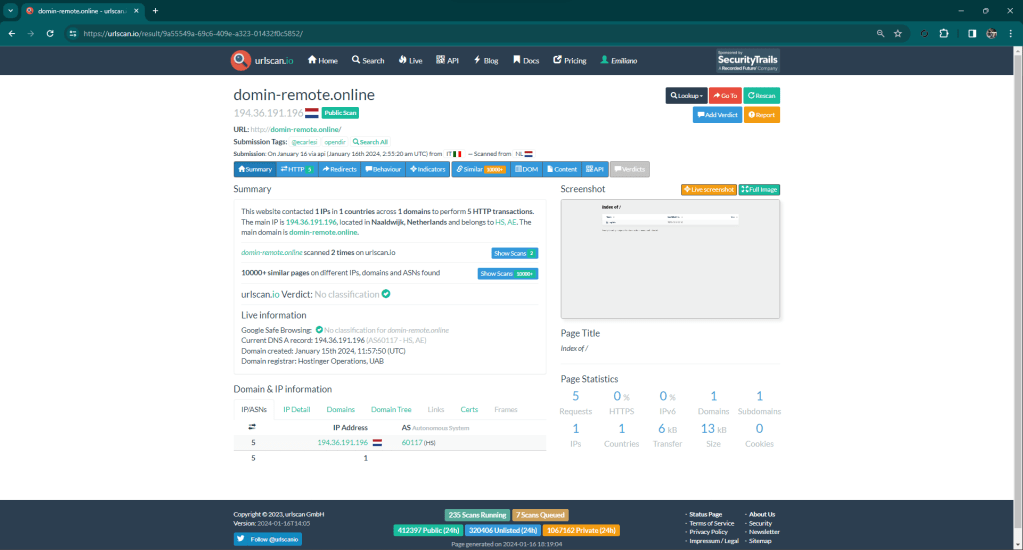
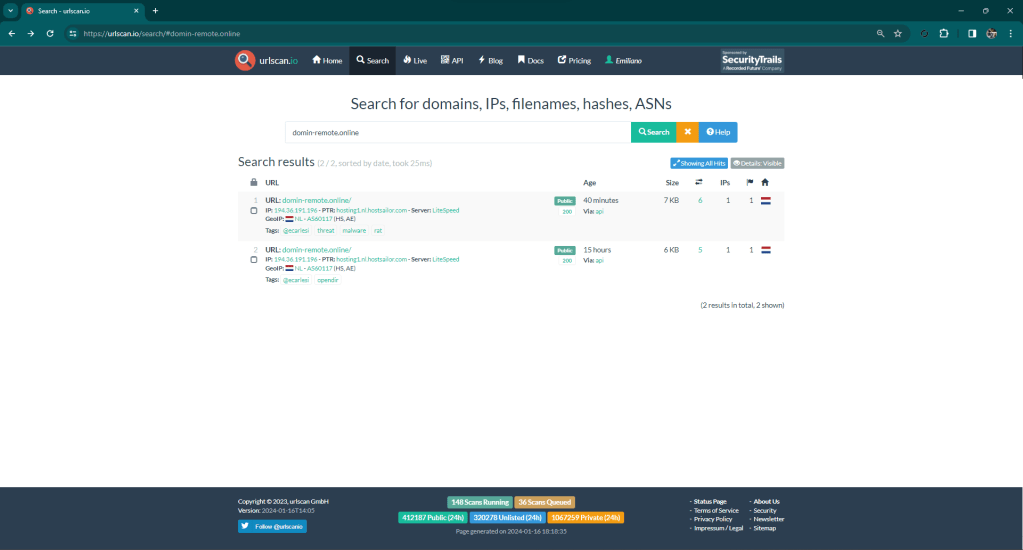
Today I’ll tell you about an attack detected a few hours ago by Matrix and reported on urlscan.io.
This is a fairly complex attack against Zoom. The attackers registered on Namecheap a domain (us06webzoomus[.]pro) reminiscent of Zoom subdomains and deployed a series of files.
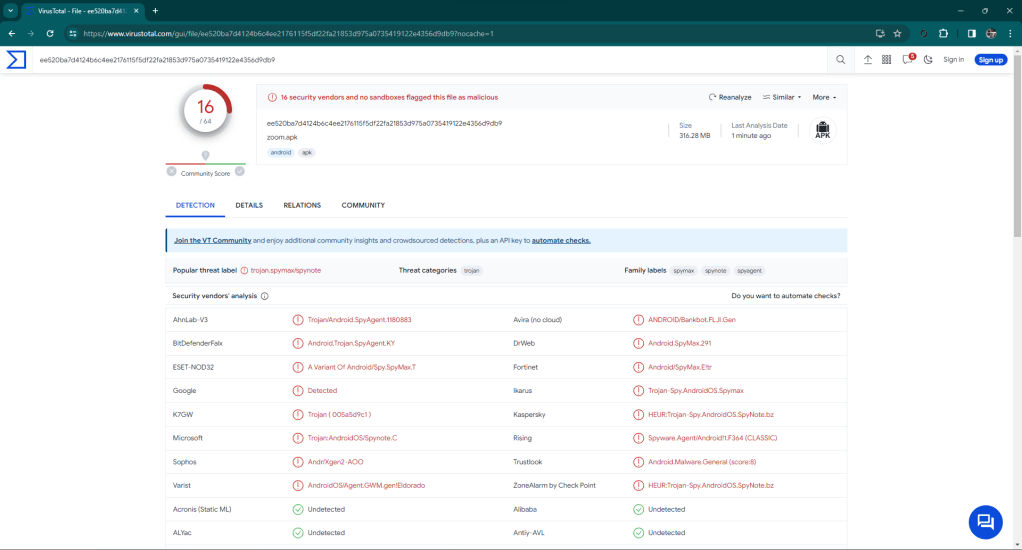
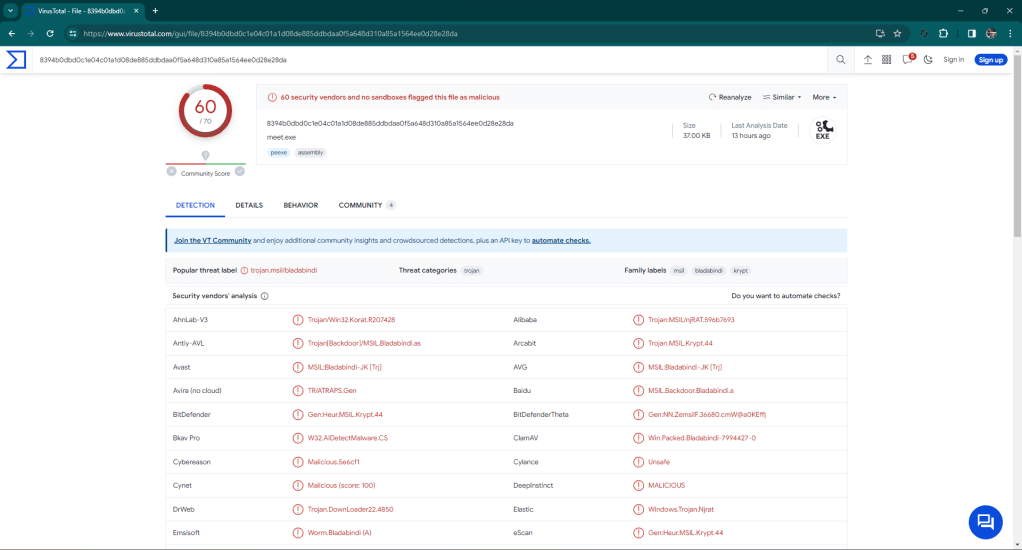
Here we find three malware (Android and Windows), static content (scripts, images, etc.), a batch for Windows using Powershell.
The contents are in Russian.
If I find the time I will update the article with details about the malware, if I don’t find the time, anyway you know not to run these executables 🙂
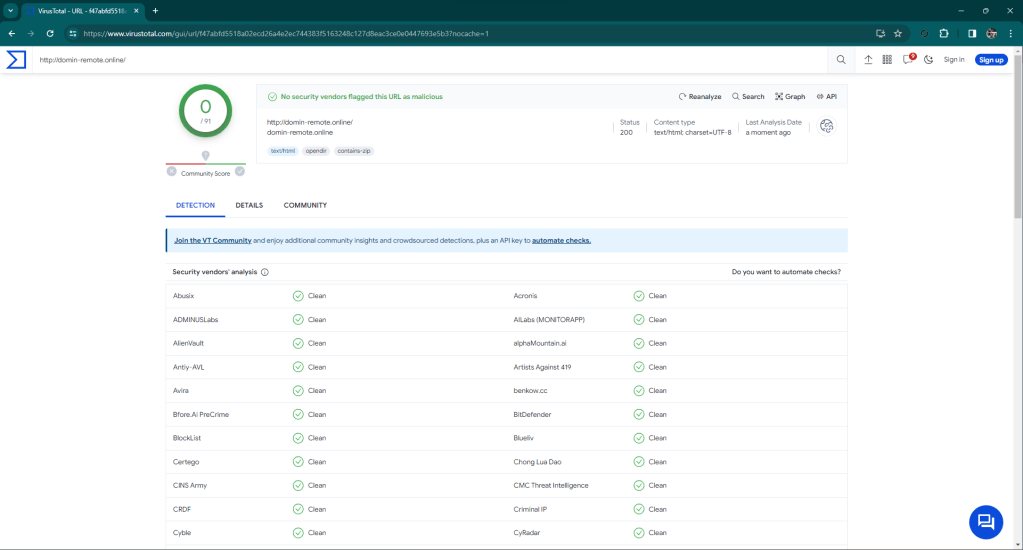
Domain Name: DOMIN-REMOTE.ONLINE
Registry Domain ID: D424887618-CNIC
Registrar WHOIS Server: whois.hostinger.com
Registrar URL: https://www.hostinger.com/
Updated Date: 2024-01-15T10:57:55.0Z
Creation Date: 2024-01-15T10:57:50.0Z
Registry Expiry Date: 2025-01-15T23:59:59.0Z
Registrar: HOSTINGER operations, UAB
Registrar IANA ID: 1636
Domain Status: serverTransferProhibited https://icann.org/epp#serverTransferProhibited
Domain Status: clientTransferProhibited https://icann.org/epp#clientTransferProhibited
Domain Status: addPeriod https://icann.org/epp#addPeriod
Registrant Organization: Privacy Protect, LLC (PrivacyProtect.org)
Registrant State/Province: MA
Registrant Country: US
Registrant Email: Please query the RDDS service of the Registrar of Record identified in this output for information on how to contact the Registrant, Admin, or Tech contact of the queried domain name.
Admin Email: Please query the RDDS service of the Registrar of Record identified in this output for information on how to contact the Registrant, Admin, or Tech contact of the queried domain name.
Tech Email: Please query the RDDS service of the Registrar of Record identified in this output for information on how to contact the Registrant, Admin, or Tech contact of the queried domain name.
Name Server: NS6.NL.HOSTSAILOR.COM
Name Server: NS5.NL.HOSTSAILOR.COM
DNSSEC: unsigned
Billing Email: Please query the RDDS service of the Registrar of Record identified in this output for information on how to contact the Registrant, Admin, or Tech contact of the queried domain name.
Registrar Abuse Contact Email: domains@hostinger.com
Registrar Abuse Contact Phone: +370.68424669
URL of the ICANN Whois Inaccuracy Complaint Form: https://www.icann.org/wicf/
>>> Last update of WHOIS database: 2024-01-16T17:42:53.0Z <<<

For more information on Whois status codes, please visit https://icann.org/epp

>>> IMPORTANT INFORMATION ABOUT THE DEPLOYMENT OF RDAP: please visit
https://www.centralnic.com/support/rdap <<<

The Whois and RDAP services are provided by CentralNic, and contain
information pertaining to Internet domain names registered by our
our customers. By using this service you are agreeing (1) not to use any
information presented here for any purpose other than determining
ownership of domain names, (2) not to store or reproduce this data in
any way, (3) not to use any high-volume, automated, electronic processes
to obtain data from this service. Abuse of this service is monitored and
actions in contravention of these terms will result in being permanently
blacklisted. All data is (c) CentralNic Ltd (https://www.centralnic.com)

Access to the Whois and RDAP services is rate limited. For more
information, visit https://registrar-console.centralnic.com/pub/whois_guidance.
Here you can download the zip file containing everything.
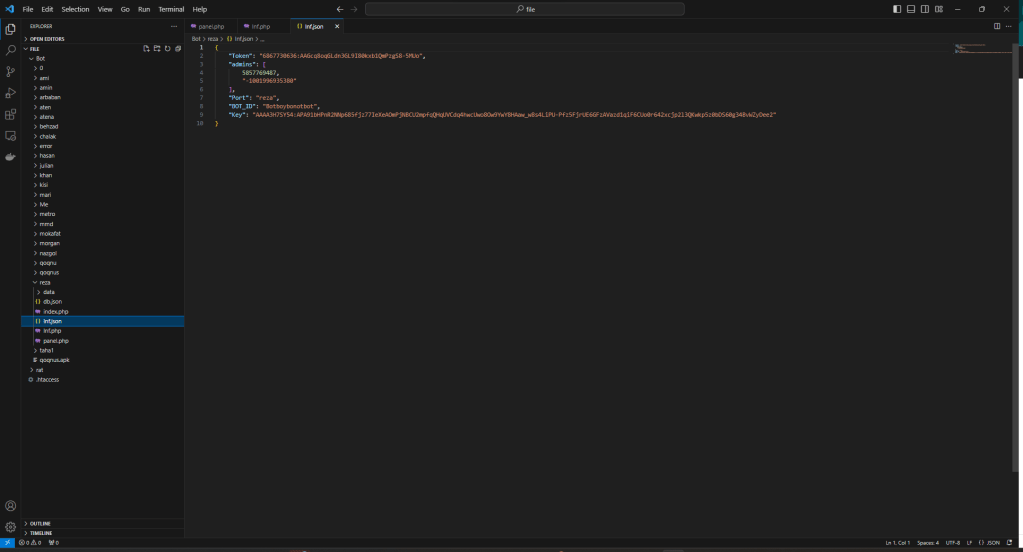
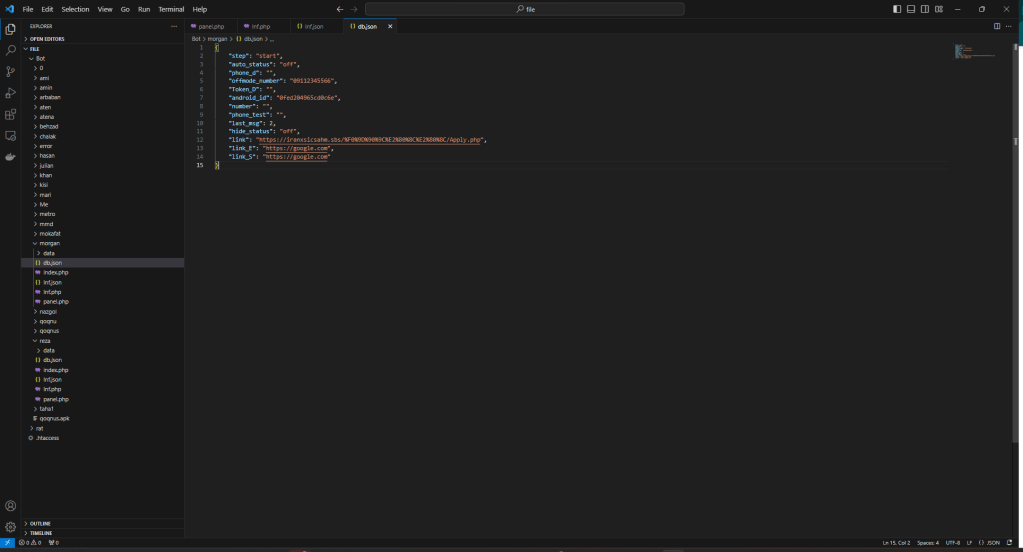
This is the beginning of the attack from which it is possible to download the PHP sources (sorry for “PHP” 😉 ) and the malware for Android, used for the attack.
The malware is a RAT and the sources represent its C2.
The C2 code is simple and was probably written by a person with little experience, even if he defines himself as a “hacker” while I see him more as a “newbie” with little hope.
Inside you will find everything you need, keys, logs, other domains involved, in short, if anyone has more time than me and wants to find out more, let me know, maybe they could collaborate on this article and enrich it 🙂
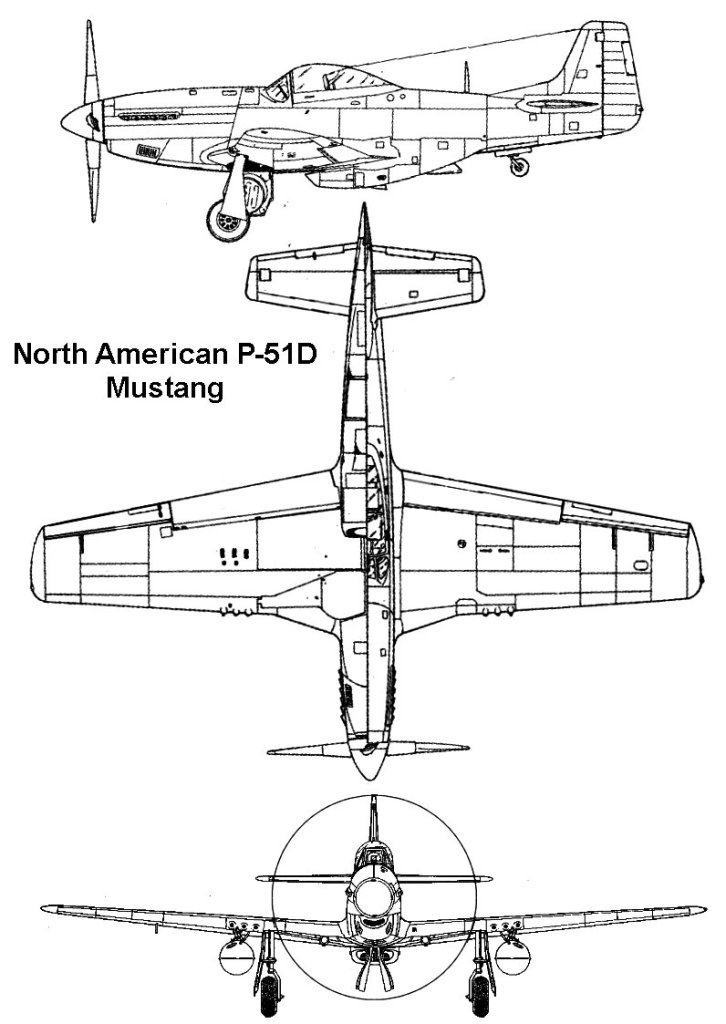
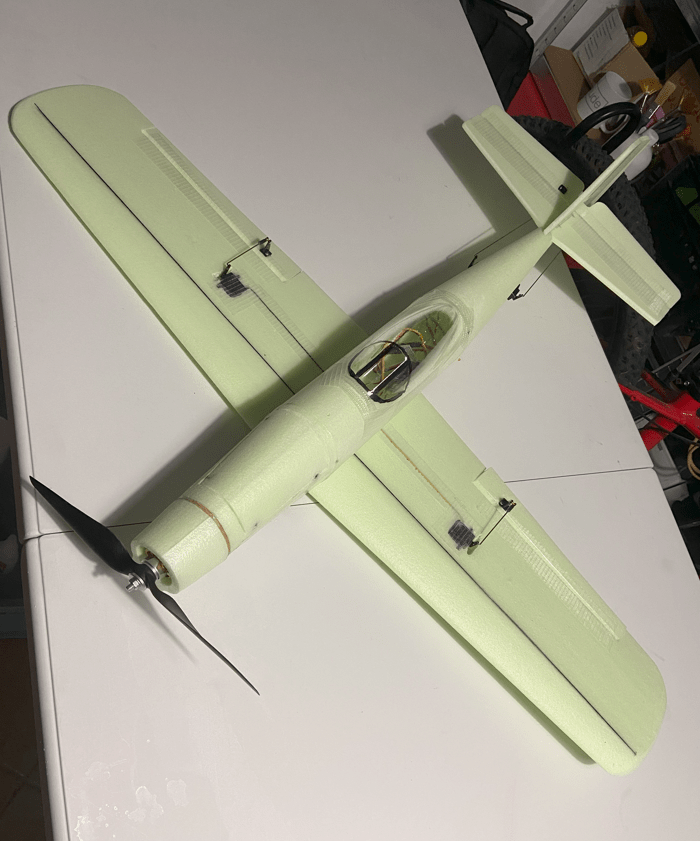
Rieccoci con un altro post su come ho assemblato un nuovo modello realizzato da Gianluca. Dopo aver assemblato il BF109 oggi vediamo il P-51D Mustang.
Si tratta anche in questo caso di un kit realizzato in polestirele ricavato da lastra, quindi buona parte dei procedimenti sono già stati spiegati nel post del BF109, vi consiglio di leggere quello se non l’avete ancora fatto.
L’assemblaggio di questo kit è un po’ più rapido del BF109, se avete un po’ di dimestichezza con questi assemblaggi non ci saranno problemi.
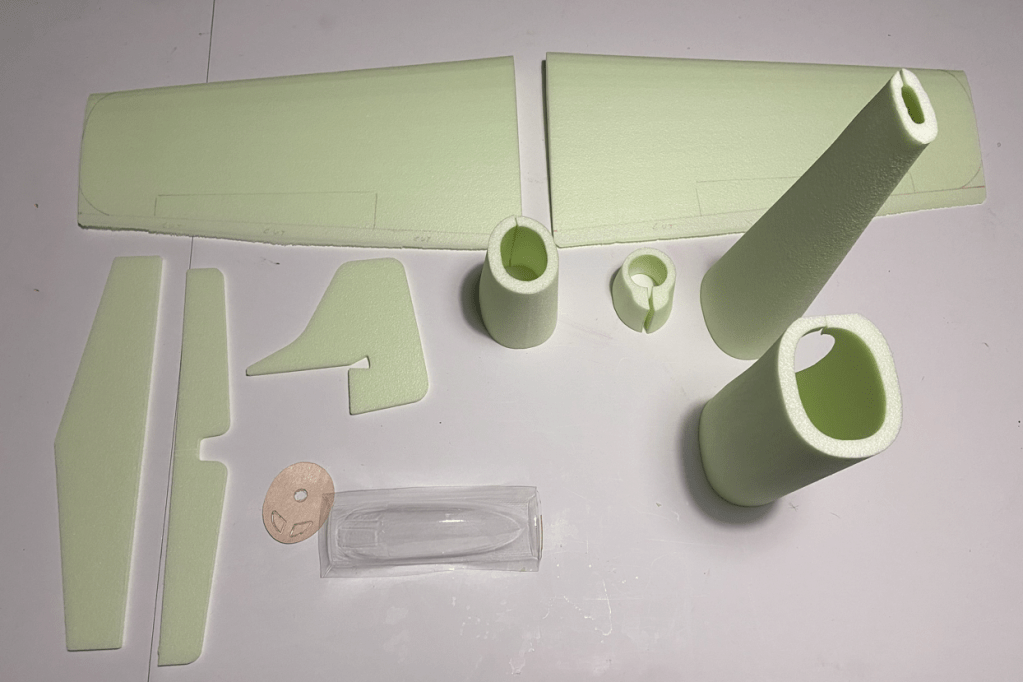
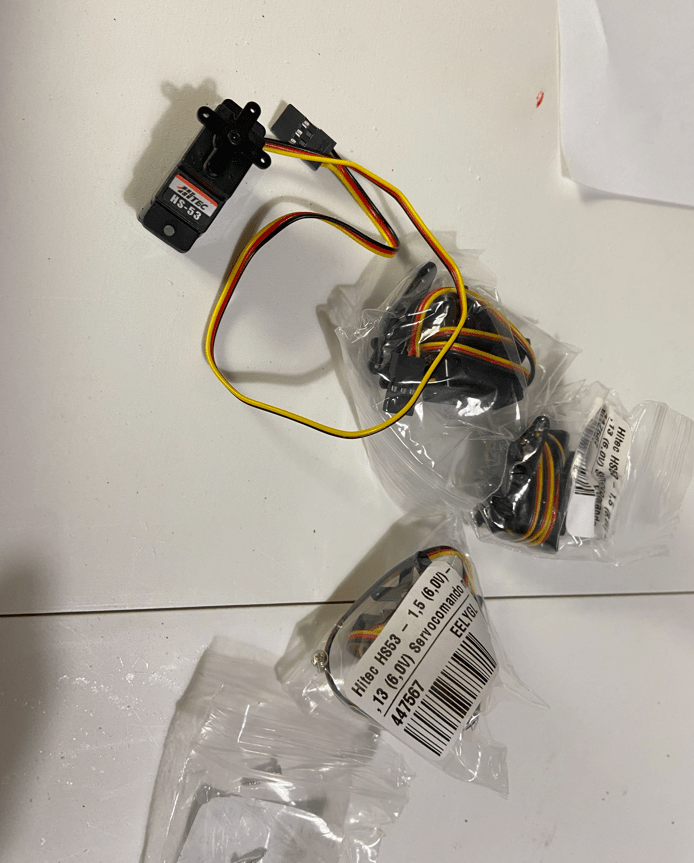
Come per l’articolo precedente anche in questo caso partiamo con l’elenco del materiale necessario. La grande differenza è nella vernice utilizzata per colorare il modello. Si tratta di una bomboletta ad acqua che oltre a colorare dona una ulteriore robustezza alla superficie del materiale.
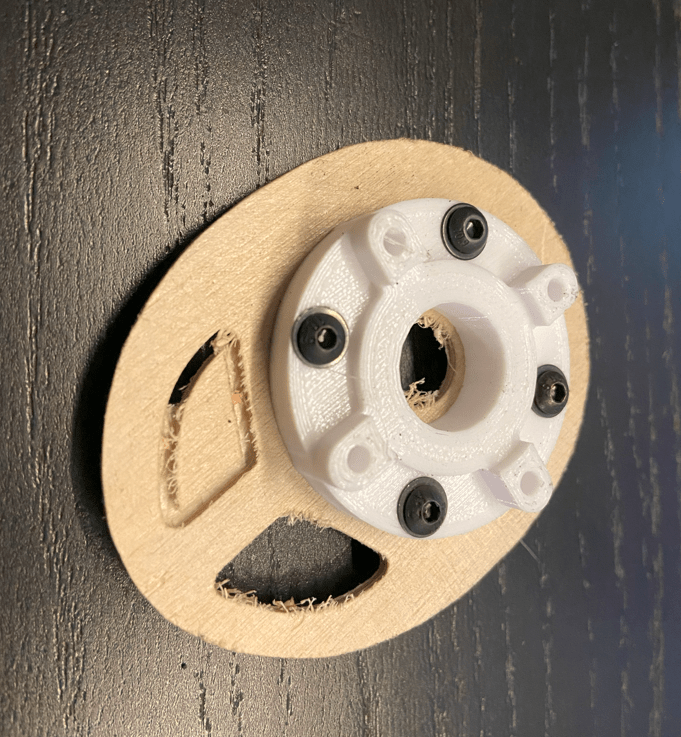
Come per il BF109 anche in questo caso ho deciso di creare un supporto motore in PETG da stampare 3D. Trovate qui il file STL da scaricare. A differenza del BF109 dove lo spessore della naca imponeva un notevole spessore dietro il motore, in questo caso si tratta di pochi millimetri, quindi volendo si può evitare di usare il supporto in PETG e usare altri sistemi. Io trovo la soluzione adottata molto pulita.
Per facilitare le operazioni di taglio degli alettoni potete usare questo tool da stampare in 3D.
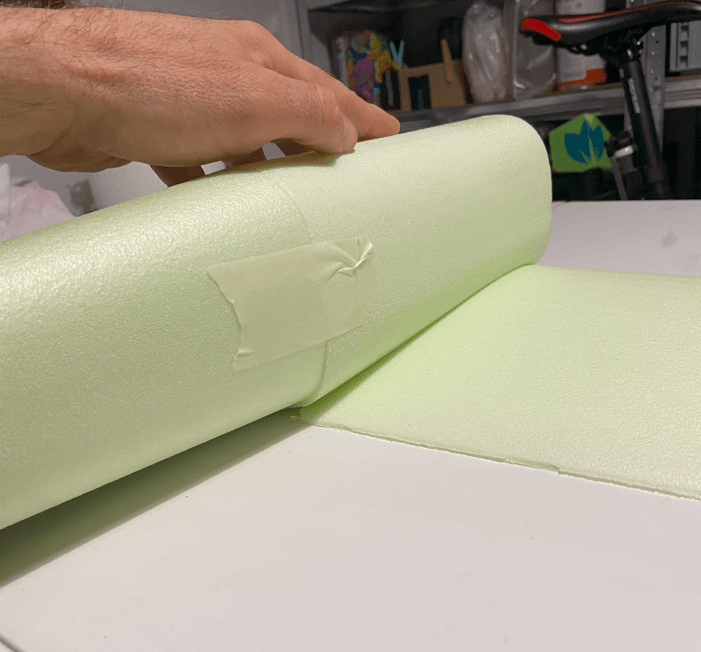
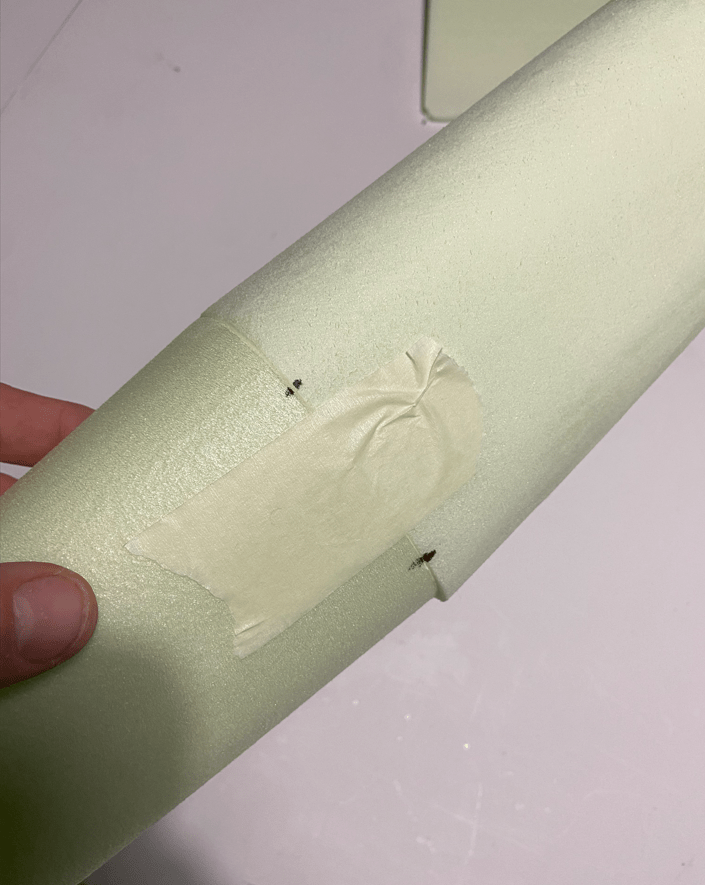
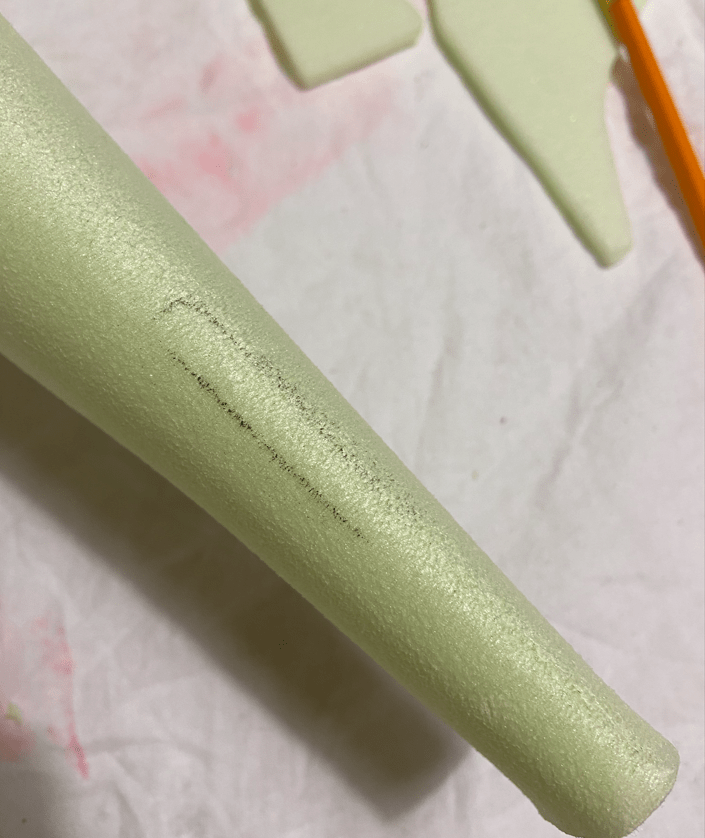
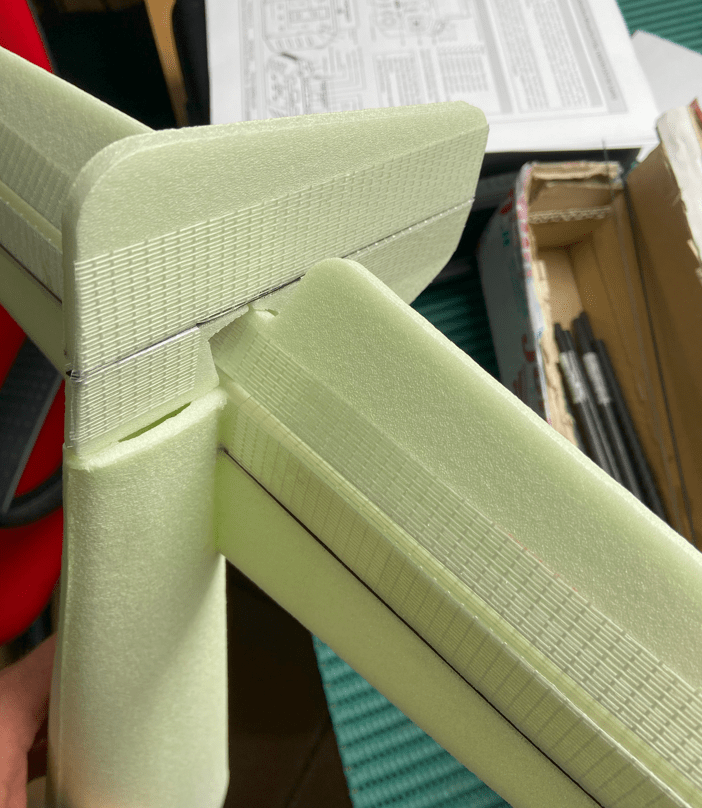
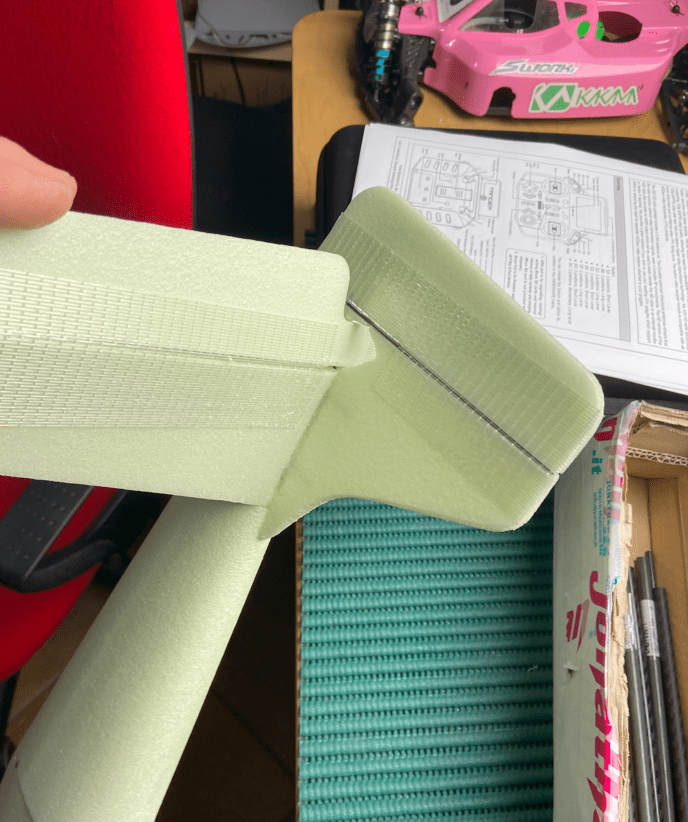
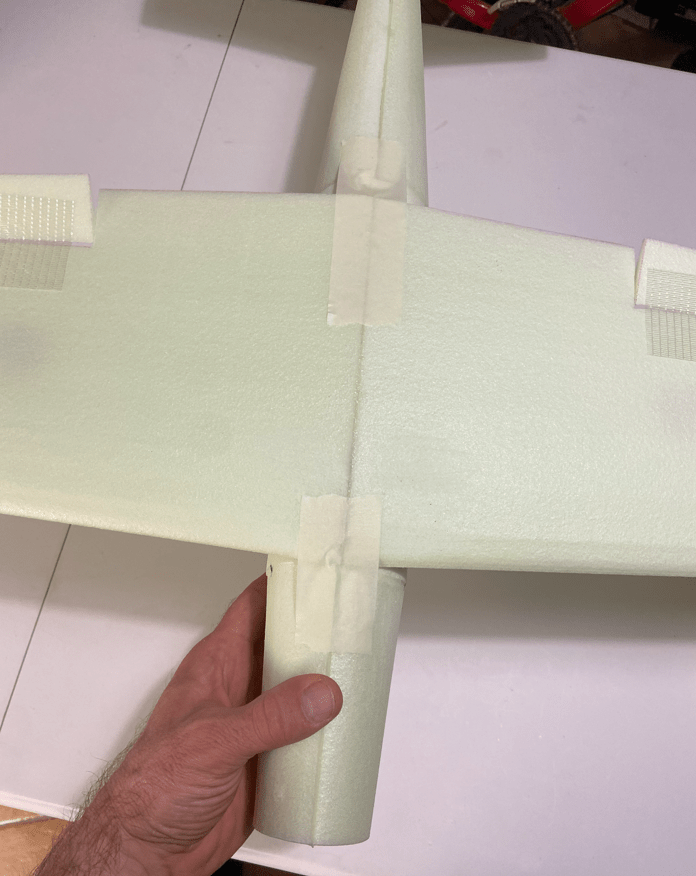
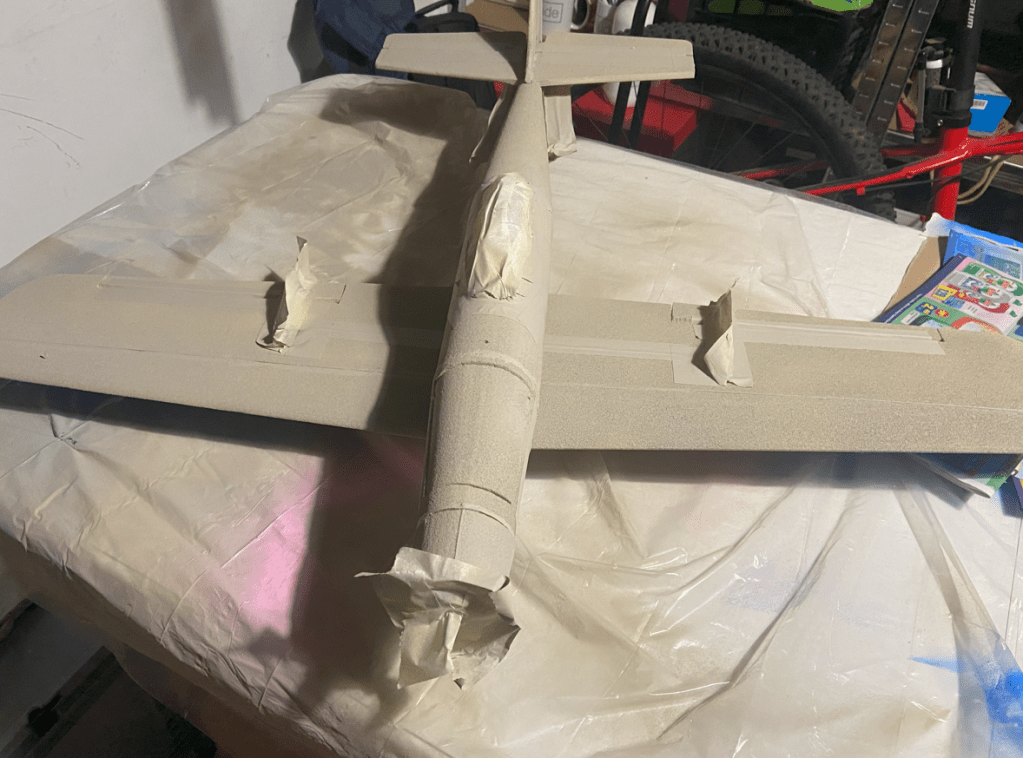
Come prima cosa dobbiamo realizzare la fusoliera unendo i tre tronchi che la compongono. Il processo non è complesso e l’unica accortezza è di incollare tutto dritto. Io ho allineato i due pezzo principali e li ho uniti tramite due pezzi di nastro da carrozzerie. Verificato che tutto fosse dritto ho segnato in quattro punti per essere certo di poterli riposizionare velocemente durante l’incollaggio e quindi ho incollato.
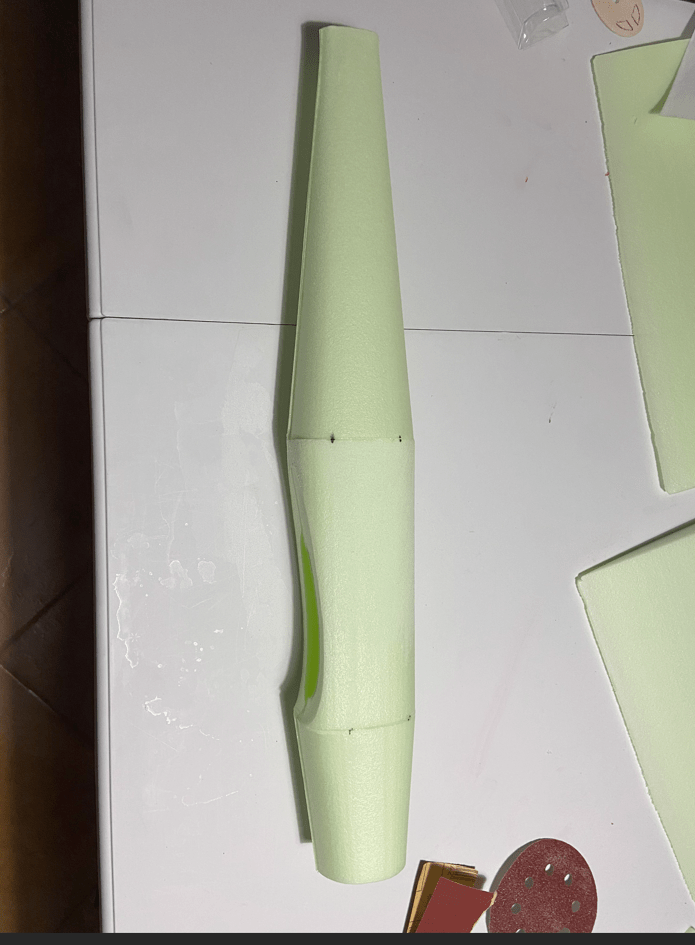
Quando la colla è asciutta data una smussata alle giunture per rendere il tutto aerodinamico. Vi consiglio di usare carta abrasiva 80 per questa operazione.
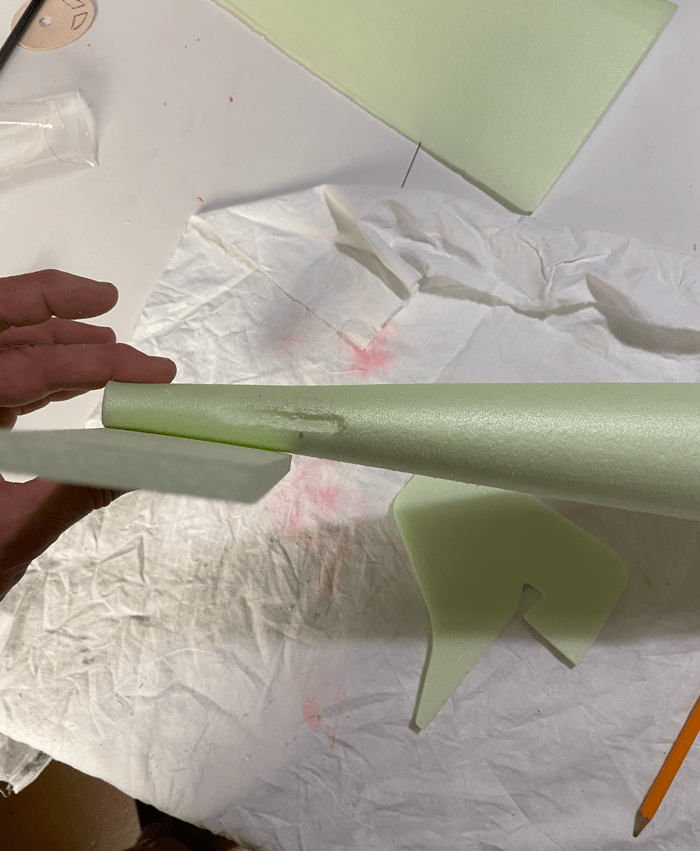
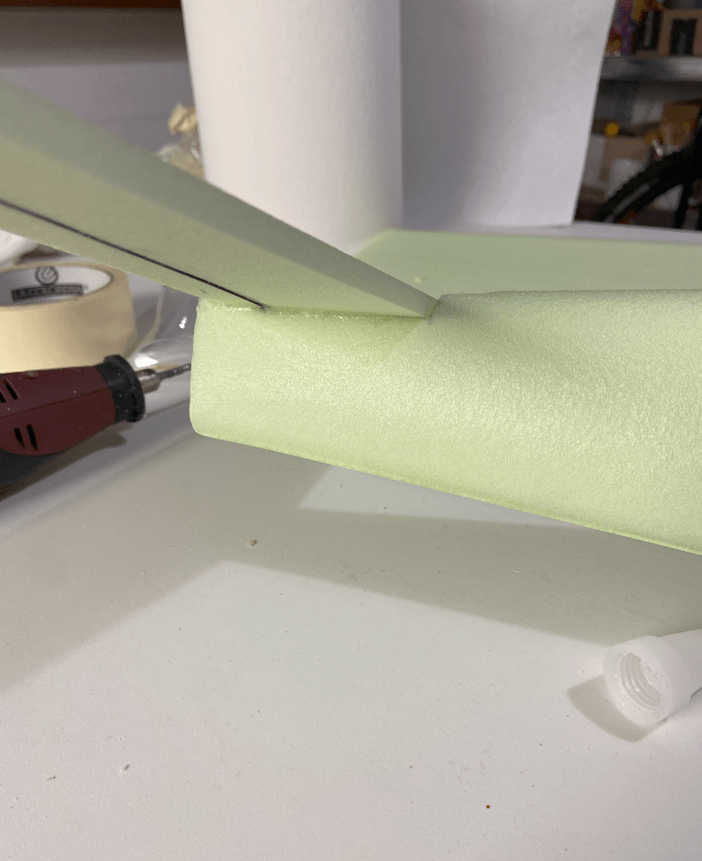
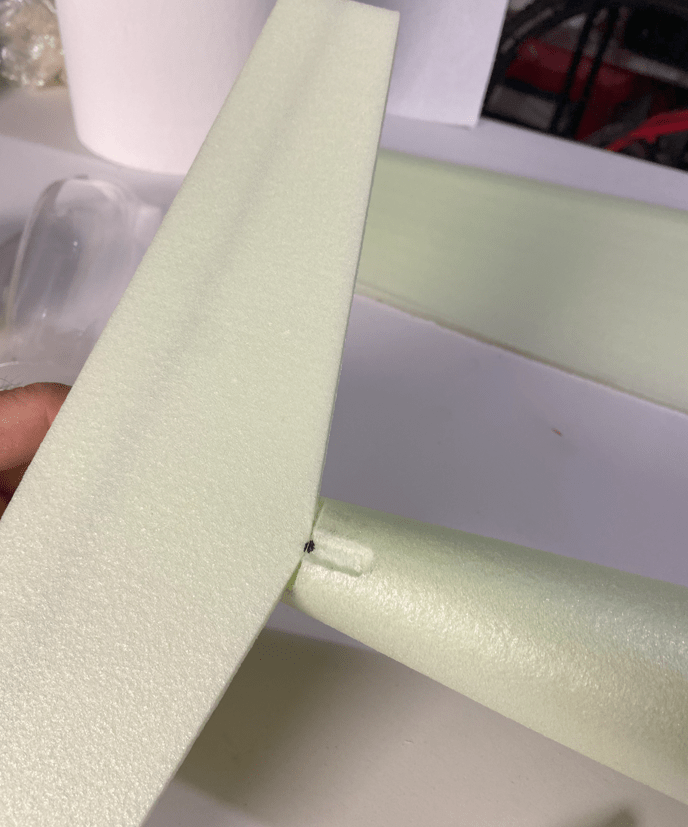
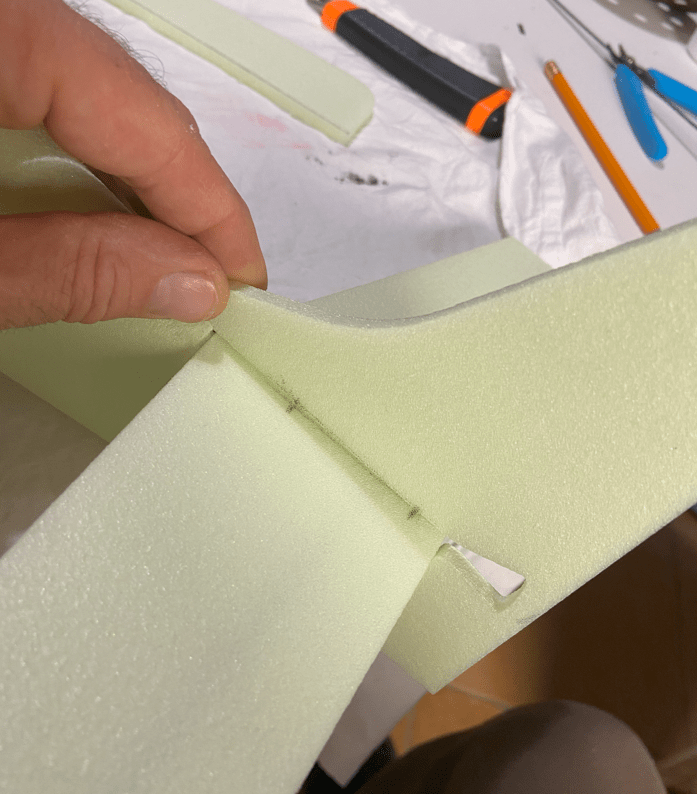
Adesso dobbiamo ricavare una sede per la stabilizzazione. Per fare questo posizioniamo il timone e segnamo dove dovremo andare a tagliare o fresare. Io ho usato una piccola fresa sul dremel.
Un volta che avremo ricavato la sede per il timone dobbiamo ricavare una piccola scanalatura per la stabilizzazione.
Lo scopo è arrivare ad avere la stabilizzazione parallela alla fusoliera in termini di piani.
Prima di incollare la stabilizzazione alla fusoliera dobbiamo irrigidirla utilizzando il listello in carbonio.
Adesso possiamo incollare la stabilizzazione alla fusoliera.
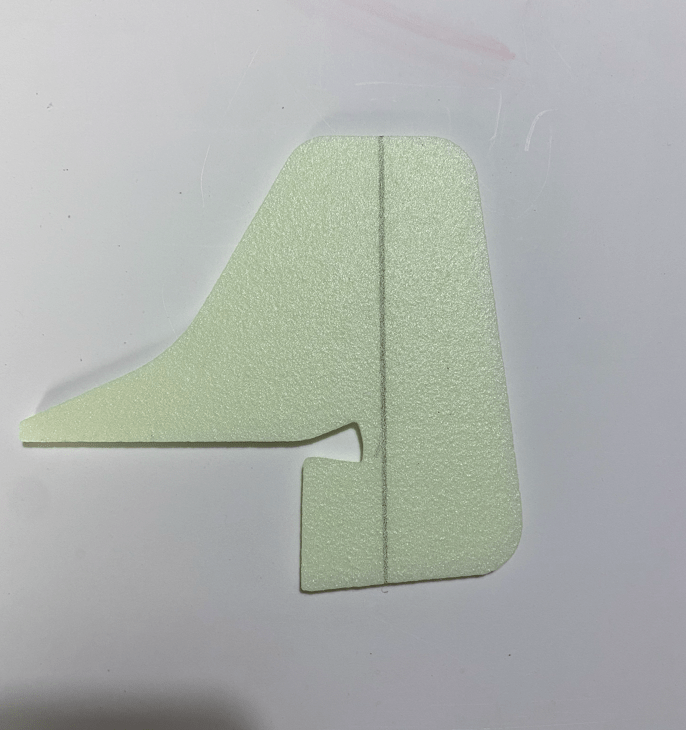
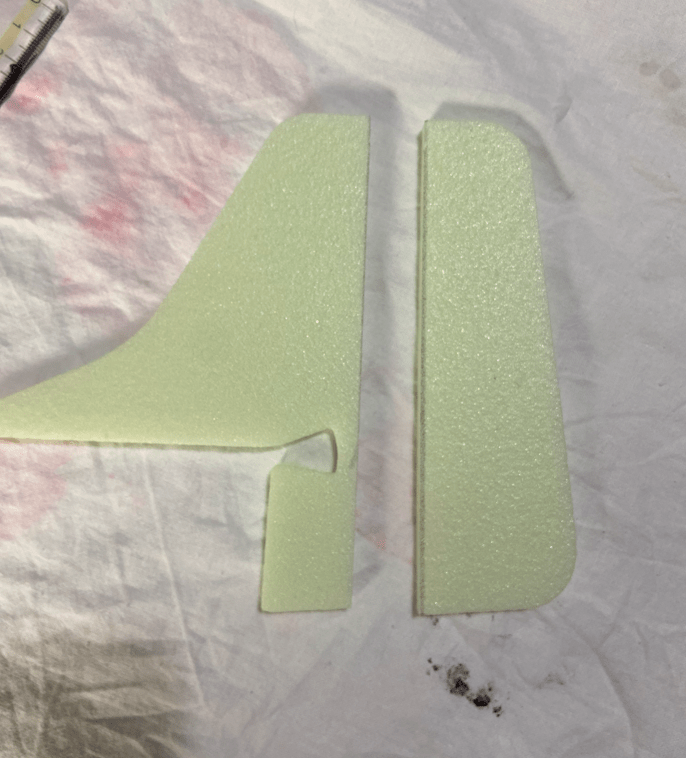
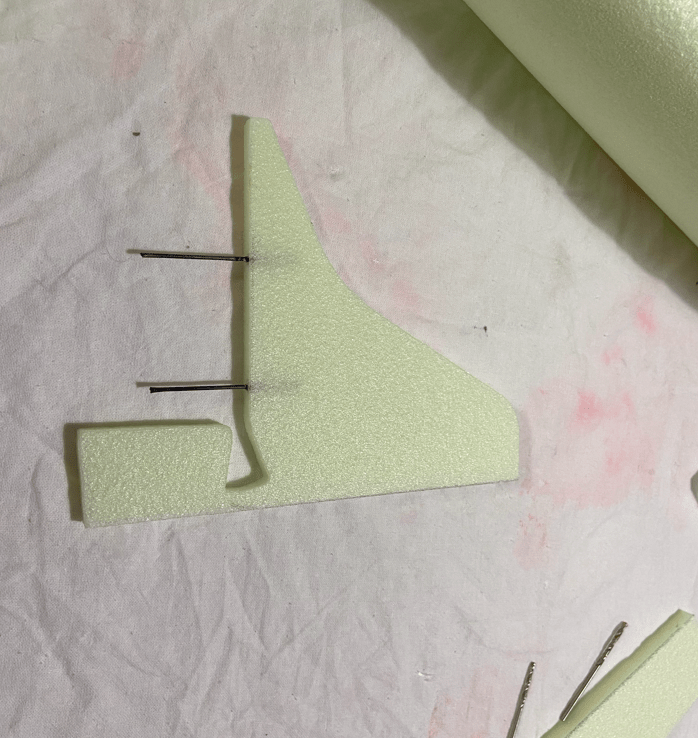
Adesso passiamo al timone. Come prima cosa lo dividiamo. Nelle foto sotto vedete a che punto ho eseguito il taglio.
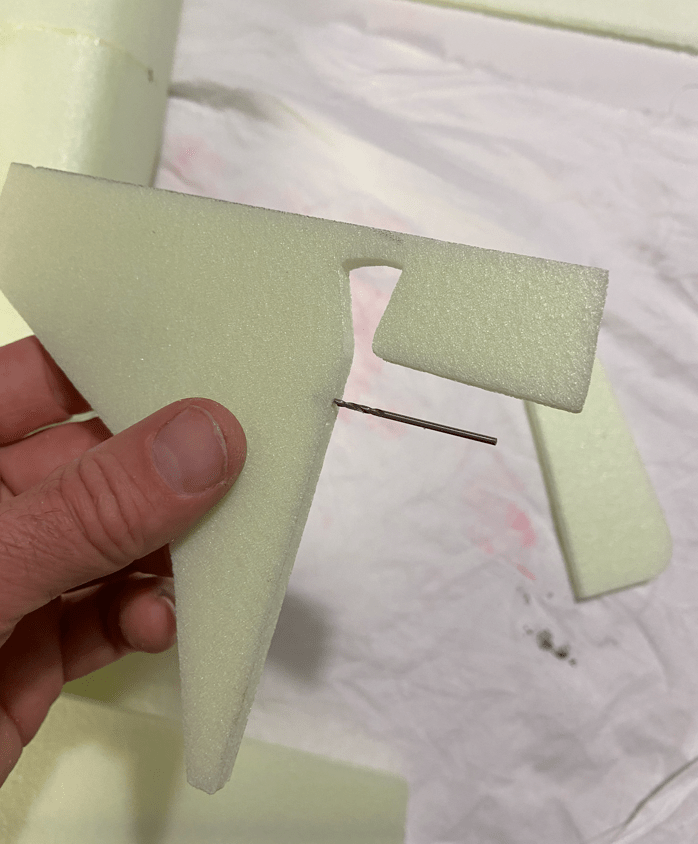
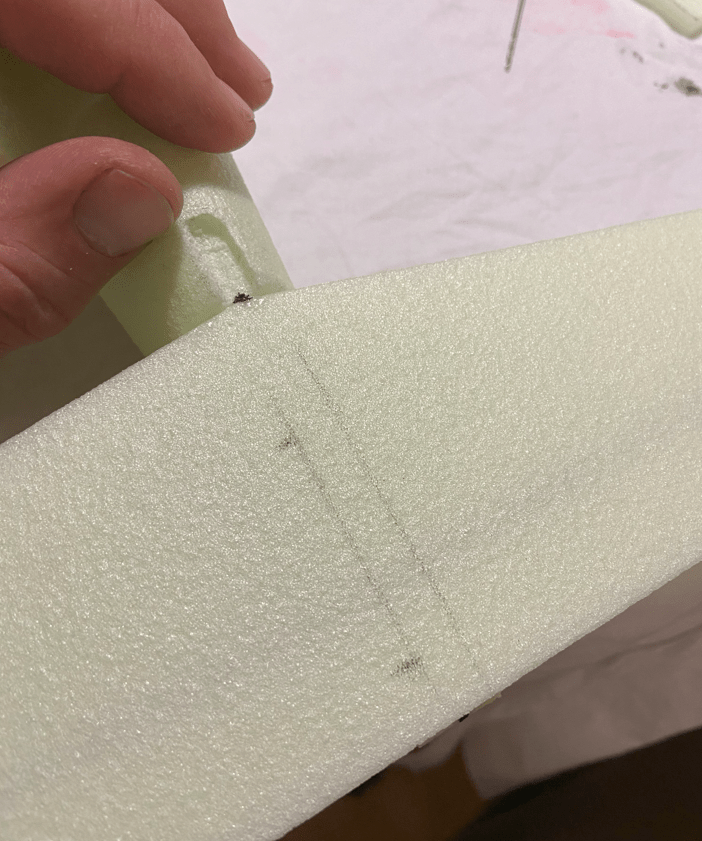
Per rendere il verticale più robusto ho installato due spine al suo interno. Le spine sono ricavate da un tondino di carbonio da 1.5 mm. Come prima cosa ho praticato due fuori all’interno del timone
quindi, prima di installare le spine, sono andato a segnare i punti sul timone
ho quindi incollato le spine al timone
Quindi ho praticato i fori nella stabilizzazione e ho incollato il verticale.
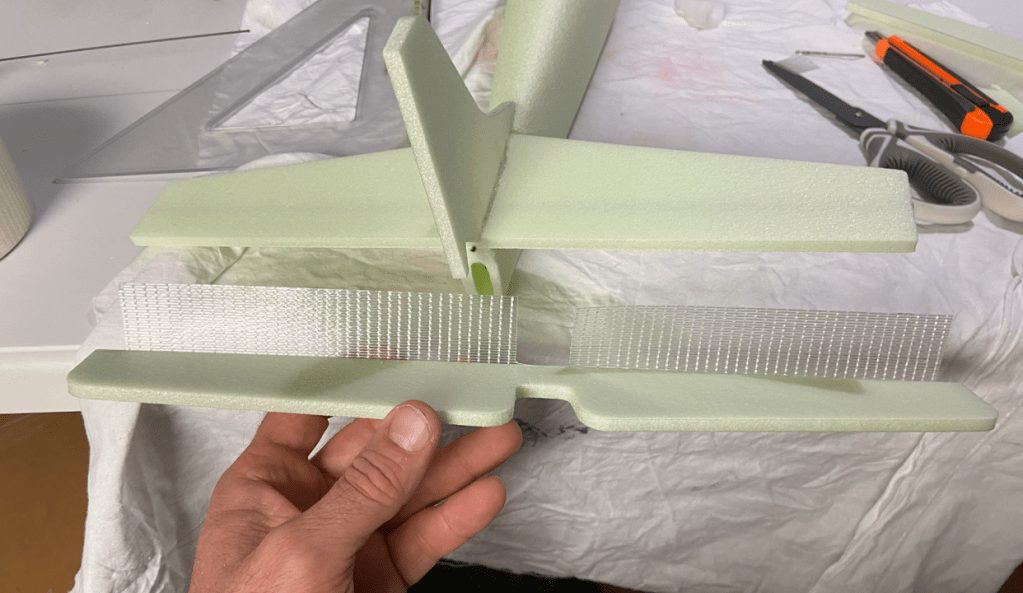
Adesso passiamo alla superficie mobile della stabilizzazione. Come visto in precedenza, per collegare le superfici mobili utilizzerò il nastro tramato.
Nel posizionare il nastro prestiamo massima attenzione che il movimento risulti libero nelle due direzioni.
Per irrobustire ulteriormente il timone ho deciso di usare un pezzo di listello incollandolo come in foto qui sotto
Adesso colleghiamo il timone al verticale
Mi raccomando di prestare attenzione che le superfici mobili siano libere di muoversi, eventualmente rimuovete il materiale che tocca in fase di movimento.
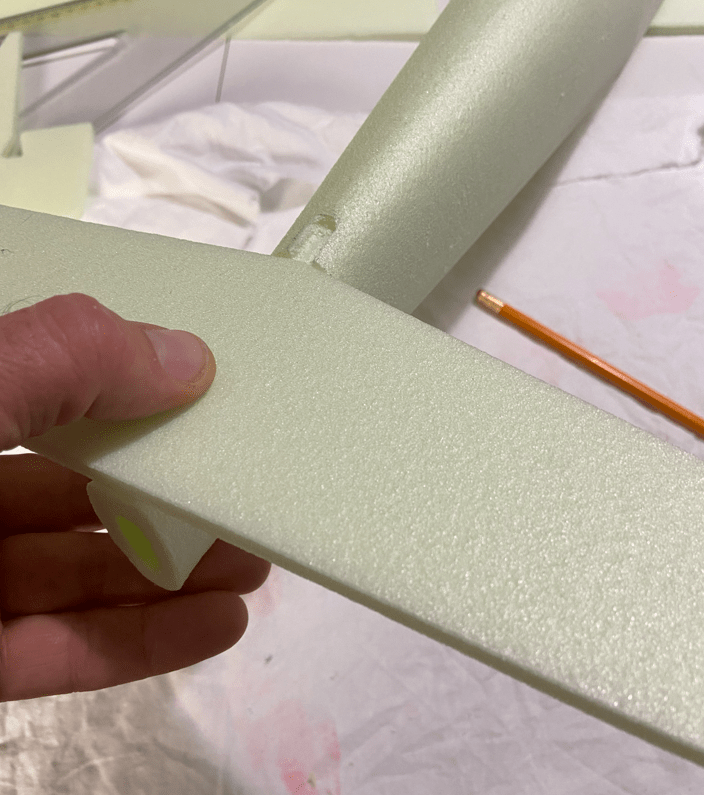
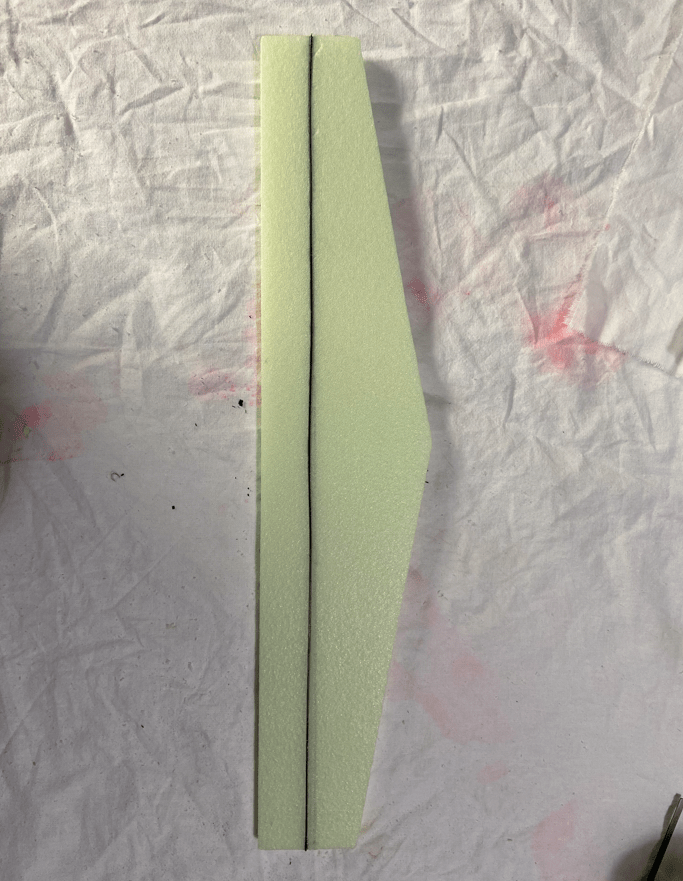
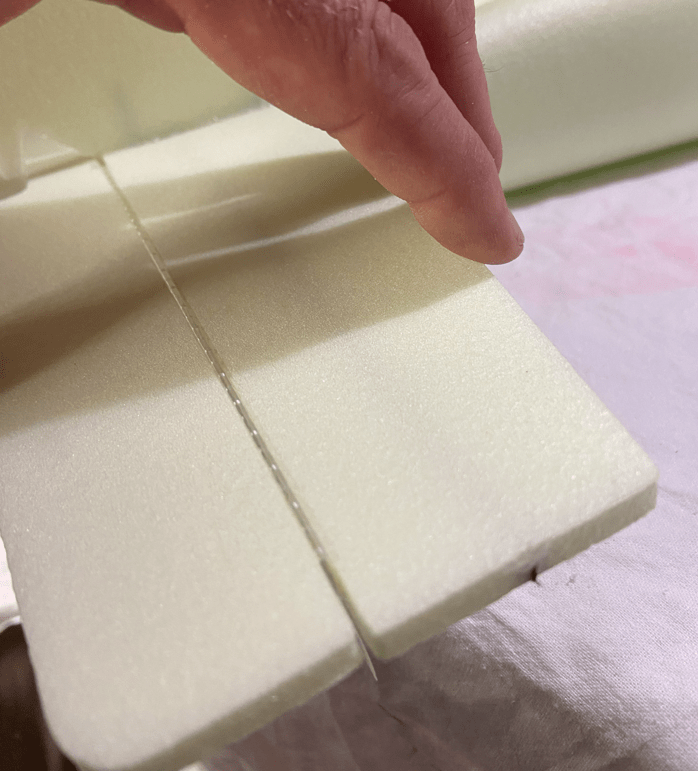
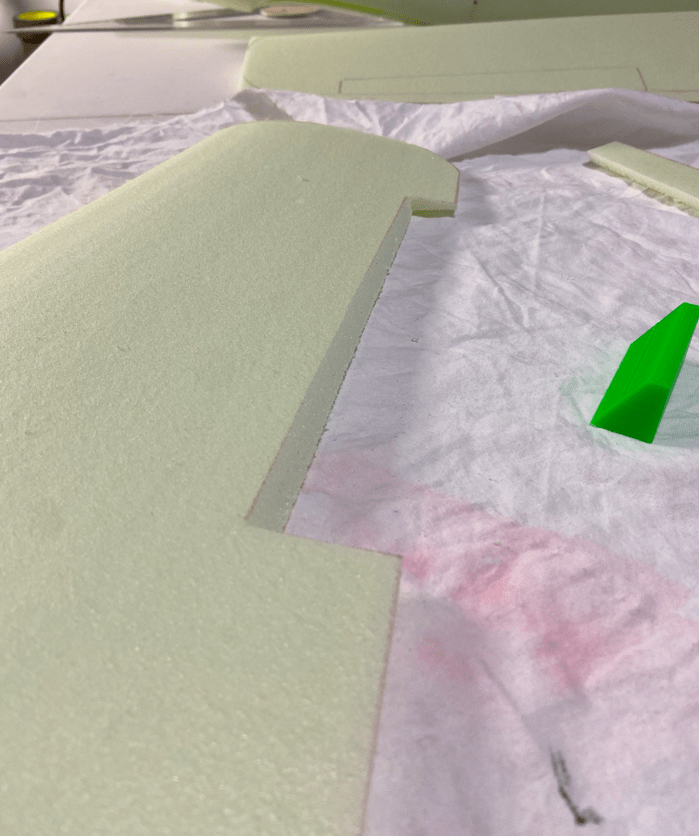
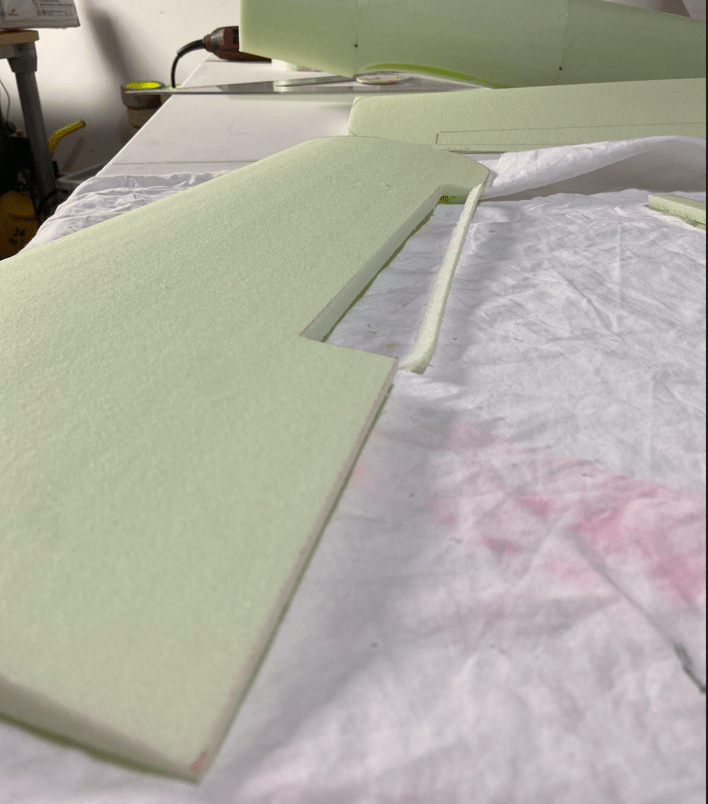
Passiamo quindi alle ali. Nel kit troviamo le due semiali grezze, dobbiamo quindi rimuovere il materiale in eccesso ed estrarre gli alettoni. In rosso troviamo i segni chiari di cosa fare. Come prima cosa rimuoviamo gli eccessi dalla parte posteriore, quindi dalle estremità. Fatto questo carteggiamo leggermente per ammorbidire gli spigoli.
Utilizzando il tool che abbiamo usato per il BF109 andiamo ad estrarre dall’ala il suo alettone
Quindi andiamo a rimuovere l’eccesso dall’ala, utilizzando sempre il tool ma invece di usare il lato con l’angolo da 30, usiamo quello a 0.
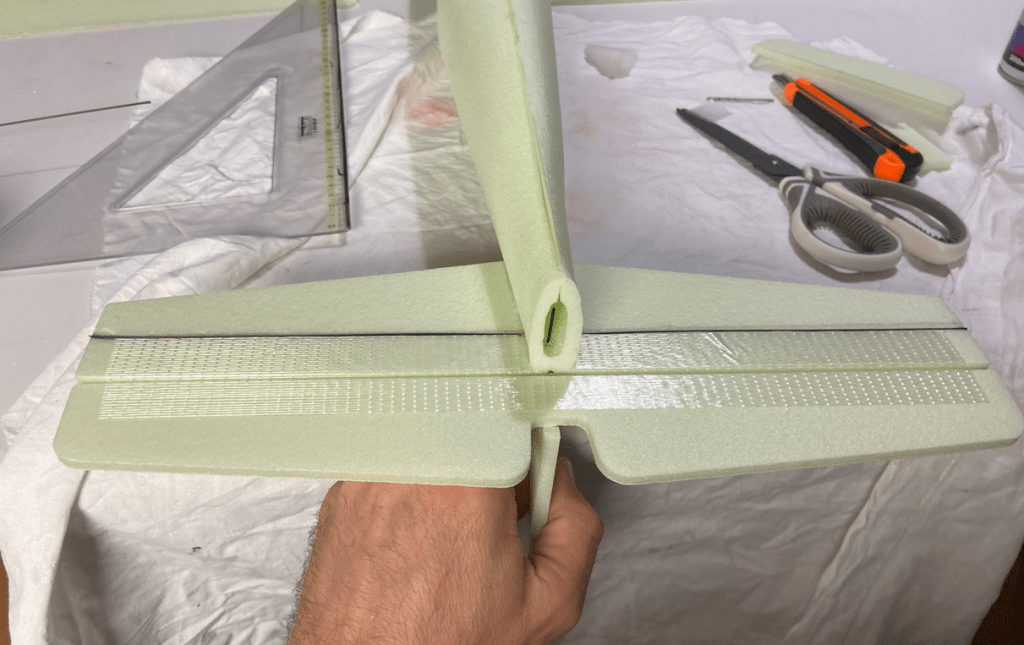
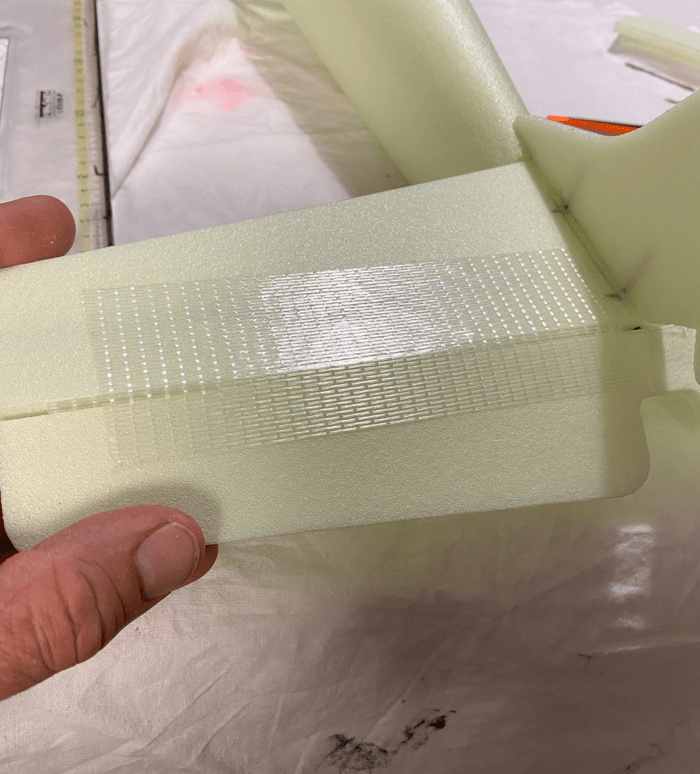
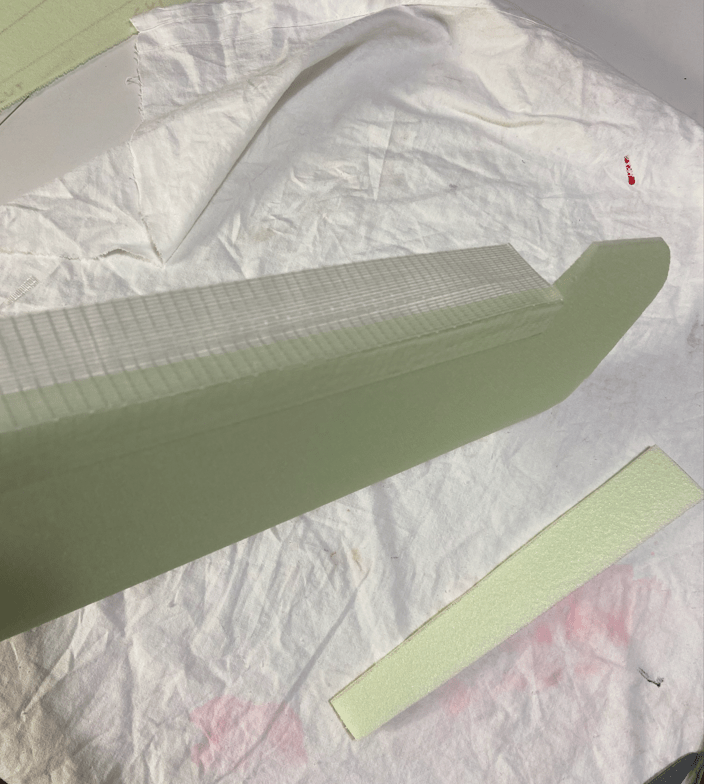
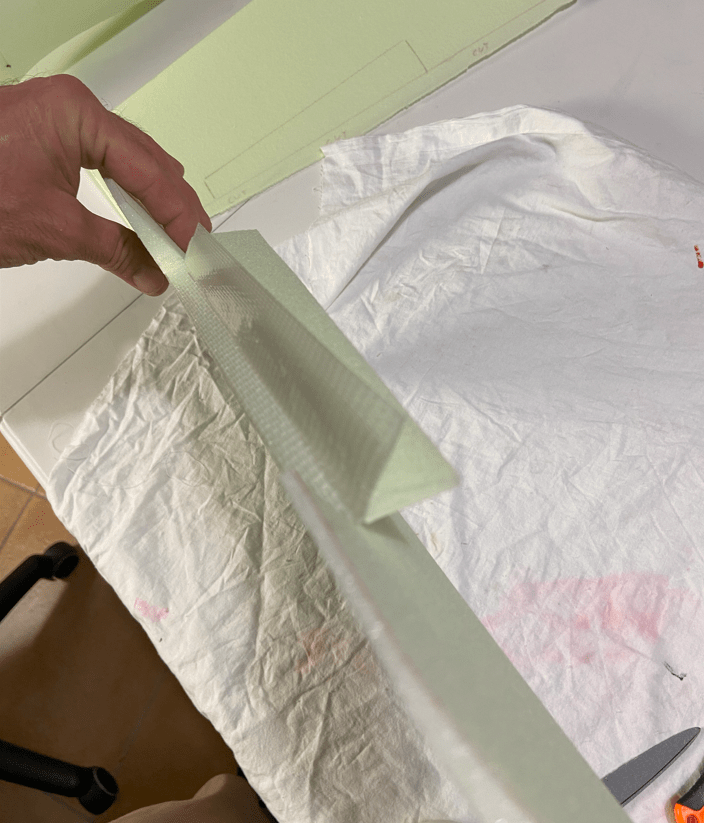
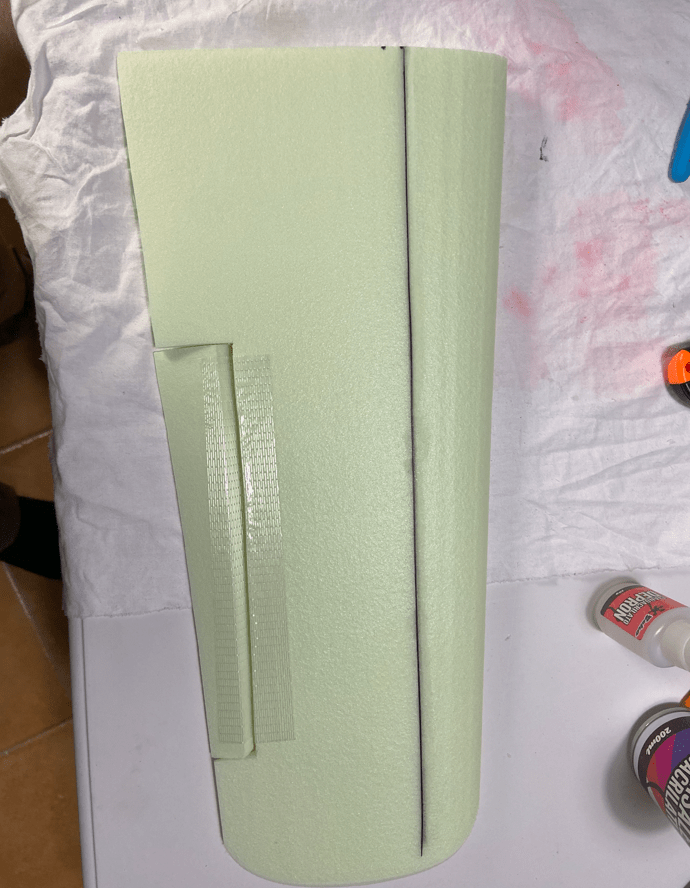
Uniamo gli alettoni alle ali. Come detto utilizziamo per fare questo il nastro tramato.
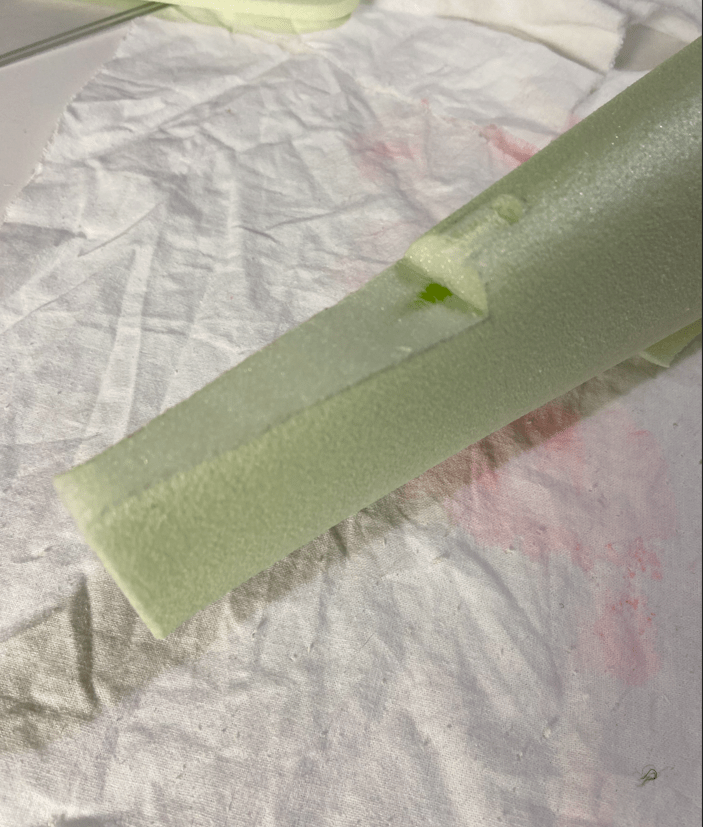
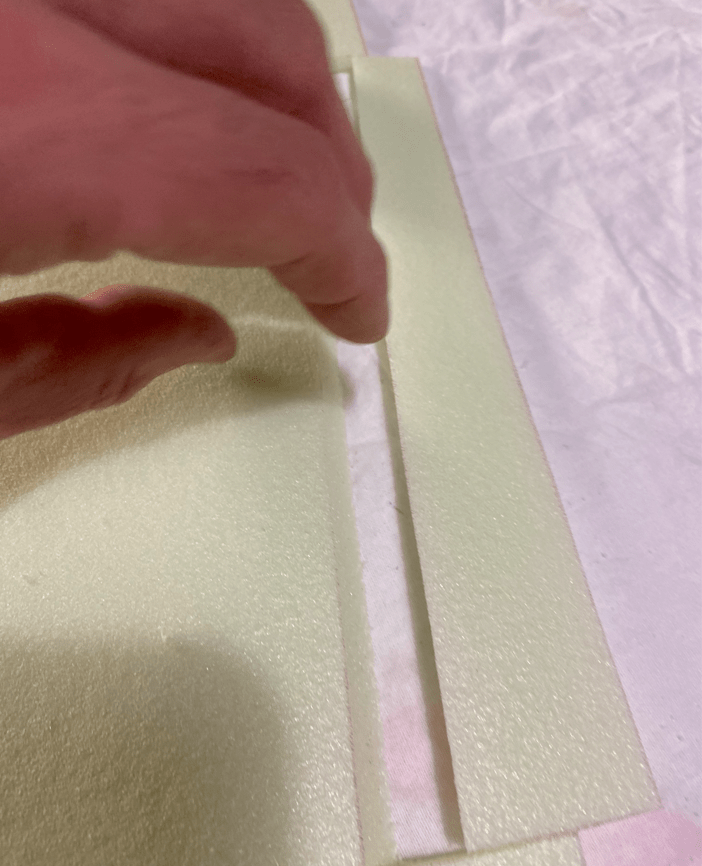
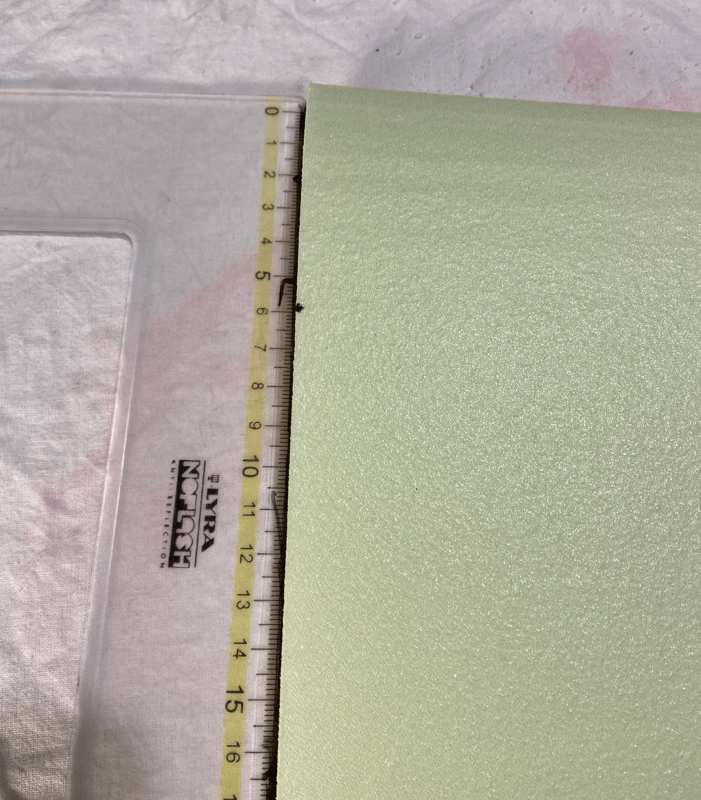
Passiamo all’irrigidimento delle semiale. Per farlo useremo il listello in carbonio come già fatto per la stabilizzazione. Segnamo 6 cm dal angolo interno anteriore, quindi pratichiamo una incisione in perpendicolare.
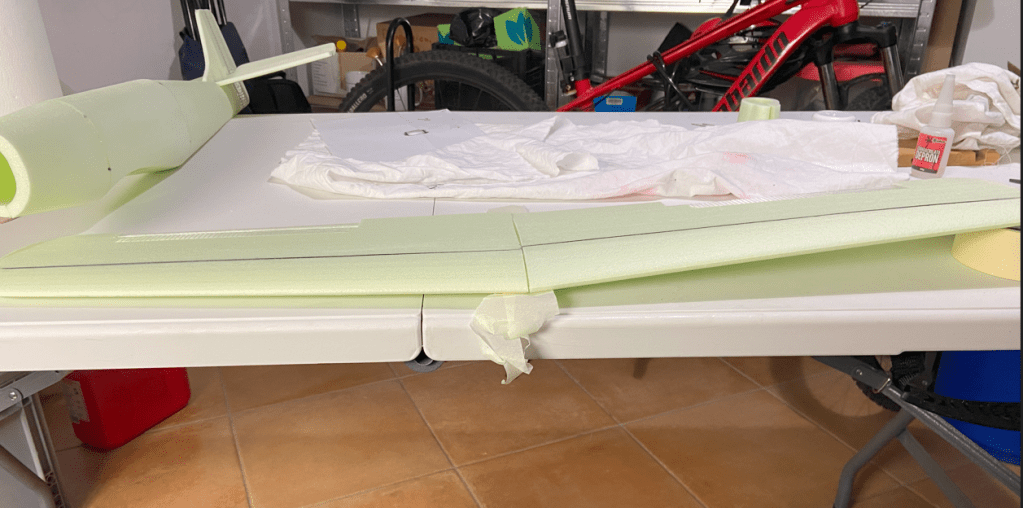
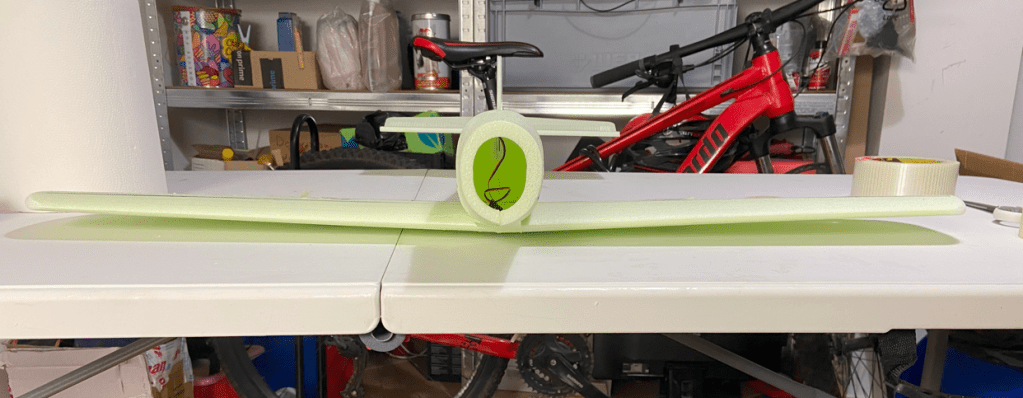
Uniamo le due semiale. Il consiglio è di creare un angolo, io uso uno spesso di 40mm sotto una punta per trovare l’angolo che desidero.
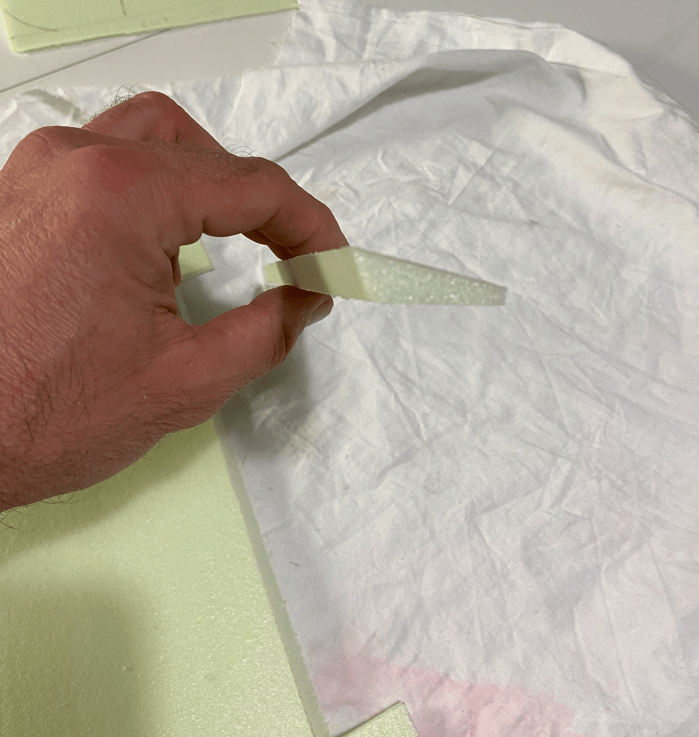
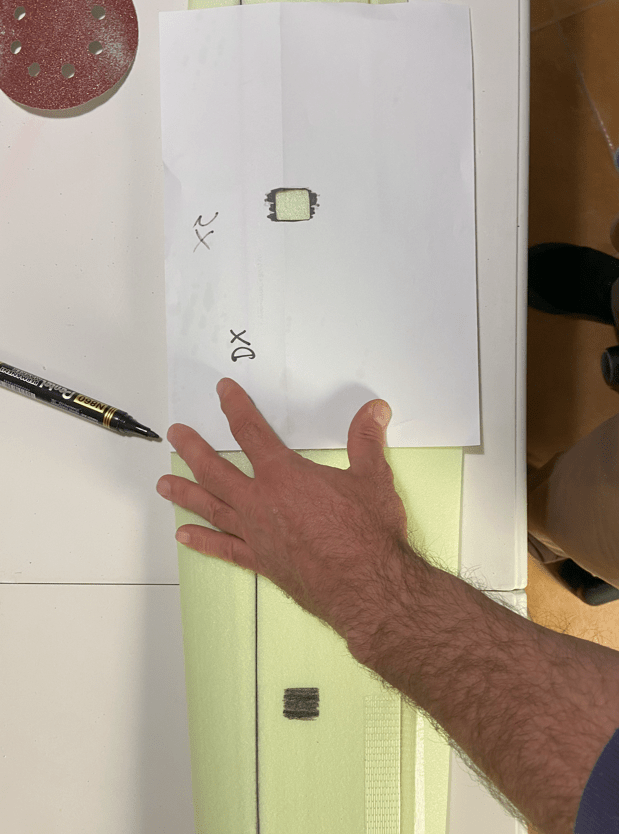
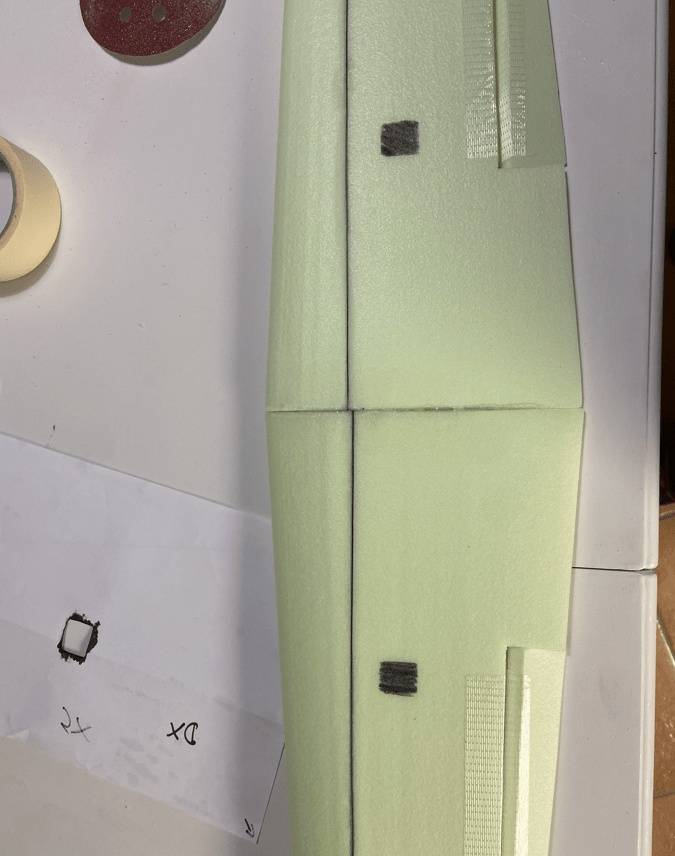
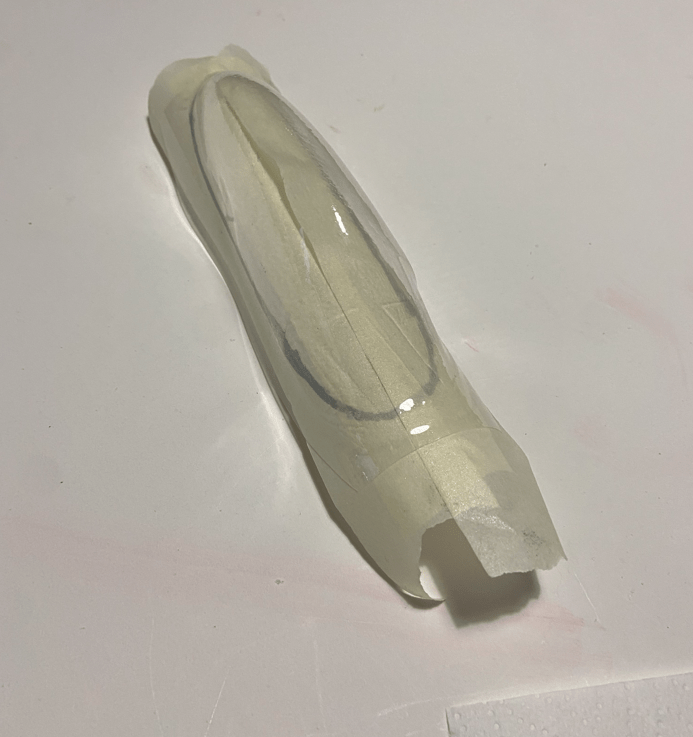
Per ricevare le sedi per i servi utilizzo una dima di carta che mi permetterà, girandolo, di avere la posizione speculare sull’altra ala
Utilizzando il dremel con la fresa ed un servo come campione, andiamo a fresare l’ala quel tanto che serve per accogliere il servo.
centriamo il servo e montiamo la squadretta prima di incollare il servo nell’ala. Dopo diventa molto scomodo variare la posizione della squadretta sul millerighe.
Per fara passare il cavo del servo incidete una linea profonda 5mm e fateci scorrere dentro un piccolo cuneo per allargare leggermente, un cacciavite piatto andrà benissimo. Quindi installate il cavo. Il servo adesso non è stato ancora incollato. Per tenerlo in sede potete utilizzare del nastro di carta. Non possiamo ancora incollare il servo perché dobbiamo prima dare la cementite e non vogliamo farlo con il servo a posto.
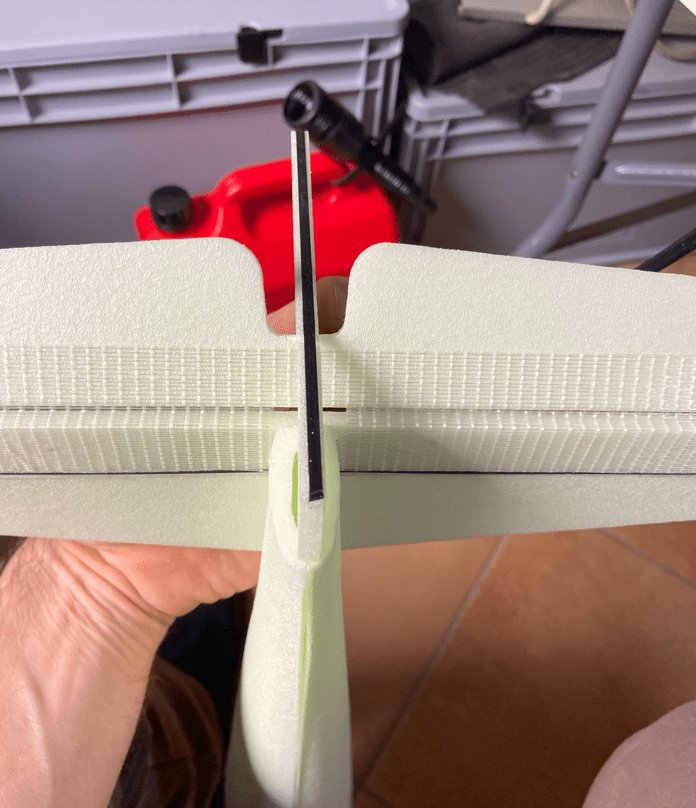
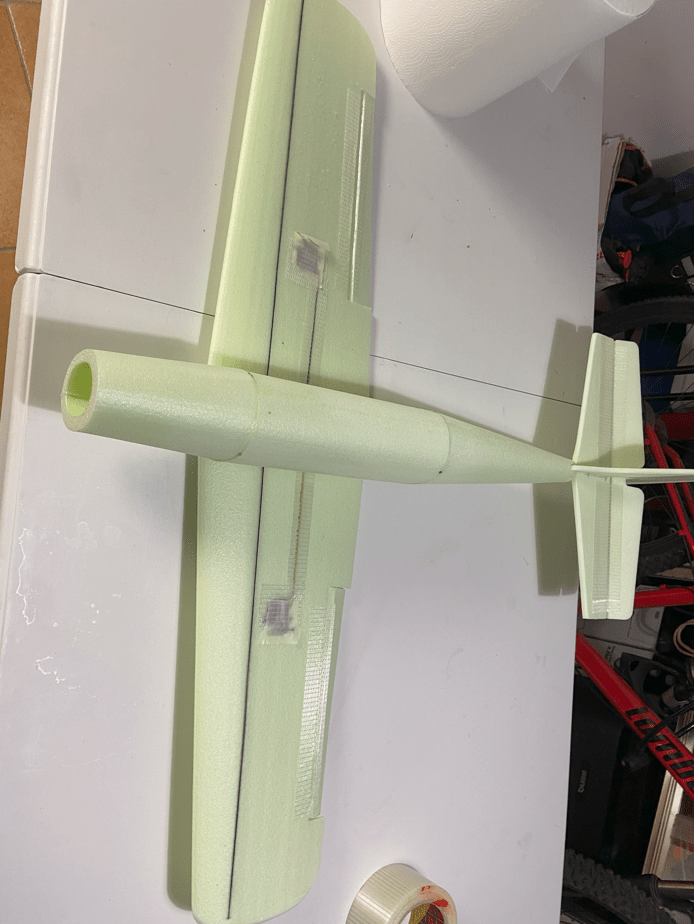
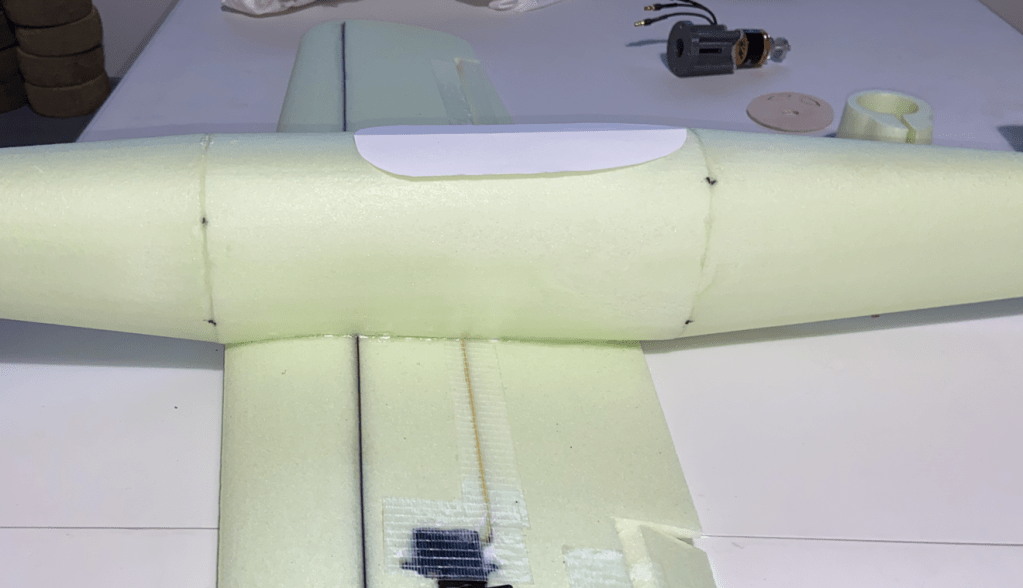
Adesso incolliamo ala e fusoliera. Come prima cosa posizioniamo l’ala e fissiamola temporaneamente con del nastro di carta sulla parte inferiore.
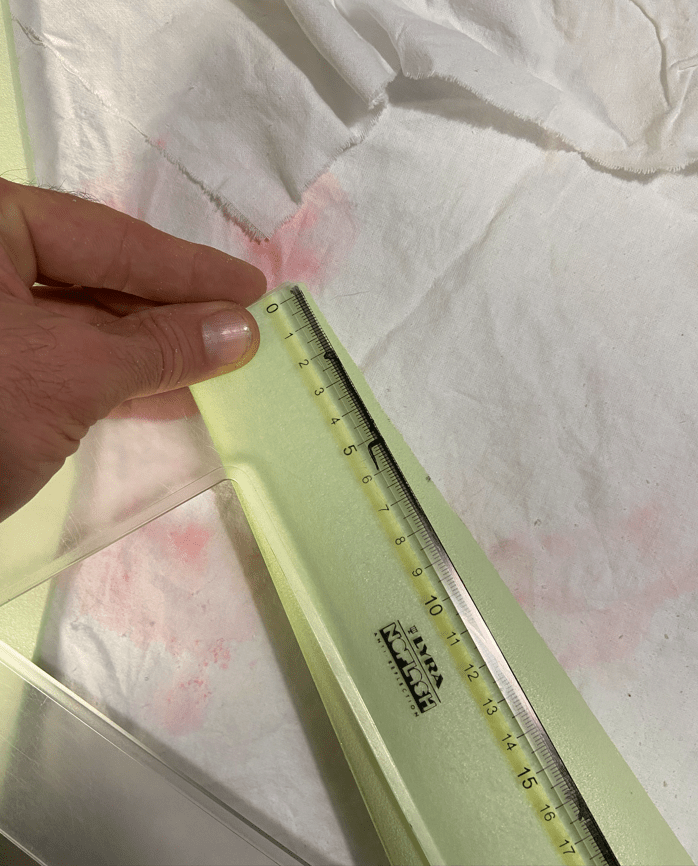
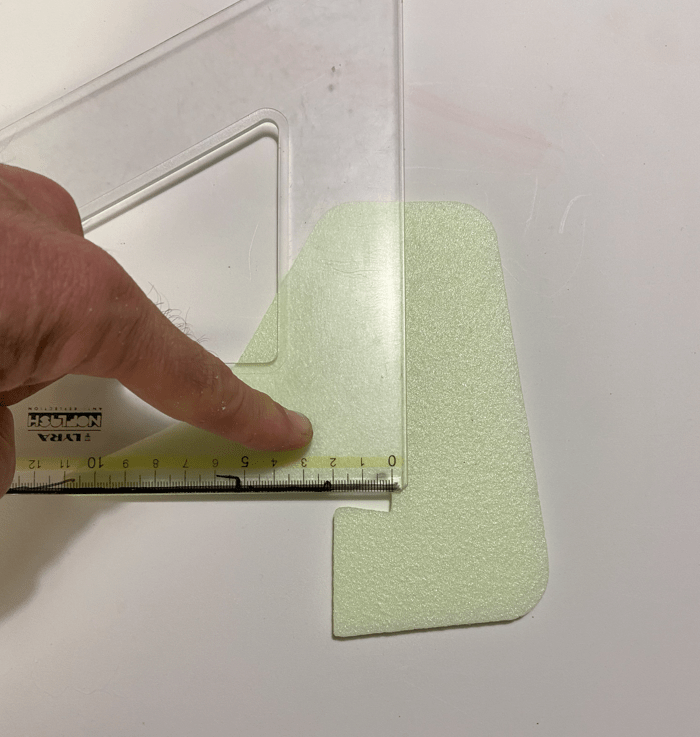
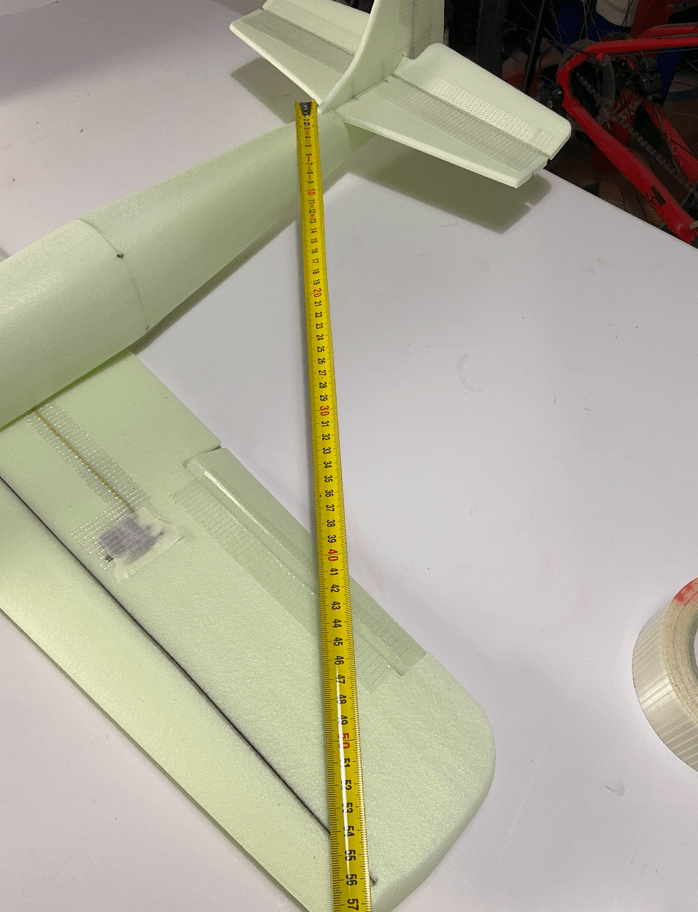
Per assicurarci che tutto sia abbastanza dritto possiamo prendere il metro e misurare la distanza tra i diversi punti, ali, timone, stabilizzazione, etc.
Prima di incollare facciamo passare i cavi dei servi dentro la fusoliera.
Quando tutto ci sembrerà a posto potremo incollare ala e fusioliera insieme. Fatto questo diamo una mano di cementite, non diluita, per irrobustire la superficie. Lasciamo asciugare e diamo una leggera carteggiata con carta fine.
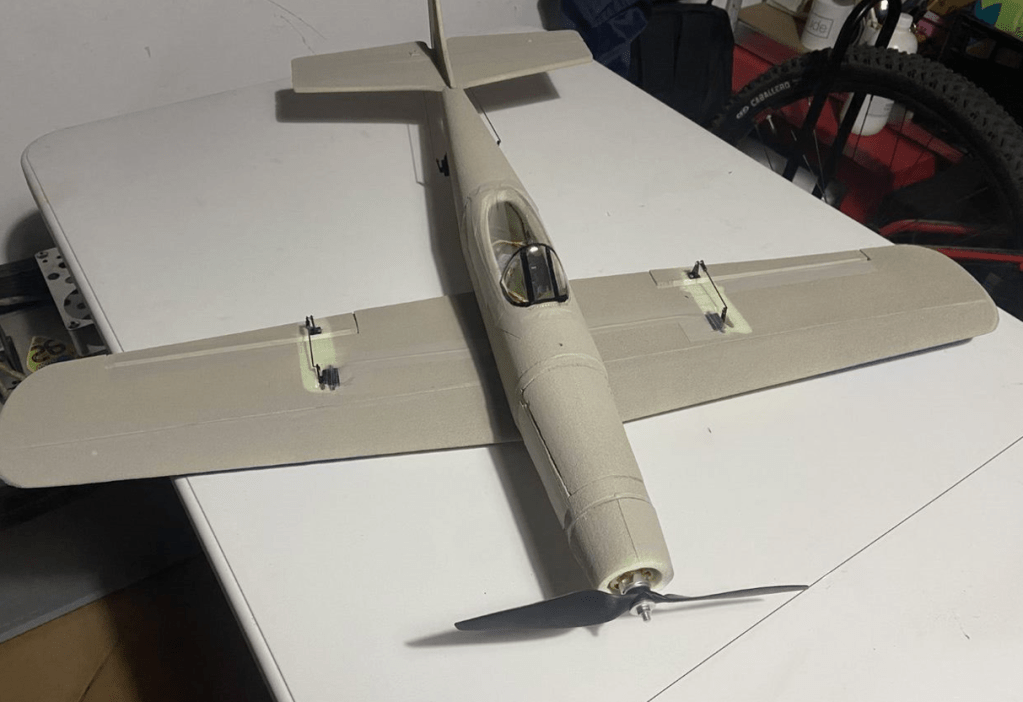
Adesso dobbiamo ricavare l’apertura del cockpit che ci permetterà in installare l’elettronica senza contorsionismi. Prendiamo quindi il cockpit e usando in nastro di carta creiamo una dima per avere le giuste dimensioni.
Posizioniamo la dima sulla fusoliera, l’assicuriamo con nastro di carta e con il taglierino apriamo la fusoliera.
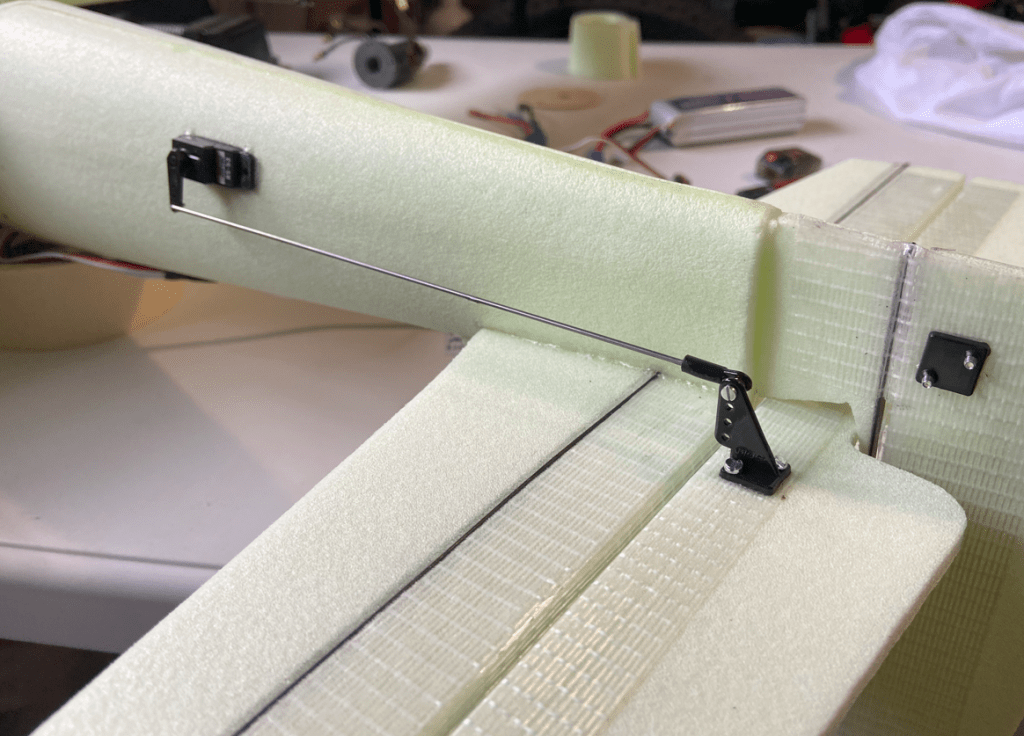
Fatto questo installiamo i servi del timone e della stabilizzazione. Si tratta di ricavare due aperture nella fusoliera e posizionare la tiranteria.
Nella foto qui sotto vediamo tutti i tiranti montati. Installiamo la ricevente e la fissiamo con il velcro ad un lato interno della fusoliera.
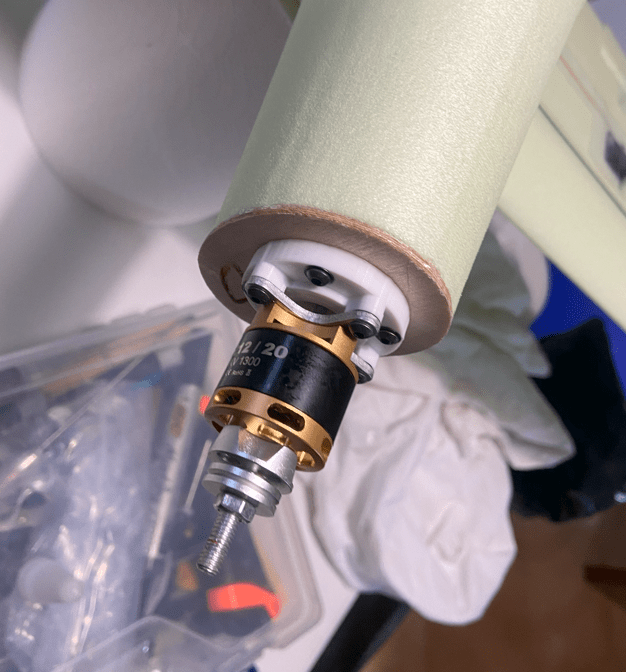
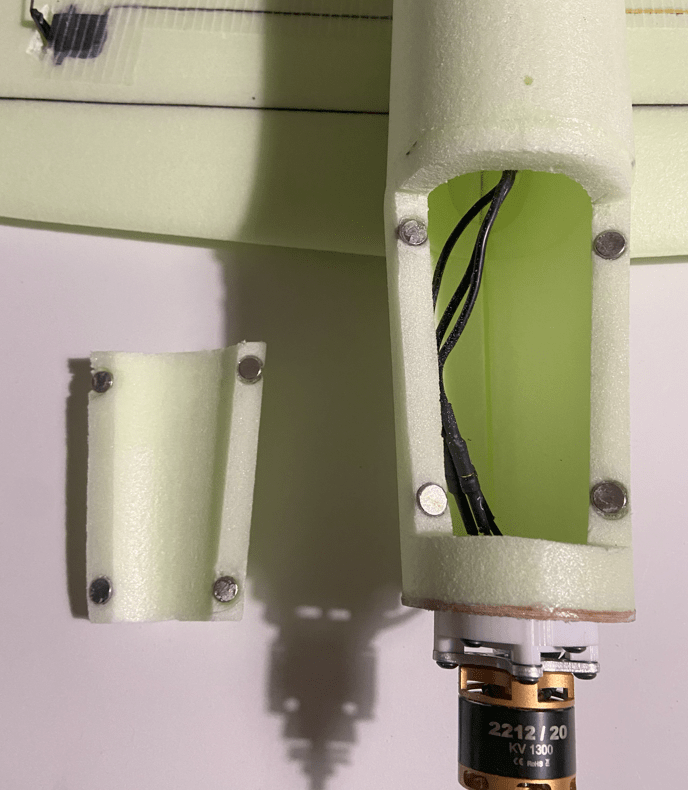
Passiamo al motore. Come prima cosa installiamo il supporto in PETG sul parafiamma
Quindi incolliamo il parafiamma alla fusoliera. Montiamo il motore e colleghiamo il motore all’ESC.
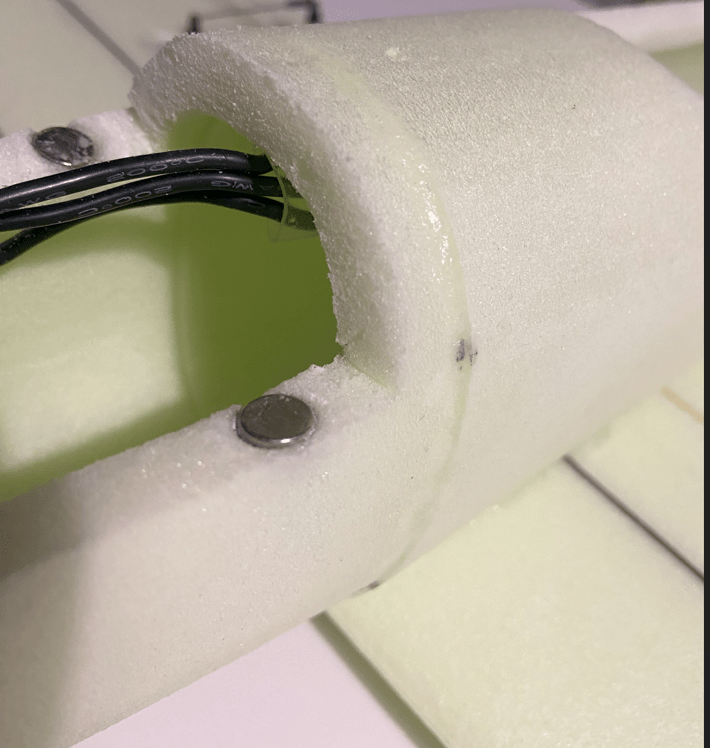
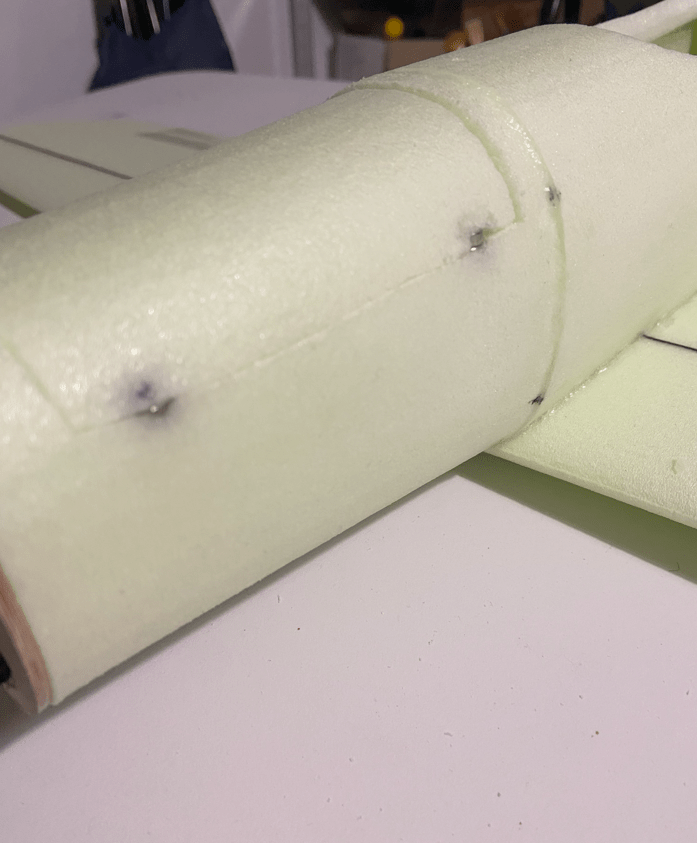
Per ricavare l’apertura della batteria ho preso un rettagolo di carta della dimensione opportuna e l’ho usato come dima. Ricavata l’apertura ed il relativo sportello ho installato i magneti per la chiusura del vano. Ho scaldato i magneti con l’accendino e li ho quindi affogati nel polestirele. Occhio alla temperatura perché si rischia l’effetto “sindrome cinese”. Dopo aver posizionato i magneti ho passato i bordi dei magneti con il ciano, per sicurezza. Attenzione alla polarità dei magneti!!
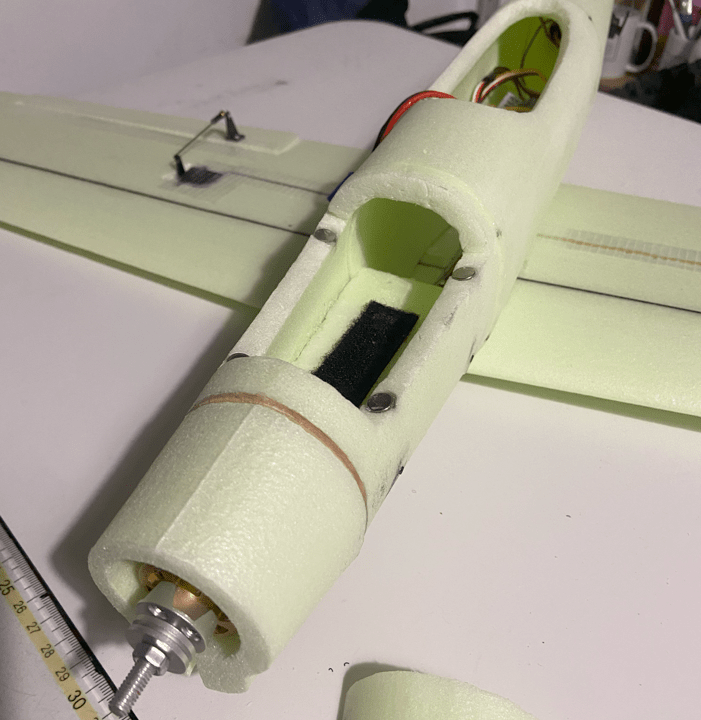
Utilizzando un pezzo di polestirele di scarto ho realizzato un supporto per la batteria. Purtroppo non ho fatto una foto al pezzo prima di incollarlo, ve lo racconto e nelle foto sotto lo vedete. La cosa importante è che sotto ci sia una scanalatura per permettere il passaggio dei cavi del motore. Per rendere il supporto più fermo ho messo due spine di carbonio passanti.
Sul supporto della batteria ho messo una striscia di velcro per trattenere la batteria in modo stabile. Adesso dobbiamo solo fissare il cockpit usando nastro tramato e abbiamo finito!
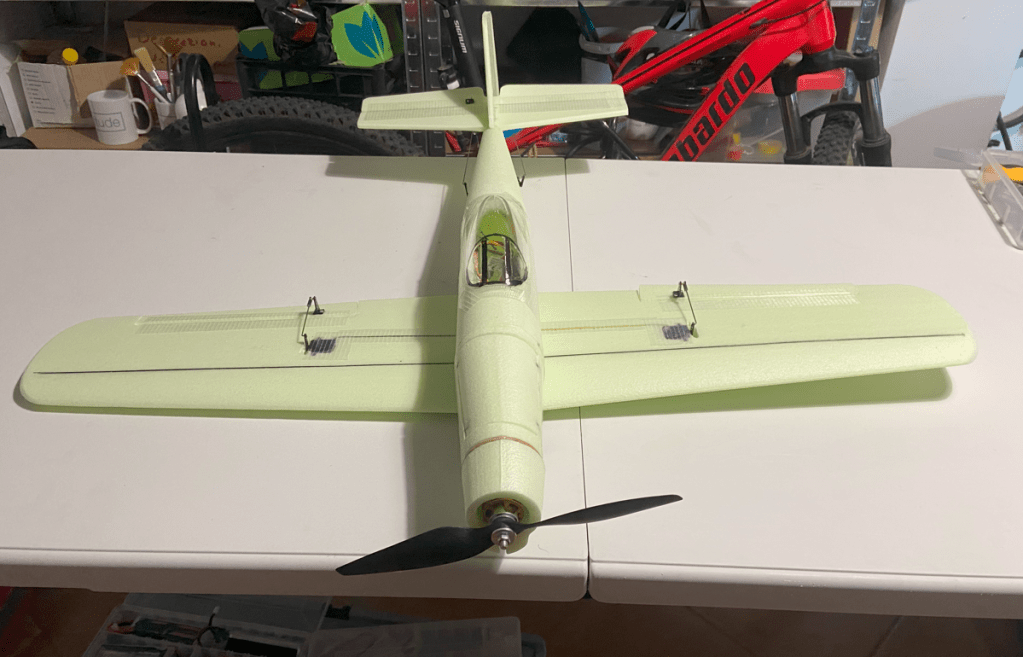
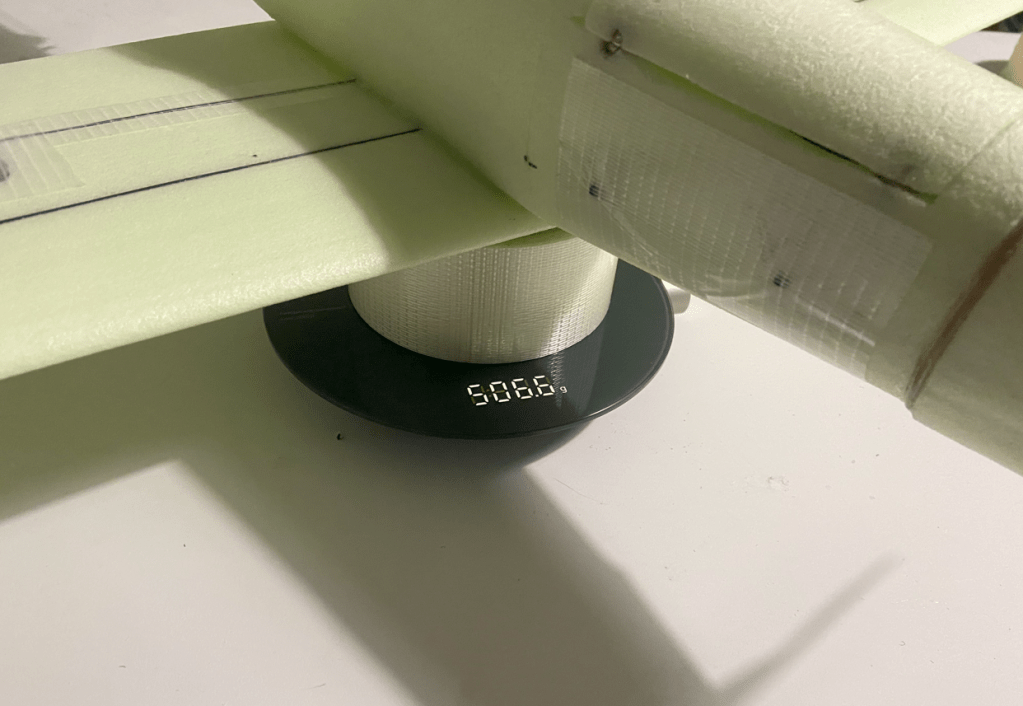
Montiamo l’elica, la batteria e pesiamo! Il peso finale è di 506.6 grammi. Non male.
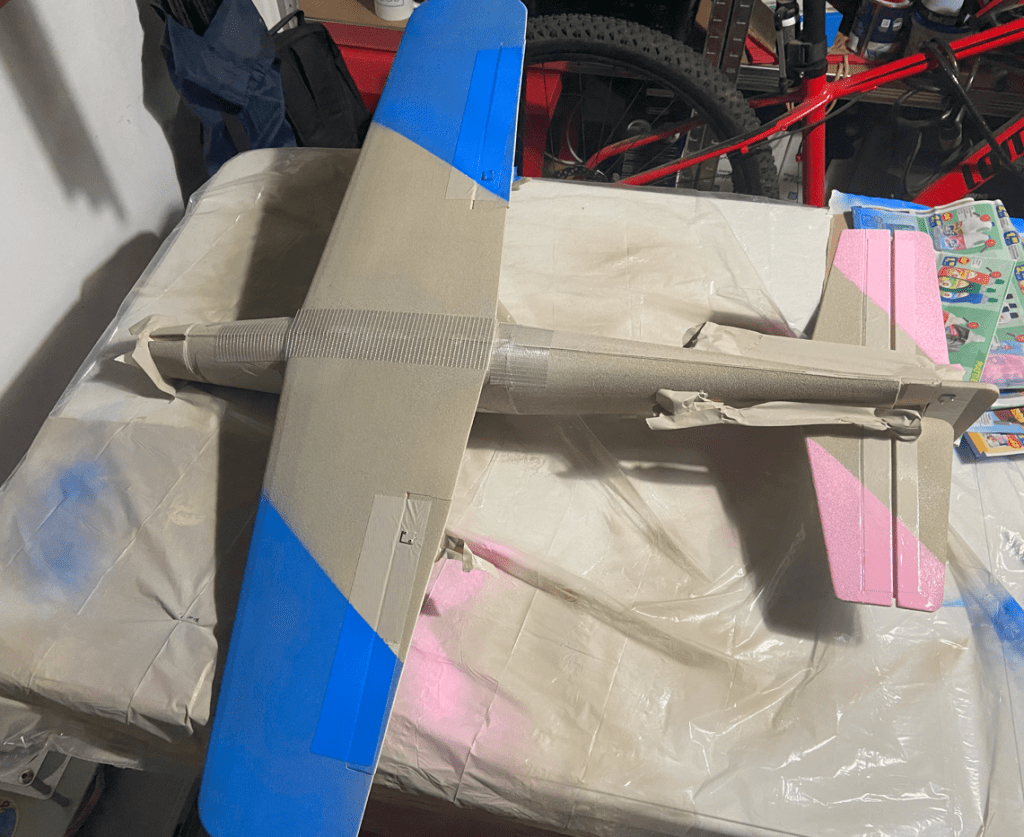
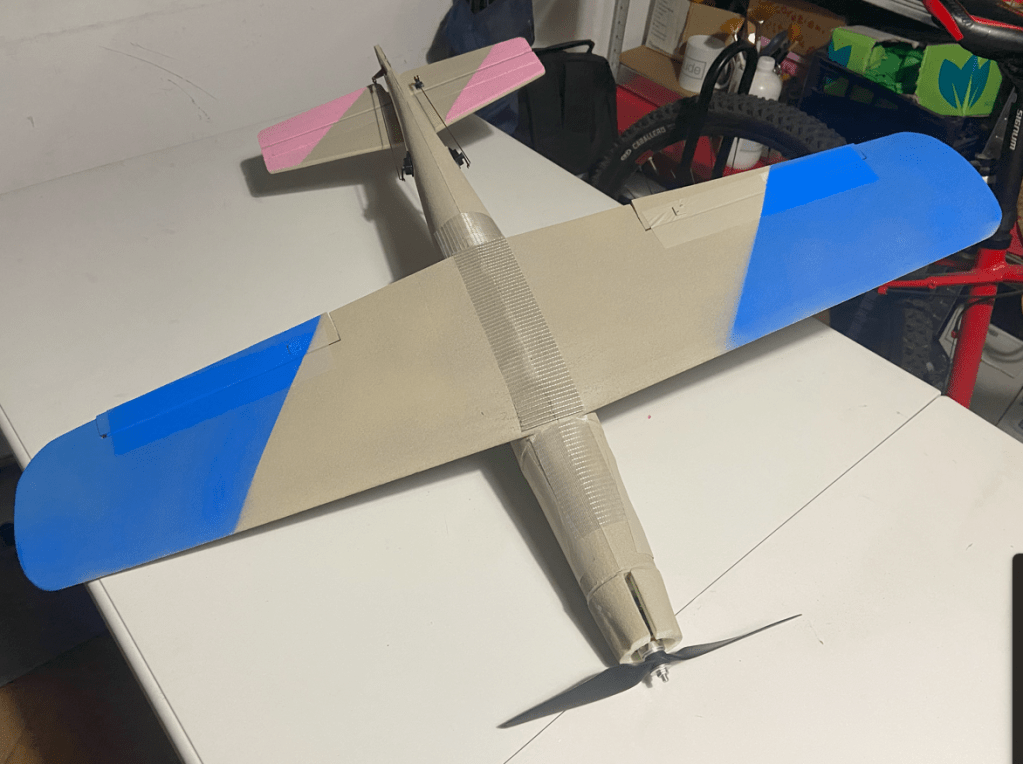
Per la colorazione ho deciso di provare queste bombolette ad acqua. Mi sempra che siano un ottimo prodotto! Oltre a colorare rendono la superficie più dura.
Ho dato una mano di grigio e quindi due ritocchi azzurri e rosa, il peso totale della verniciatura è di soli 21 grammi. Ottimo!
Visto che il nostro P-51D non dispone di carrello di atterragio ho aggiunto un pezzo si nastro tramato per proteggere un po’ il fondo.
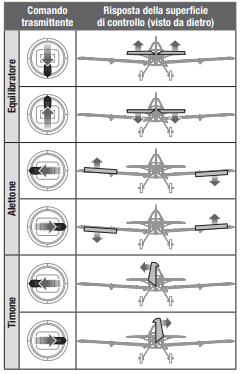
Adesso passiamo alla configurazione della radio:
endpoint
reverse
dual rate ed esponenziale a piacere
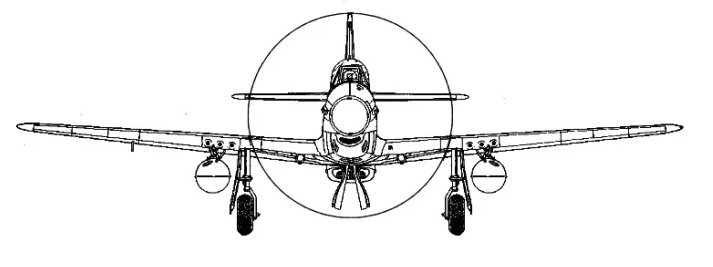
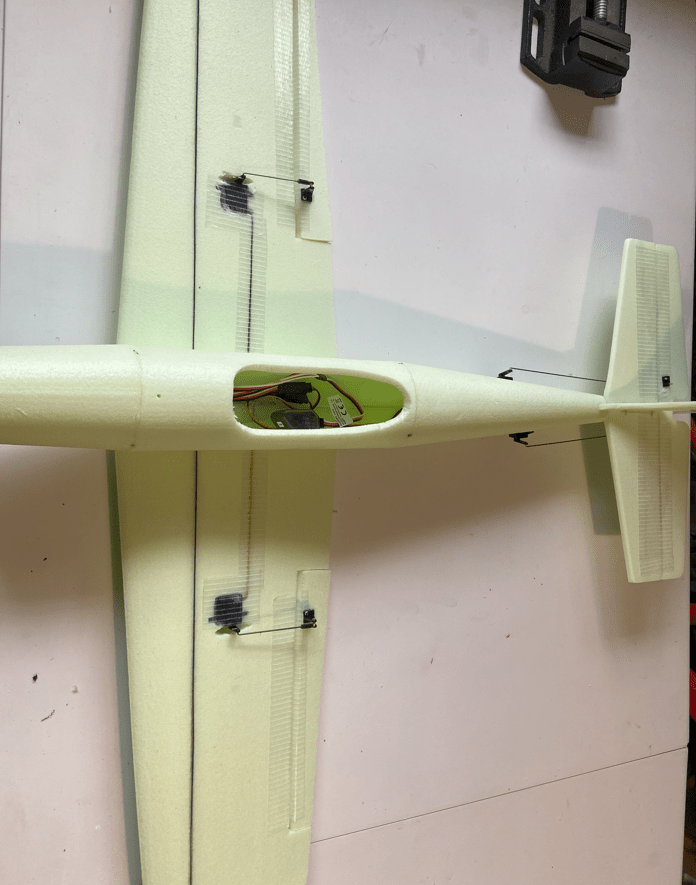
L’immagine sotto è di riferimento sul movimento corretto delle superfici mobili.
Fatto questo non ci resta che caricare le batterie a andare a collaudare! Per questa fase vi consiglio di farvi aiutare da qualcuno per agire sul trim mentre voi lo pilotate.
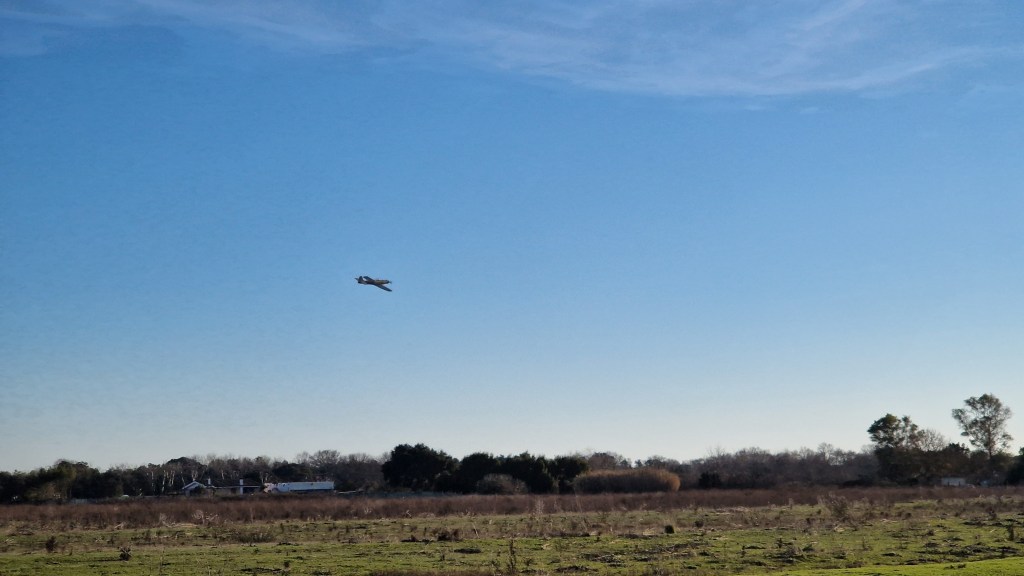
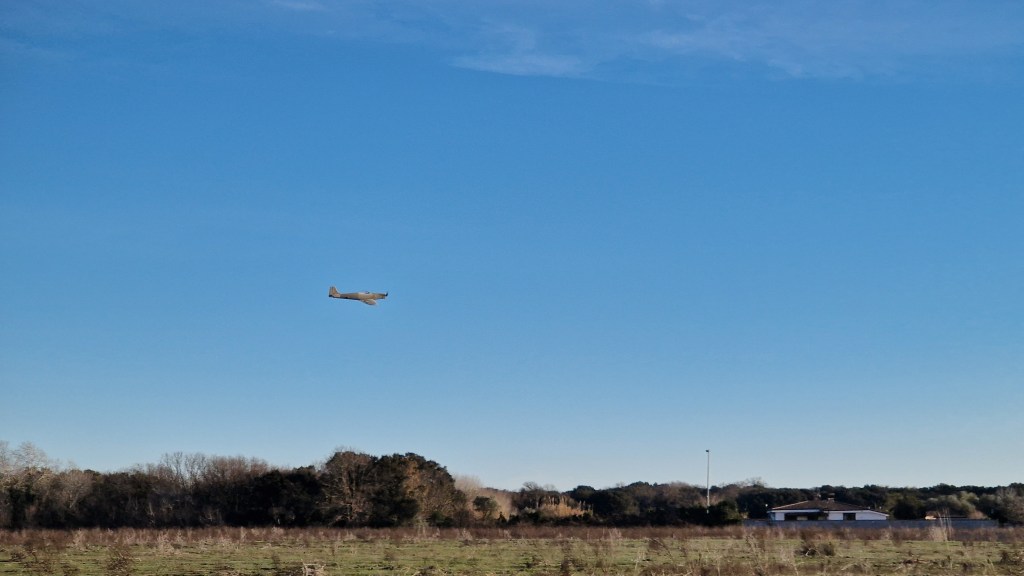
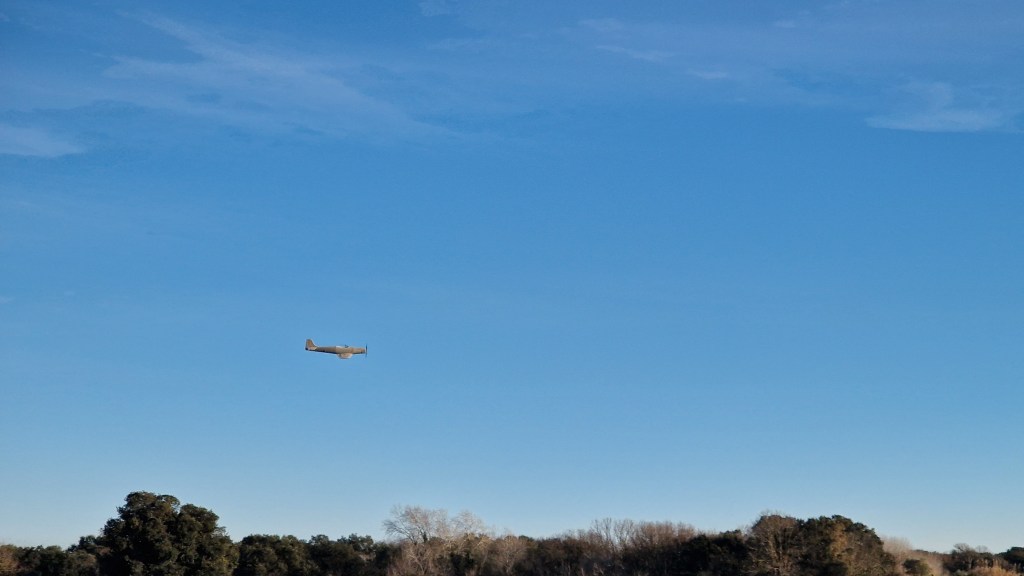
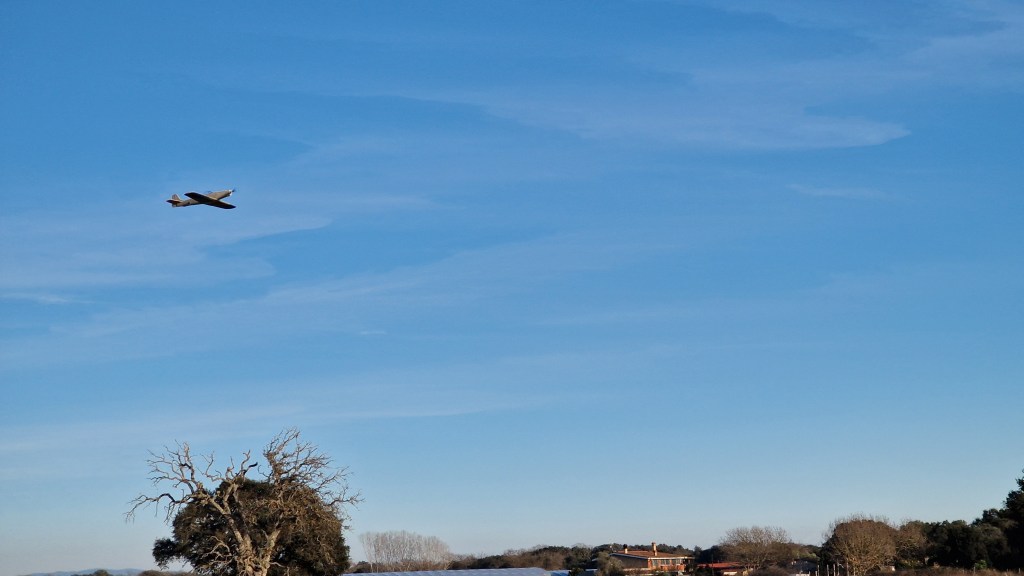
Per il collaudo mi sono recato al campo volo qui a Infernetto (Roma) dove, con il supporto di Gianluca, abbiamo messo in aria il nostro P51. La giornata era un po’ ventosa ma il piccolo s’è comportato bene. La prima batteria l’abbiamo consumata per il settaggio dei trim che una volta a terra abbiamo convertito in subtrim. La seconda batteria invece l’abbiamo usata per verificare la differenza di volo rispetto al BF109. La maggiore superficie dei piani di coda rende questo modello un po’ più stabile e più rapido nelle manovre: molto divertente!
La colorazione si è dimostrata molto ben distinguibile in tutte le fasi grazie a quelle aree blu e rosa nella parte inferiore.
Given that the Iranian regime disgusts me, as does every theocracy, I dedicate time to this kit because it has interesting features and because I think that we all owe solidarity to the Iranian population, persecuted by a fascist regime.
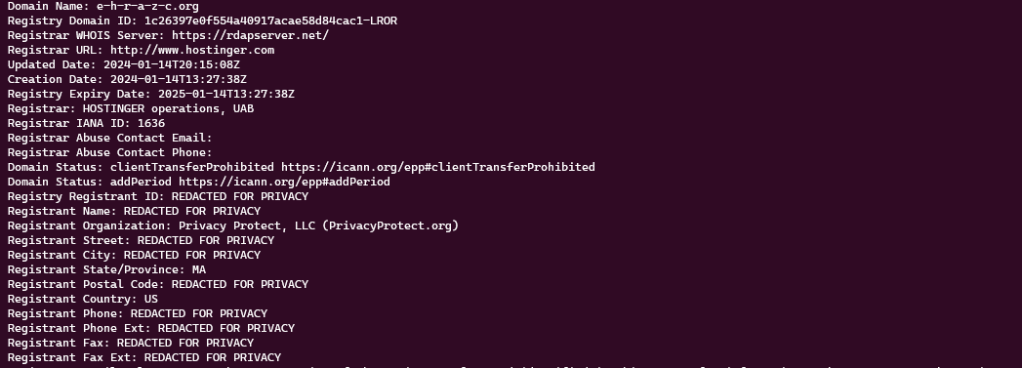
After this introduction, let’s move on to this kit. Matrix downloaded it from the e-h-r-a-z-c[.]org domain around 9pm today (January 14, 2023). The domain was registered via hostinger.com
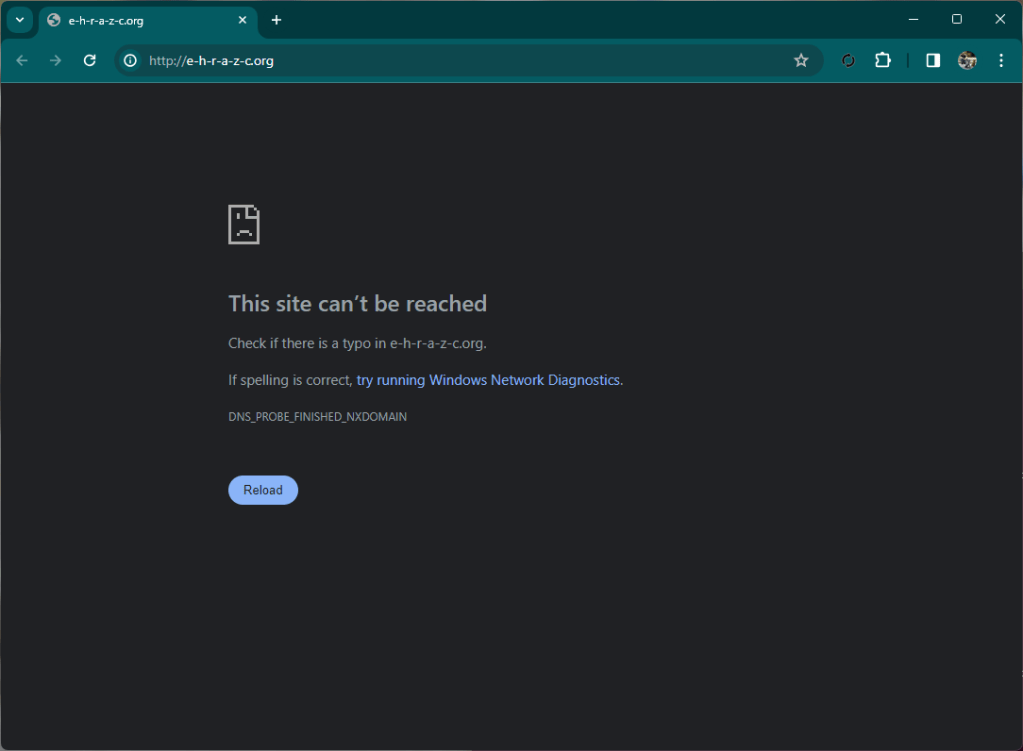
At the time of writing this article (about two hours have passed since the kit was found) the web site is inactive.
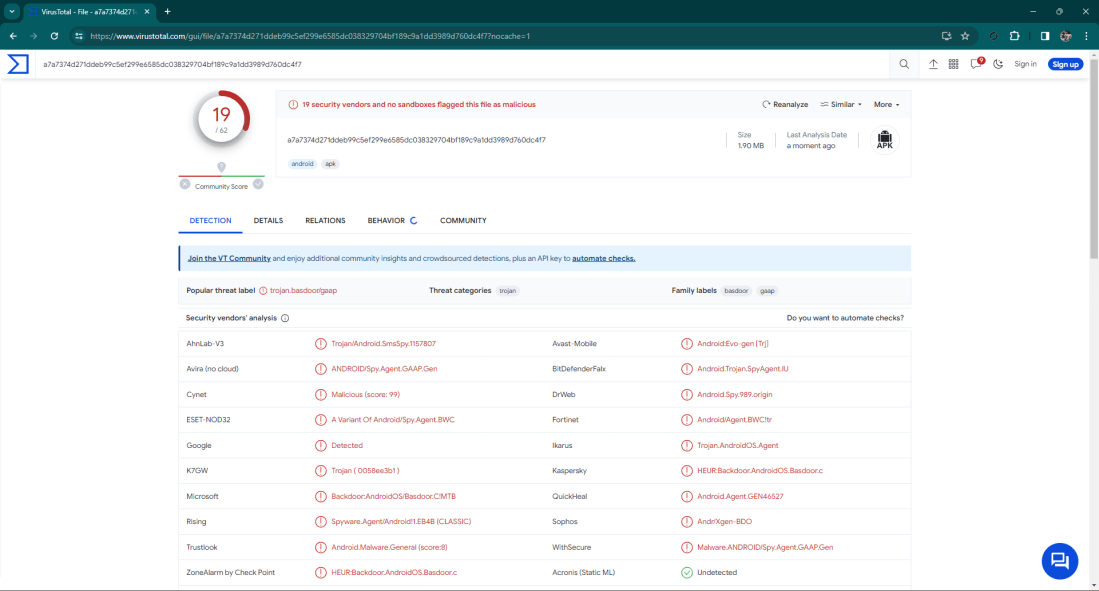
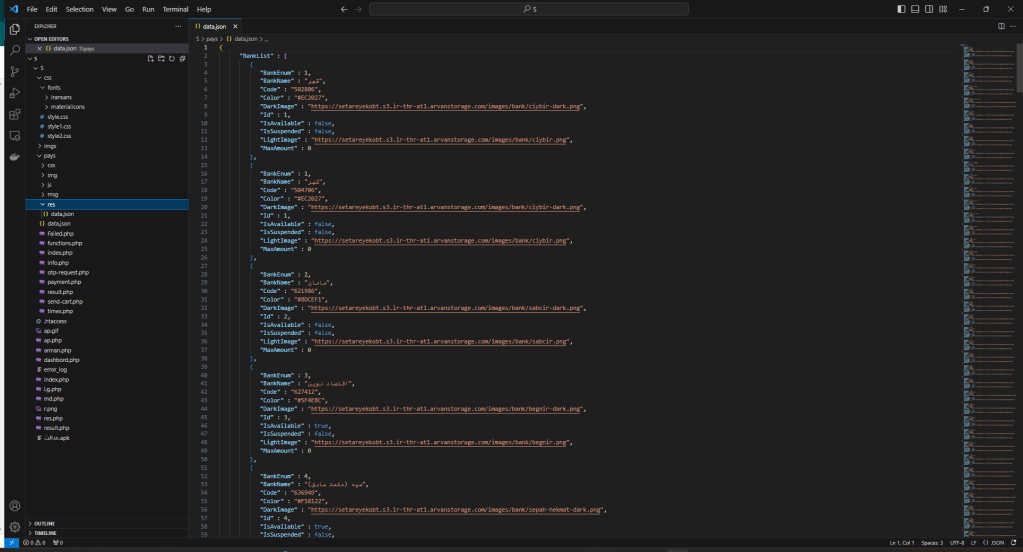
Inside the kit there are the PHP sources that make up the phishing site and a malware for Android.
The kit targets customers of several banks.
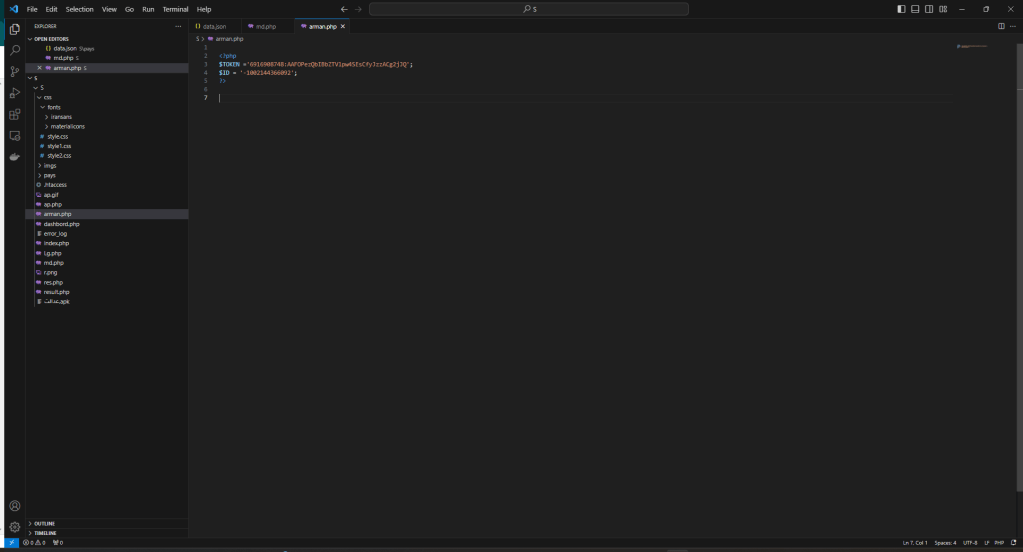
In the PHP sources we find the token to which the stolen credentials are sent.
The site is not listed on urlscan.io because at the time of the notification the site was already offline. I can say we downloaded the kit at the last second 🙂
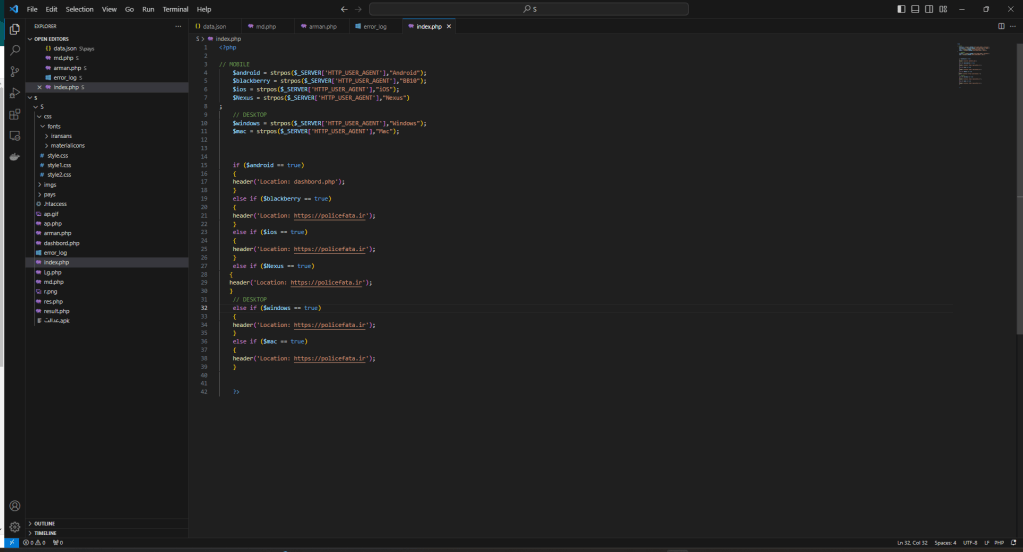
The main goal of the attack was to install malware. This can also be deduced from the cloaking mechanism which redirects all non-Android devices to the cyber police website which deals with cyber security.


You must be logged in to post a comment.