This video shows how easy it is to gather useful information from a domain name.
A List of MIME Types by Content Type
Create Windows bootable USB with macOS
If you need to create a Windows 10 installation USB key using a macOS, you can use these commands to do it simply.
This procedure deletes all data from the USB stick, so be careful 🙂
Open Terminal and use the following commands
diskutil list
diskutil eraseDisk MS-DOS "WIN10" GPT <USB disk>
hdiutil mount <path to the Windows 10 ISO file>
cp -rp /Volumes/<ISO mounting point> /Volumes/WIN10
hdiutil unmount /Volumes/<ISO mounting point>
hdiutil unmount /Volumes/WIN10About autonomous driving
In these days I’m driving an Infiniti Q30, I find it very pretty and even if it has the wrong wheel drive, it can be fun too 🙂
One of the things I like best about this machine is electronic stuff. One of the driving aids I noticed is the autonomous reading of the road signs. I found the thing interesting also because I immediately looked at it from the standpoint of autonomous driving. Right about this context yesterday I noticed something that I did not like. Passing behind a tourist bus I noticed that the car read as a speed limit, as reported by the heavy vehicle that preceded me in a sticker that reported its maximum speed on the highway. In the picture you can see little because I was driving and I took it at a run. However, you can guess what happens: the car signals me as a speed limit of 80 km / h (instead of the 50 real ones) because the coach in front has a sticker that indicates its maximum speed on the highway in 80 km / h.

I noticed this behavior on several occasions between yesterday and today.
Today this is not a big problem, I guide and I know the limits and I know what directions to follow. But if she were driving, wouldn’t it be too easy to deceive her? And in the case of autonomous driving, any fines, who should pay them? Who was in the car? No, he wasn’t driving! The owner? No, he didn’t even drive! The manufacturer of the vehicle? Who hadn’t passed a patch in time?
I leave you with these doubts and with the invitation to use the right pedal until we can do it 🙂
Wait for an event in a WaterfallDialog
Working on a Skill, I needed to block the execution of a WaterfallDialog while waiting for a specific event to arrive.
The solution is simple and based on the use of EventPrompt. Below I show how to use it.
Register EventPrompt in the constructor
AddDialog(new WaterfallDialog(nameof(WaterfallDialog), new WaterfallStep[]
{
	HelloAsync,
	WaitForEventAsync,
	DoneAsync
}));

AddDialog(new EventPrompt(nameof(EventPrompt), "SampleEvent", Validate));

InitialDialogId = nameof(WaterfallDialog);
Implement the three dialog steps
private async Task<DialogTurnResult> HelloAsync(WaterfallStepContext stepContext, CancellationToken cancellationToken)
{
	await stepContext.Context.SendActivityAsync(MessageFactory.Text("Hello :)"), cancellationToken);

	return await stepContext.NextAsync(cancellationToken);
}

private async Task<DialogTurnResult> WaitForEventAsync(WaterfallStepContext stepContext, CancellationToken cancellationToken)
{
	return await stepContext.PromptAsync(nameof(EventPrompt), new PromptOptions { Prompt = MessageFactory.Text("Waiting for the event") });
}

private async Task<DialogTurnResult> DoneAsync(WaterfallStepContext stepContext, CancellationToken cancellationToken)
{
	await stepContext.Context.SendActivityAsync(MessageFactory.Text("After I receive the event."), cancellationToken);

	return await stepContext.NextAsync(cancellationToken);
}
Implement the event validator
async Task<bool> Validate(PromptValidatorContext<Activity> promptContext, CancellationToken cancellationToken)
{
	var activity = promptContext.Recognized.Value;
	if (activity.Type == ActivityTypes.Event)
	{
		try
		{
			string eventValue = (string)activity.Value;

			if(eventValue == "OK")
			{
				return true;
			}
		}
		catch { }
	}

	return false;
}macOS disable WIFI on logout
I recently started using an Apple notebook as a development laptop. I realized that when I block the screen the WIFI connection goes down. This is a wanted behavior and can be changed using this command:
cd /System/Library/PrivateFrameworks/Apple80211.framework/Versions/Current/Resources
sudo ./airport en1 prefs DisconnectOnLogout=NO
Obviously you need to replace “en1” with the identifier of your WIFI interface.
Share data from Virtual Assistant to Skill
For some weeks I have been working on a project based on Bot Framework. Things were going well until I found myself in the position of having to share information between a Virtual Assistant and a Skill … Given that it gave me problems and that my requests made on Stackoverflow did not produce answers, I share the solution here.
This post expects the user to be clear what Virtual Assistant and Skill are and has already installed the prerequisites as described here:
https://microsoft.github.io/botframework-solutions/tutorials/csharp/create-assistant/1_intro/
Create a Virtual Assistant using the Virtual Assistant Template and name it SampleVirtualAssistant
Add to the solution SampleVirtualAssistant a new project (the Skill) using the Skill Template and name it SampleSkill

Rebuild the solution.
In the following example I’ll show the commands as execute on my system, where my sources path is C:\Users\emili\source\lab, be aware to replace it with your correct path!
Open PowerShell Core to execute the following commands.
Deploy to Azure the required resources.
cd c:\users\emili\source\lab\SampleVirtualAssistant\SampleVirtualAssistant\SampleVirtualAssistant
.\Deployment\Scripts\deploy.ps1
cd C:\Users\emili\source\lab\SampleVirtualAssistant\SampleSkill\SampleSkill
.\Deployment\Scripts\deploy.ps1
Now we go to work on the code.
In the project SampleSkill, edit the file manifestTemplate.json to add the required slot.


cd C:\users\emili\source\lab\SampleVirtualAssistant\SampleVirtualAssistant\SampleVirtualAssistant
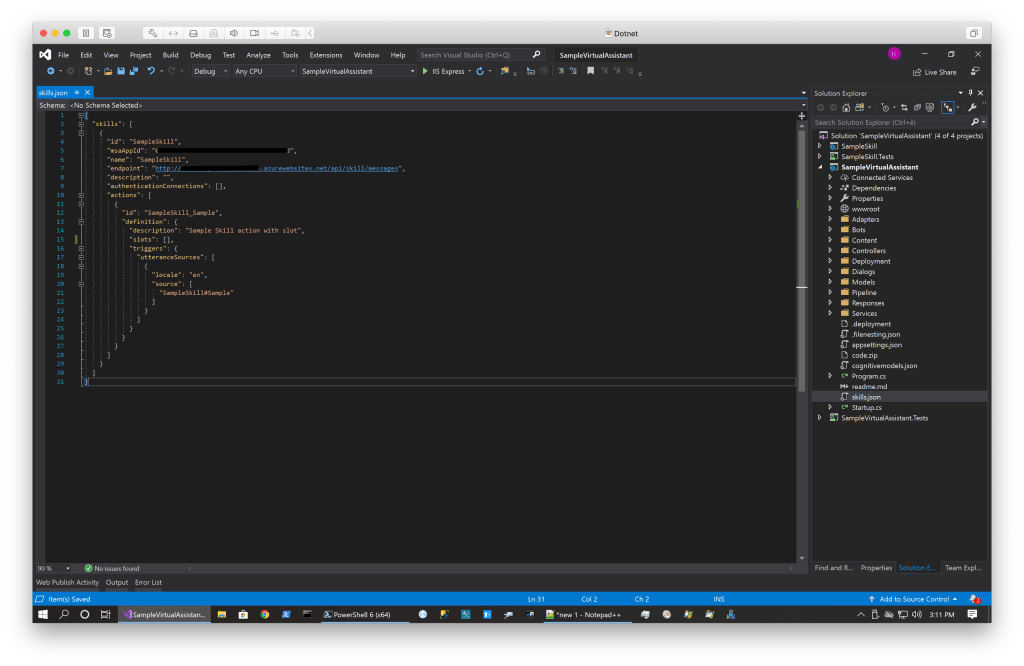
botskills connect --botName SampleVirtualAssistant --remoteManifest "http://<your resource>.azurewebsites.net/api/skill/manifest" --luisFolder C:\Users\emili\source\lab\SampleVirtualAssistant\SampleSkill\SampleSkill\Deployment\Resources\LU\en\ --csIn the project SampleVirtualAssistant edit the file skills.json to add the required slot.

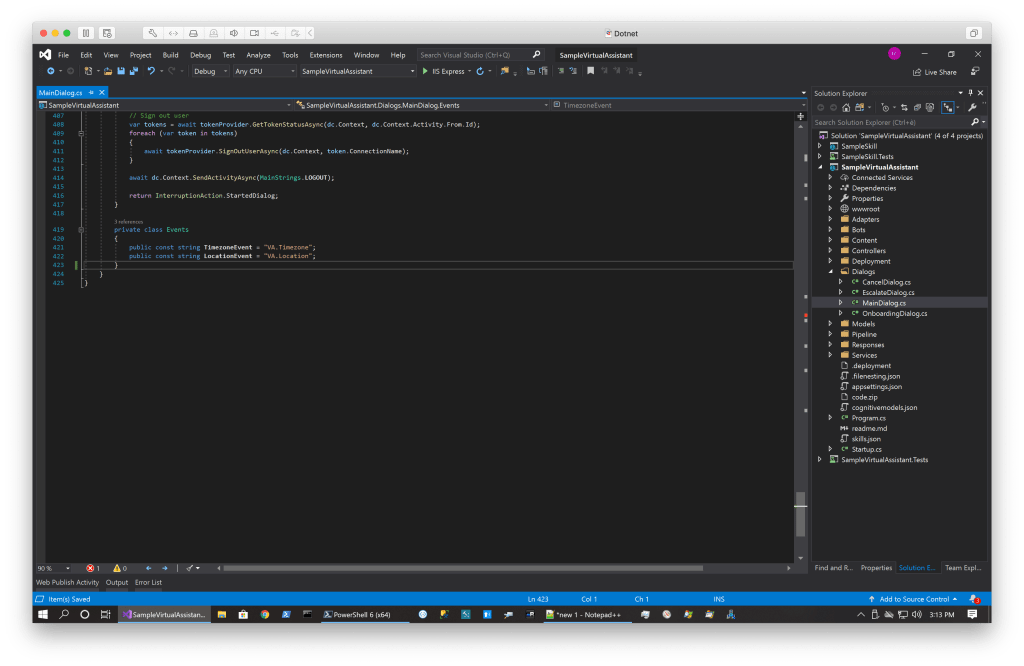
In the project SampleVirtualAssistant edit the file MainDialog.cs to update the class Events
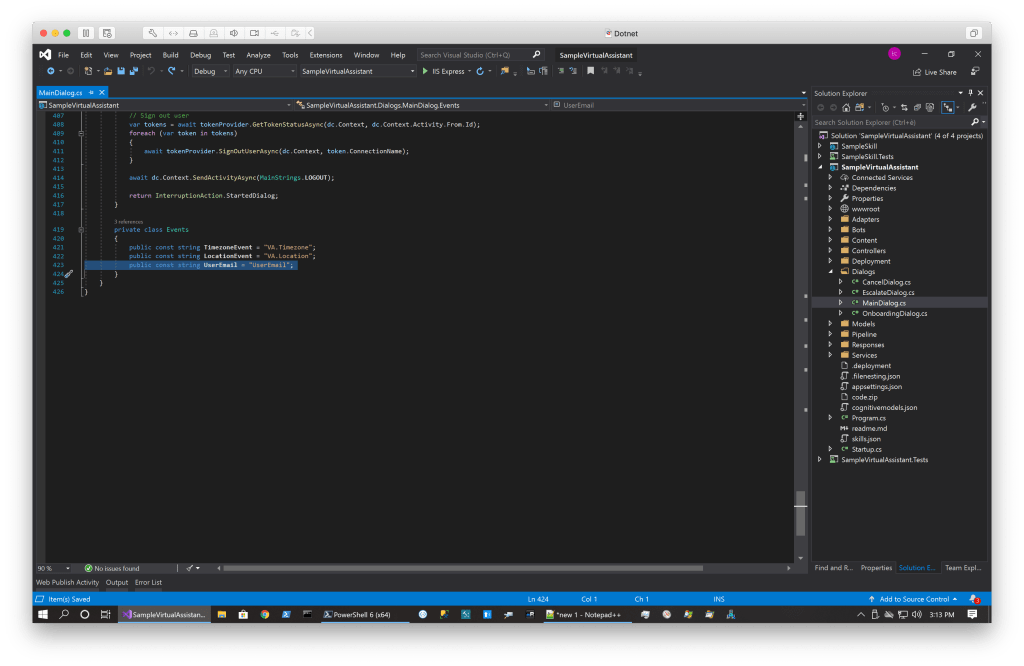
In the same file, in the method OnEventAsync add the code that handle the event to set the UserEmail

In the project SampleSkill, in the file MainDialog.cs in the RouteAsync method insert this code after the call to PopulateSateFromSemanticAcion

Rebuild all.
Publish the skill and the VA.
Start the chat and test it 🙂

Azure Key Vault – Basic
Over time, I have used Key Vault several times. I think it’s a great solution and I clearly recommend its use to everyone!
Since every time I talk about it with something, after the enthusiasm I am asked how to use it, I have prepared a simple project that illustrates the basics of its use.
Use this PowerShell commands to create the Vault:
# Using this command you can see all the location available
az account list-locations

az login

# The following command a new resource group. If you already have one you can use it.
# Choose your location
az group create -n "resource-group-name" -l "North Europe"

az provider register -n Microsoft.KeyVault

# Create the Key Vault. This call return the URL of the key vault.
az keyvault create --name "keyvault-name" --resource-group "resource-group-name" --location "North Europe"

# Add some secrets to the vault
az keyvault secret set --vault-name "keyvault-name" --name "secret-1" --value "test 1"
az keyvault secret set --vault-name "keyvault-name" --name "secret-2" --value "test 2"
az keyvault secret set --vault-name "keyvault-name" --name "secret-3" --value "test 3"

# List all the secrets in the specified vault
az keyvault secret list --vault-name "keyvault-name"

# Create an app. this call return the appId and secret to use in the app.config
az ad sp create-for-rbac -n "app-name" --skip-assignment

# Trust the key vault to be accessed with the app credentials
az keyvault set-policy --name "keyvault-name" --spn <use the appId previously created> --secret-permissions get list set
In this example, credentials are used to log in to the vault, I recommend, if you have an application in Azure, to set up an identity to log in to the vault.
Here you can find a .NET example project:
https://github.com/ecarlesi/azure-keyvault-sampleclient
First post :)
After so long it seems that I have found the time to open this blog!
I’m not sure what to do with it, at best I will use it to share thoughts and images.
For those who do not know me, let me introduce myself: my name is Emiliano Carlesi and I live in Rome. I work in computer science (one of my greatest passions, it is not “just” work), I have a 13 year old son and a fantastic partner. I also have two dogs (Olivia and Ambra).
In addition to information technology, my hobbies are mountain biking, archery and off road RC cars.
For those interested, here are some more info about me:
Yuo can also write me at <my firstname>.<my lastname>@gmail.com

You must be logged in to post a comment.